Leaderboard
Popular Content
Showing content with the highest reputation on 08/09/21 in all areas
-
No it isn't all expended as heat. Most of it is used to drive the load.3 points
-
3 points
-
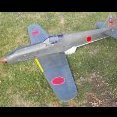
I must daft but I just could not resist completing the development set. It seemed logical to model the prototype as it was nearest to the P1081 predecessor. In addition the protoype would be the easiest to make true scale as the production Hunter had quite a few modifications over its life. It was painted in the same very pale green/blue as the P1081. The fuselage plan tile printed to the same scale as the Sea Hawk et al. This gave the size of the tail pipe, 41 mm, which is exactly the diameter to give 90% of the FSA of a 50 mm EDF and I just happen to have a nice 8 blade one! The Hunter inlet duct for the Avon is much less restricted than was required for the Nene but this means the EDF will be rather further back. As before the next task is to design and print the complete duct to be used as a spine so the fuselage can be built around it. At just 50 mm diameter this duct is going look long. This is just the exhaust part. There is an EDF down in there somewhere! This could take some time. ?2 points
-
2 points
-
Hot weather running update. It has been stated the the engine cooling ducting is a very important part of the engine's installation so I was interested to see how mine would fair in this bout of rather warm weather we are currently experiencing, I know that up at the field yesterday it was showing 30 degrees C. I decided that, ss today was forecast to be more of the same, then this would be the acid test. Having started the engine I let it run on a fast idle for a few minutes in the pit, this resulted in the engine losing power and cutting out and despite repeated attempts I couldn't restart it. After a 15 minute break I was able to get it running again so this time out was then straight out onto the runway and take off. The engine didn't sound like it was on full song, sounding very much as if one pot was running too rich but I continued flying and after about 4 circuits it started to improve and for the rest of the 8 minute flight it performed really well. Back in the pits I did a quick cylinder temp check and found that they were within 5 degrees of each other, with the front one the hotter of the two. Air temp was 29 degrees. I left it for half an hour then took it up again, this time the engine sounded better right from the start and completed another 8 minute routine of nearly full throttle work. Again back in the pits I checked the temps and once again they were within 5 degrees of each other. Several other flights took place with the same results. My conclusion? - in hot weather do not let it idle for too long as it will overheat but once up in the air the ducting is working very well. All good information for when I fit the 160 in-line into the P51.2 points
-
Secure at both ends Steve. Not in the middle. That results in BOTH parts expanding and cancelling out any trim changes. If you secure them all along, the outer cannot 'bow' to allow it to expand, and there is a 'net' increase in the relative length of the inner. I hope that helps Graham2 points
-
Peter The only time that statement would be true would be at wide open throttle with the motor stalled (i.e. the shaft clamped stationary). Once the motor begins to spin ohms law and winding resistance become much less relevant to the relationship between volts and current in the motor. Dick1 point
-
Sorry for the delay. Pesky C-19 got in the way. So, a bit more has been done. The wings are straightforward. Slotted liteply spars and foamboard ribs. Ailerons are built in, to be separated later. They can stay in one piece until I'm ready to do a bit more on the wing. There are no tubes for the servo leads. I don't find them essential on a wing this size as it's easy enough to pull a new lead through with the old one. You can see the slots in the top of the ribs; I turn the wing over and gently tease out the old cable if it becomes necessary. I do test the servos beforehand though! Servos are mounted on 1/16 ply plates as simply as possible; wrap of insulation tape and gorilla glue. Works a treat and saves ply blocks. You can see now that the wings are pretty much done. Sheeted, joined and sanded. I am considering a strip of lightweight glass cloth to reinforce the centre, but that may be overkill. I didn't bother with the Harmony/ Spitfire hybrid and they are solid. The model will be one piece, so the wings will be glued into the fus; it's likely to be plenty strong enough at the target weight of 2lb 12Oz. Next stop; the fuselage... Graham1 point
-
It seems that it needs converting to MP4 format for some computers. Hopefully this converted version will work… somehow it comes out a much smaller file size. IMG_1283.mp4 Brian.1 point
-
Hello yes I have a backplate from a clapped / damaged engine . Backplate is fine . Pm me you address etc . I'll post it if you cover the cost of postage into a cancer charity ? If thats ok ? E.D.1 point
-
1 point
-
Remember that a wattmeter measure the voltage applied to the ESC not the voltage at the motor therefore it only gives a true reading of watts at WOT. If you want to measure the heat lost in the motor you need to know the resistance of the coils circuit that's presented to the ESC output, then calculate using current sq * resistance.1 point
-
Why the post if you don't know what a wattmeter actually measures ?1 point
-
Long answer: A wattmeter is telling you the instantaneous current draw in amps and total pack voltage at that point in time under load. Amps and Volts are multiplied together to give the total power drawn. The magnitude of the load is determined (in simple terms) by a combination of the motor Kv, prop and input voltage, but the wattmeter doesn’t know anything about that or indeed what is generating the load. What is measured by the wattmeter includes energy lost within the system from the ESC forward that doesn’t go to generating thrust (i.e. heat, noise etc), but it’s not limited to just the losses. I seem to remember reading most brushless power trains are in the 80-85% efficiency range end to end, so if you are measuring (say) 300W at the wattmeter probably ~250W is going into the prop. Short answer: Every electric flyer I know has a wattmeter, and they all use them to optimise power train performance and avoid a overloading their components. If you are right, they are all wrong… ?1 point
-
Looking good Steve. We'll be able to work on some synchronised Ballerina routines! Graham1 point
-
Apologies Just noticed a solution was offered Selecting V tail wing This allows the rudder channel to work1 point
-
Looking good. Mentioning snakes has reminded me of an error I made, I glued them in to all the formers ?. Not a major issue I just have to keep retrimming every flight as the temperature changes.1 point
-
Friend has got a Cockpit Sx, MPX have made it easy to set up a V tail (or elevon mixer), just select V-tail as the tail plane type and in the set up you just cycle through the 8 options until the V tail surfaces move as they should, job done. If you wanted a separate steering control for say nose leg or tail wheel steering I don't think you can separately assign rudder control to another servo (but check it might allow this), but what you can do is use a control mix and using the overwrite option switch control of a servo channel to the rudder stick, so then the rudder stick would control the V-tail surfaces and also the wheel steering servo.1 point
-
F2 has been cut to allow for the battery tray, and a new piece of balsa cut for F3 as the supplied F3 will form part of the battery tray, which is next to be built. Very pleased with the alignment so far, the tail platform is spot on and a dry fit of the snake litres has not required any further adjustment to the holes in the formers.1 point
-
Matty, Now I have pretty much all of the feedback I will get on it, should be submitted by the end of the month all being well. Rich1 point
-
Hi , Here is my Video of the Gyroo, Here in Manchester we get the best of all the weather conditions so we have to live with it. The Blades I used for this test flight are 650mm x 55mm although shorter than specified by Richard they work well. Cheers Steve.1 point
-
Yes 0.4mm to be precise. Probably my favourite modelling material as I may have mentioned previously. So easy to cut with a scalpel or scissors accurately. All the sheeted areas of this 1/4 scale Kirby Kite I built from a plan by John Watkins in the 80’s was 0.4mm ply.1 point
-
Like other builders, I glassed the wing before fitting it to the fuselage to complete a major sub-assembly and hopefully minimise hangar rash. I also cut out the rudder as a scale detail, but as time is short, I will fix it in place.1 point
-
As promised a bit of a video taken of the Gyroo and the single 1mm tri plate today.There seems to be no difference in performance compared with the Revolver plates. An overcast day and I waffle on a bit but you can see it flies fine.1 point
-
An update on the 200i fitted to the Sportster. I've been flying it for a while now but decided to address the slightly rich running, it had also started to exhibit some hesitation when exiting banked turns. Tuning the engine in the garden showed that the rear pot was quite a bit out (rich) but I also found that I had left off the horizontal baffle plate from within the cowl! So I made a new one as I couldn't find the old one (probably has been repurposed and is now built into another model!), whilst doing this work I also lowered the fuel tank as I felt that wan't helping fuelling matters. I took it out last night for a quick blast and it appeared to be running a lot better but the real test was going to be today. So having fired it up I took it out and threw it around a bit to try and upset the fuelling, I couldn't. This is the vid of the first flight of the day, I further tweaked the rear pot tuning later in etc day and it was even better!1 point

