Leaderboard


Popular Content
Showing content with the highest reputation on 10/11/21 in all areas
-
I thought I would share photos of the balancing jig I just finished . It was inspired by one of Rons earlier posts and as I had just finished building a DB Spitfire I needed something steady to balance it on . This should work for any models I envisage building. Weight is not a problem on this unit as it is heavy duty with 13mm aluminium tubing sleeving the pivot bolts and 10mm ID bearings. It was built from some solid wood shelving off cuts, 3mm and 4mm ply and a couple of old bike suspension ball race bearings , plus a few other bits I had lying about in the workshop. The balancing arms are made from laminated 3mm ply with 4mm flat top surface. The top will be covered with foam strip after painting to help protect the wings when in use. The unit is very adjustable with removable slot in legs, and long m8 Threaded rods which run in brass sleeved holes in the wooden side panels. The side panels can be turned either way round . It folds away almost flat so requires little space After varnishing I will stick the self adhesive measuring tape to each arm so the balancing point can be easily read.4 points
-
Well after 18 months I finally got down the airfield with my Whippish again! The photo below may not be very remarkable but it was taken just after my first ever landing with an autogyro!! I think I might have cracked it at last after many attempts, just to convince myself that it wasn't a fluke I had a further 2 flights and landings only stopping when the battery retaining strap came loose and needs workshop attention. I still haven't managed to take off from the runway as I couldn't get the rotors up to speed with very little breeze. I held the model vertical to get the rotors going and then when up to speed launched with about half throttle, went away beautifully. The only issue I have is pitching up with power on. I've added 50 grams of nose weight (before this flight) and screwed the rotor plate pushrods in a couple of turns. I can't wait to get down the field again and have another go, it was great fun and I was so pleased when I managed a landing.2 points
-
Well, at last, after 16 months in the build, my KeilKraft Falcon from a Ben Buckle kit is complete! Today was a calm day at Greenmires, our North Yorkshire flying site, and so a fine day for a maiden... I was somewhat worried that take off would be skittish, due to the very forward undercarriage, but it was really just a pussycat! The model weighs 8lb 5 oz, no ballast required with the cg at 130mm, just 5mm behind the plan cg. Engine is an OSfs56a, turning a wooden 14"x4" prop. Took off at half throttle, and spent most of the flying time at 1/4 throttle. Eventually tried a few aerobatics(!!), it loops reasonably, barrell rolls interestingly?, but the stall turns are excellent! A few pics, with many thanks to club photographer Nigel Castle...1 point
-
while waiting for the engine mount to arrive in the post, I headed off to the Shuttleworth collection at Old Warden. What a special place that is and surely one of the finest living museums in the world. They have some extraordinary aircraft there and in more normal times would surely be a huge visitor attraction. It was very quiet when I visited, which was at least safe from a Covid perspective but concerning for the museum.1 point
-
Tim, my comment was also tongue in cheek, I just forgot to add a ?1 point
-
Dont worry , there will be Spitfires soon .?1 point
-
I have put a backorder in for the Spitfire on the Warbird Replicas site in the hope I can join in. Sit and wait I guess?1 point
-
That last video is very instructive, Jon. A lot of people adjust the low needle to give the highest idle speed but this clearly shows the tuning is then too lean for clean acceleration.1 point
-
NP at all. As you now realise it is one of those things that is intimidating the first time, but once you've done it successfully once you realise it is super straightforward. With Frsky's excellent comms skills ? the hardest bit (as per @Trevor Crook's post above) is normally finding the correct pairing of TX and RX firmwares that work together! ?1 point
-
That's only half the story Don. You need to check that the right memory bank in the brain has been selected as well - not so easy! I have been using JR radio since 2010 and their use of model match, adopted from their Spektrum agreement pending the release of their own DMSS solution, has been a god send.1 point
-
Flashed both receivers successfully this morning. I needn't have worried, it was a far quicker and simpler process than I feared and of course gives me options for future Rx purchases. Many thanks to all who chipped in, especially MattyB!1 point
-
Any 3 cell lipo of sufficient capacity should do it - anything above an 1800mah should be fine I would think, it's not like you use your starter for long periods. This is a good "second life" use for packs that may be past their best and you would no longer fly in an electric model.1 point
-
Me, I'd just recover usable components (RX, servos, those parts of the power-train that weren't totalled) and fit them in a new model. The wing that fluttered down, I'd mount above the door as an aide-memoire...1 point
-
I prefer screws ,it’s easy to plug pulled out screw holes after a difficult landing .The same landing with captives can lead to pulled out u/c plates and a right mess1 point
-
Sign seen i my garage office. SO TRUE1 point
-
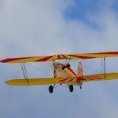
Slots are fixed holes in the wing (Druine Turbulent) and slats move. Kruger flaps are panels on the lower surface that extend down and forward then take up a curved (aerofoil) shape by the hydraulic actuators bending the panel. The Tornado GR.1 had them along with a half closing undercarriage door system (also increased lift) but both systems were disabled (along with automatic wing sweep). Droops are the whole leading edge moving down (early F-4 Phantom, known as 'hard wing', late F-4E and F-4F have slats). I made some plastic slats for my 1/4 scale Tiger (non-functional) and I lost one on its maiden flight, made no difference to it! RAF Scampton, 1997.1 point
-
Hi Ian, I cut 5 strips wider than required then dipped them in resin and draped them oved the former. Once cured I trimmed the frayed edges off. I'm not sure what the cloth spec was, I bought it a long time ago1 point
.thumb.jpg.507e8e41f64a8a0ae8fbd699d456cbca.jpg)