Leaderboard


Popular Content
Showing content with the highest reputation on 16/11/21 in all areas
-
This came up on the news feed on my phone from the Guardian, nice to see some positive coverage, https://www.theguardian.com/uk-news/gallery/2021/nov/16/gliders-in-lancashire-model-aircraft-enthusiasts-in-pictures9 points
-
Thought it was time to repeat a warning about cheap nasty and dangerous counterfeit servos that are STILL being sold online on a well known auction site. Most of us already know about these pieces of junk but newer members to the hobby might think they are getting a bargain. THEY ARE NOT! A member who rejoined our club after a twenty plus year break found a set of four servos online for around £10 complete with assecory pack. The price should have given the game away but he's been out of it for a long time. Plane flew one flight OK then servos decided to lock over with inevitable results. The most common counterfeits are of standard sized Futaba servos now now selling for around £14 ish for 4 and being openly advertised with the Futaba logo online,other fakes Inc Tower Pro already a budget servo but made even cheaper! I have been told there are also Macgregor fakes out there. Please don't buy these rubbish items and if you already have them fitted in a model take them out of your models and bin them. Also check any second hand models you may buy as its not unheard of for then to be fitted to make sale look good. Please bring it up at your next club meeting as newcomers may not be aware of these. They will cost you a model or even injury . It's not if but WHEN. The main giveaway is the price . Other things to look for are shiny cheap plastic case mouldings with labels stuck on badly. Poor molding on base of CE mark or country of origin. They can also rattle when shaken as they often contain swarf or solder and wire cuttings inside the case; as we found on a post crash check a couple of years ago. IF IT LÒOKS TOO GOOD TO BE TRUE IT USUALLY IS !5 points
-
Finally making progress again on the P51. I have finished the basic paint work for Ferocious Frankie. I found the painting to be the hardest part of the build! My choice of paint probably made things more difficult than necessary. Here is the detail: Covering -Solartex white (seconds) with Halfords car paint grey primer Aluminium finish - Halfords acrylic car spray paint Aluminium Silver Olive drab - Express paints RAL 6022 semi-gloss spray Yellow - Guild Materials Chroma Gloss Yellow Enamel grey I found paint adhesion between the Halfords grey primer and the Guild yellow spray was rather poor. I had to re-do the painting after rubbing down. Also the guild yellow did not cover well at all and needed several spray coats to deepen the colour. The Aluminium Silver was difficult to get a consistent finish and needed several coats. The Olive Drab went on well. I think the lesson here is to pick a paint type and stick to it for all the colours. Mixing types contributed to my issues. Anyhow, its done and the next steps are add the markings, complete the controls and the electrics. Then wait for spring to fly!! I have really enjoyed the build and learned a lot for the next one. Richard has gifted us a great kit which is a joy to build and from all reports a dream to fly! Thanks Richard.2 points
-
Last observation of the day relates to the butterfly wing bolts. The bolt wings are definitely going to foul on the inner formers. I decided to pick out a couple of M4 hex bolts and use washers to make a better job of it.2 points
-
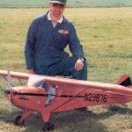
Those that had the PT-19 were in good company. Here's the first man on the moon Neil Armstrong with his son Mark & their Cox PT-19.2 points
-
@Rich Griff, if you don’t know how to post links on your device please Google how to do it or look at the manual - it is normally a trivial cut and paste exercise from the address bar in your web browser. Expecting everyone else to do this for you each time isn’t reasonable and will only lead to frustration.2 points
-
I recently picked up an unstarted Mohawk kit from someone thinning down a huge stash of ARTF kits. The kit, as supplied, has a steerable nosewheel but no operational rudders . Even though it has 3 fins. So I decided that needed to be remedied. The kit specifies 3s lipo power. I opted for 4s 3700 lipo with lower kv motors. We shall see how that works out. The model is ready to go now, just waiting for better weather. Hopefully Saturday will be test flight day.1 point
-
Update on progress on the LA7, top decking's are fitted, rear one still drying hence the use of the masking tape to pull it into the sides neatly, tailplane supports sanded to go round the stern post and also glued into position, F1 and F2 have been epoxied in. There have been a few parts so far that have needed small mods, they were not a problem but i am mentioning them on here to help those yet to build their LA7 kits. The slots in the crutch for former F3 are 7mm too far forward, i cut the tabs off F3 and moved it to the position marked on the plan which is at the rear of the wing seat, F3 needs a small amount sanded from the width as well to allow for the thickness of the fuselage ply doublers. The forward foam top decking sits too high when resting on the 1/4 square balsa, it should sit in a position just above F2 so that the cowl which sits on F2 is level with the top decking. I sanded the bottom of the foam decking slightly to get the position right, the picture shows it sitting just proud of F2. Tomorrow i will work on the rear fin support and control snakes so that the fuselage bottom can go on.1 point
-
1 point
-
I tend to use servo shop,excellent service and genuine servos.1 point
-
Looked it up on the net , sold for $199 which would be £160ish? quite a lot for what you get but certainly different and a lot of fun with the local bird life1 point
-
Yea, I reckon I’m going to fix the cabin light in my boat.1 point
-
Jonathan, That should work OK but if you find you need a noticeable amount of up-trim, a small ballast weight at the tail my help with inverted flight.1 point
-
While we are waiting ? Link to webinar here. Dick1 point
-
Moving slowly on with additional formers and reinforcing top and bottom around the inlet duct as indicated to be necessary after a 4s test run. The inlet trunking outside the fuselage will have additional support when the wing root fairing is added. It will have added maybe 10g (1%?) but it should mean the duct will not collapse!1 point
-
A pity because the price of decent branded standard servos hasn't really gone up that much - if at all they're cheaper! I remember paying £12 for a huge brown Futaba standard servo (with the old exposed pin connector). back in the 70s. What's that the equivalent of now, £60-£70 maybe? People love a 'bargain' and whether it's fake car parts, dodgy booze or whatever, the ££s will take priority over sanity for some.1 point
-
It is also perhaps worth mentioning there are cheap servos that is not trying to be something they are not. Given a duty appropriate to their specification they can work fine for a long time, certainly as long as a cheap plane is likely to last. Just don't use them on your expensive pride and joy.1 point
-
It's important to remember there are bricks and mortar UK-based shops trading on eBay. They aren't selling knock-off goods on eBay whilst simultaneously selling official stuff in store or on their own website. Always check the seller, eBay isn't a big bad wild place, it's highly convenient when used properly.1 point
-
That's the problem, we're all old gits on here so silly questions and assumptions are par for the course!1 point
-
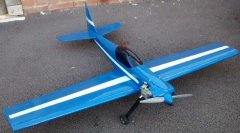
The Cox PT19 and the Tri-ang/Frog/Cox Fledgling were two different aircraft, both Cox powered. This is the Fledgling: This is the PT-19. Its my brother's that he bought in Canada in 1970. The engine went into various other models and is around somewhere. Note how both models were available with reversed colour schemes to that on the box:1 point
-
I remember poring over the Keil Kraft catalogue at the control line models but didn’t manage to afford such luxury as the Phantom Mite until I was into my later teens. I don’t recall any disappointment with the kit contents and it flew very well until an attempt at a loop went horribly wrong. I moved on to RC after that - but a few years ago I downloaded the plans and built a replica with a DC Merlin from my collection of bits and bobs. Perhaps one day I’ll pluck up courage to loop it but it’s well worth the effort of laying out the lines and flicking the engine into life - for the wonderful aroma at the very least - and getting rather dizzier than I recall in earlier years!1 point
-
I wanted the plastic Hurricane model as a youngster but the local model shop owner persuaded me to build a Phantom Mite on which to learn to fly C/L. Good advice which started me on the right path to success. This is from the back cover of Model Aircraft Magazine Aug 1965:1 point
-
I've flown a few 'ornithopters' and this is by far the best flying I have tried out. Super simple to assemble as well. Hours of fun for the pilot and local wild life.1 point
-
Just heard that a British vacuum cleaner manufacturer has bought the Co-op funeral directors. Some people think that's ok, I think they're Dyson with death!1 point
-
The inner wedge is 1 degree and the tip wedge is 2 degrees. It is the narrow tip that might be liable to tip stall. All six of my "Angel" series use the same wing layout and it has always performed superbly.1 point
-
That's a very good question. There are two wedges one at each end of the aileron. The washout at the tip is not obvious whereas at mid wing it is obviously there. The two wedges can be seen under the blue battery and next to the sanding block.1 point
-
If you've changed nothing, it sounds like a loose connection somewhere, or possibly some binding caused by heavy landing. Try rotating the motor slowly be hand - should be silent; if not, it's either rubbing on the airframe, or internally (crud inside it from 'landing'), and that needs rectifying. If motor OK, check soldered connections and fix as necessary. If both OK, and you haven't changed anything, ESC probably damaged and needs replacing. Easiest to get one with same connectors for battery and motor that you have - probably meaning an FMS spare. Or if you're happy soldering the old connectors to the new ESC, and generic ESC will do. Soldering is a 'must have' skill for electric flight IMO. Please let us know GG1 point
-
I finally was able to retest this model with the larger motor as Steve has and was happy with the "sparkling performance". I found the flight very punchy and quite different from my first rather sedate flight. I can recommend this motor set up. Chris...1 point
-
Once when having a hearing test, it occurred to me that the frequency of my poor hearing coincided with the rpm of the TD049.1 point
-
Same fella was telling me he can throw a ball 1/2 mile for his dog and it’ll bring it back… I thought that’s a bit far fetched!1 point
-
An enya 155 would tear it to bits. A friend has that engine in the H9 20cc version and its still got monster power. Topflite always recommend massive engines for the american market. They tend to build them really heavy and fly them at 500mph scale speed. If you build it to 10lbs, which should be easy enough, a 90 or 100 would be fine exactly as Don suggests. Also, TF wood tends to be a bit like oak floor boards at times. You might want to get some decent balsa in for sheeting the tail and fuselage to help keep the weight down1 point
-
Have the canopy frame almost done and though there are a few wrinkles to sort out it should look ok with the metal coat flattened back a little with fine wire wool. I am not going to entertain the idea of it sliding as it will only allow closer inspection of cockpit detailing when done. I certainly don’t have a ‘Sea Fury in My Workshop’ and will be happy to have a semblance of the interior. Having said no sliding mechanism it’s been surprising what has come loose in the cockpit of my P47. I have extricated both the bomb sight and joystick, which both came adrift despite my fairly gentle arrivals. Trouble is there is no way back inside to re glue them without paring the canopy away and that isn’t going to happen. I think I shall try to make the floor pan of the Fury cockpit detachable from the sides, so I can drop it out for maintenance and canopy dusting. With a break from rivets after completing the fuselage I have now made a start on the wings. The marking out is time consuming, but once done impressing the rivets is about a couple of hours work per side. I have almost done one side but will need to regain the feel in my fingers before starting the next. I shan’t be doing the underside! So far I have only made one hole through the wing skin; probably an area that was over sanded and thinner than elsewhere. It’s hard to say at this point how they will look when sprayed over, but I am at least a little hopeful it will be worth the effort.1 point
-
For me this is not good.1 point
-
Does it really matter if there is not a lot of interest? What really matters is: Do you like the model? Do you enjoy building it? Do you enjoy flying it? If the answer to those questions is "YES" why worry about what other people think. I design and build what I want and if others like it, Great!. If not I am happy with it and that is what matters to me.1 point
-
Yeah , I bet you have Eric , Probably a free standing Belling from 1972 . Notice , that Graham has an "induction " hob . (West Sussex for you ) Talk about North/South Divide . There's going to have to be a lot more levelling up methinks . I bet Brian Cullen , up in Jockville is probably cooking on a bonfire outside the cave .1 point
-
I remember seeing Derek Hardman giving demonstrations of covering using Solarfilm at several Sandown shows years ago - he said much the same as in his video. But I still found it worthwhile looking at his video online recently. Almost a Masterclass but he makes it seem simple which it really is if you follow the simple steps shown. Note particularly the way he leaves enough extra material ( maybe 3 or 4 inches) at wingtips etc in order to grip it and have it shrink nicely. Check out the way he makes insignia too.1 point
-
Some late in the day P-38 mixing Preparing the effected areas... I made a tool to suit the required radius for 'near net shape' blending before the sandpaper... It proved easy enough to sand and blend in... And now the rad already shaped into the front and rearmost sections (in wood) appears to run along the entire length. Not easy to photo with the rubbish depth of field on the I-Phone, but you get the idea.1 point
-
Thanks for the belated best regards, it really does mean so much... I can honestly report, other than a little bit of filler repair work where I've crashed stuff into it whilst stored in the corner of my little workshop, the A-10 has not been progressed since the last update. Which is a shame. Worse still, with number of smaller models ahead of it in the queue to finish, I can't see it getting much action anytime soon. Sabre, JP150, Swept Tornado are certainly all in line to be finished first.1 point
-
Well we got there in the end, all major painting now done, just some odd bits of touch needed plus fuel proofing. Control linkages still to be fitted as is the radio.1 point