Leaderboard
Popular Content
Showing content with the highest reputation on 02/12/21 in all areas
-
2 points
-
A few pics of the cockpit. The hole in the bottom is covered by the Pilot’s seat. Pilot has a nylon bolt in his back going through the former behind him and a wing nut tightening him in place. Hopefully he isn’t going anywhere. Nothing fancy for the instrument panel. Just a colour photo from the specific full size I am modelling on, hence the modern gps etc. Gives the right impression hopefully2 points
-
Following Kevin's great build of the Black Widow to this stage I am finishing it off. at this point I have covered the flaps and inner wing s with lam. film and fitted the flaps. I have also fitted the elevator servos. Kevin already had the wiring in so not a lot to do. The main fuselage is mainly covered with ABS mouldings these take some time to cut and fit. next stage is to fit the retracts, I am using electric, as these were not available when the original plan was drawn some mods will be needed.1 point
-
With the nose added I really have gone as far as possible until the servos arrive. Compared to the previous 4 Hawkers built like this out of XPS this one has gone very slowly. In my defence I had not intended to build it so no parts were ordered in advance. In addition there is no rush, it is winter and I have no where left to store it when it is finished! ?1 point
-
LA7 update, wings are have tips, trailing and leading edges on and are waiting for me to attack them with the sanding block, servo boxes have still to be cut into the wing. Fuselafe has the control snakes properly installed and supported and the bottom sheeting has just gone on this evening.1 point
-
It’s December, winter’s here, but… I refuse to put snow tyres on my car, because: It’s my car, my choice, my freedom. The effectiveness of snow tyres is not proven, except by studies carried out by tyre manufacturers and the government. My neighbour had an accident after putting on snow tyres: this proves how dangerous they are. Some are already on their third set of snow tyres: this proves their ineffectiveness. We do not know what snow tyres are made of. Winter is a worldwide hoax created by the tyre companies to scare us and thus enrich themselves. In fact, the tyre companies invented snow: they spread it at night while you sleep. If you have snow tyres, the government can track you in the snow. Educate yourself, open your eyes, stop being sheep! This winter - snow tyres?!? Just say NO! You know it makes sense.1 point
-
Considering the recent exchanges (see above) I would not rely on my answers being accurate?1 point
-
4 wing panels now covered and ready for doping. This job will also have to wait until there is less damp weather, while its ok to dope outside, its better if the air is dry to prevent trapped moisture (bloom).1 point
-
An ABS moulding would be good, but I don't think the demand would justify the time and costs. I built it up from off-cuts, the same as the big bits of balsa at the tail will be.1 point
-
I am very lucky that at my field , I am the go to " maiden flight " man, so I get to fly them all, petrol, glow and electric. There are 3 sport 40s, 2 glow I/C, and 1 electric. All fly very well and are lightly built resulting in good training characteristics too. The Boomerang is brilliant, and will fly in wind too, as it has a great wing and a little heavier. Flys equally well, I/C or electric, there are a couple of 4S lipo powered at my strip. I find the PC9 is not a trainer, but more intermediate, probably because lack of dihedral, but flys well and looks good in the air. Cubs are a favourite, and with big sides and tail feathers, do fly in their own way, and you can learn much from them.1 point
-
Guys, thanks for the "likes", certainly wasn't expecting what amounts to about 10 of them! I'm very proud of the model, and pleased it's finally finished, so the fact a bunch of "strangers" from across the globe appreciate this too is somewhat pleasing. Interesting discussion resulting from my comment about uploading the plan to OZ. I did have a small moral dilemma about it, but as i have previously asked DB S&S, and Traplet if the plan was still available before deciding to salvage what i could of mine (lots of tape!), i decided that preventing what might have been the only copy in existence from disappearing was more important to me than unknown copyright status. If it was raised as an issue then i would like think it could be removed, as with any such plan on similar sites.1 point
-
A properly tuned, and propped .52 Surpass is well able to fly a Boomerang Aidan, Have seen such a set up fly a " B " certificate successfully.1 point
-
If you're going to use the supplied wire linkages (with z-bends at the servo ends), then the simplest method would be to solder on an extender with a screw-on clevis for adjustment at the control-horns: https://www.rcworld.co.uk/acatalog/M2-Clevis-and--Solder-Extenders-Pk2-5508041.html#SID=591 point
-
I find the easiest method is to rough cut the parts on a scroll saw (I cut heavier ply on a band saw but a scroll saw will cut 1/4 birch ply OK - just a bit slower) and then trim them to the finished shape on a bench sander. More expense but a very useful tool to have - a cheap one will be fine for modelling purposes.1 point
-
I usually use stainless steel clevises (2mm mostly but 3mm for bigger models). Fit a 2mm locknut and a short piece of fuel tube to prevent the clevis from opening (though they're usually very strong and the chance of their opening in flight is quite remote) The 2mm push rods supplied by SLEC are actually smaller than 2mm and the 2mm thread at one end is rolled (like a bike spoke) rather than cut. If the push rod is too short I use 3mm carbon tube which has a 2mm hole and glue 2mm threaded rod into the adjustment end with epoxy and a short 2mm threaded pushrod at the Z bend. Make the bend on the unthreaded part. If you're using snakes then do the same (without epoxy) at each end. Personally, I prefer push rods rather than snakes but snakes work OK just not as well IMO.1 point
-
No, we discovered this issue earlier, have already corrected the issue and your latest Op Id will be back in place at some point tomorrow.1 point
-
Have you seen this John? https://www.rcgroups.com/forums/showthread.php?1666181-Martian-Space-Ship1 point
-
Looking good. For a bit of added motivation attached is an Aeromodeller article from 1970 describing a control line version of the Black Widow. It was designed & built by Maurice Bodey, a late Clubmate of mine, and even after 50 years I well remember its presence both on the ground and in the air. 20211201_NORTHROP Black Widow’.pdf1 point
-
1 point
-
Progress on the Hurricane, now going to be BoB colours, I used card for the fillets at the tail end . My next model will be all black apart from the invasion stripes.1 point
-
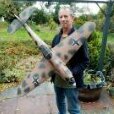
This has been about 15 years in the making. David Boddington 1/5 scale. about 70". Myself and modelling friends built it, despite being not quite finished, it had one flight on a 914st. Ended up in storage and recently a burst of enthusiasm came on to get it finished. Reworked a few things, including a recover and repaint in a different scheme, and a conversion to electric due to the infrequency at which it might fly, and avoiding fuelproofing. Flies brilliant on 5s, and is acutally quite easy to fly. Plan now on Outerzone, because I put it there. https://outerzone.co.uk/plan_details.asp?ID=134061 point
-
Well Graham , Patience is a virtue . Although I dont think she was when I went out with her , Or am I thinking of Olive oil ? Anyway , lets carry on with this 110 and see what transpires. As my Mum always said , "You never Know what's round the corner " ( she had tunnel vision ) Terrible business , but it kept her focussed . On the horizon, mostly .1 point
-
if anybody is interested here are 2 scale drawing of the la5 and la7, if anybody wants copies let me know and I will email to you1 point
-
Thanks Roger, it's still 50/50 if my retracting tailwheel stays. If I can't get the plane to balance I will remove it. I haven’t made as much progress as I would like but I have managed to find time to repaint the pilot figure I brought. He looked a bit cheap and I also had to extend the body so that he could see out of the windows. I just used a piece of white packing foam for the body and sanded roughly to shape. Not much will be seen so I wasn’t seeking perfection. This is my first attempt at painting a figure. I don’t think he came out too bad and he certainly looks a bit more realistic. Before After I also found a picture online of a cockpit that is available for a larger model. I straightened it up in some photo editing software and scaled to fit. I think it will look ok once fitted. Edited By Pete H on 25/02/2017 20:39:441 point

