Leaderboard
Popular Content
Showing content with the highest reputation on 08/01/22 in all areas
-
"It will heal by itself" is a dangerous assumption. A few years ago I tripped over a kerb and badly grazed my knee, went home cleaned it with antiseptic and stuck on a plaster. It didn't heal, started to swell. I ended up in hospital being treated for sepsis, intravenous antibiotics and all. Don't ignore minor injuries! Most will heal but If it doesn't dry up in a few days you could get sepsis.3 points
-
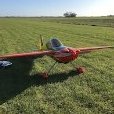
Big fan here, for sport scale models. They are cheap, easy (forgiving) to spray, and you can get in any colour you like. Ref below: chipmunk red, white, grey over ceconite and epoxy fibreglass; Russian spit green and grey undersides over epoxy fibreglass and overcoated with flat clear spay can enamel; PR Spit blue all over over wbpu and over coated with 2k clear for glow fuel proofing; and tiger moth cream sides (ceconite) over coated with 1k automotive gloss clear. all these mentioned colours are hardware store acrylic mixed to colours of my choosing, in a mix of resene, Val spar and who knows what else. I thin the paint to the consistency of full cream milk with plain tap water, and spray with a cheap mini 125ml hvlp touch up gun, as found on ebay for around 15-20 pounds, e.g. Link Unless you're aiming for top level sCale, why not?2 points
-
Now the fun of CoG balance. Helpfully the optimum mark is engraved on the inside of the fuselage. Judicious positioning of the lipos gave me a good starting point.2 points
-
Hi In terms of builds compared to many others i've been rather lazy, it happens.......?. Anyhow, over christmas I managed some good progress with the wing & fuse construction. Mart2 points
-
Thanks for the suggestion but I’d rather not use a gazebo for a couple of reasons. Firstly, I tend not to build logically and don’t wait to start painting until everything is ready. I quite like bringing some parts to completion long before other parts as it boosts morale and sustains me through the less exciting bits – I’d be erecting and dismantling a gazebo quite often. Having said that a gazebo may have helped yesterday as a very light shower developed just as I was finishing painting one of the inner cowls. The sun was shining but I suddenly saw a few drops on the newly painted surface. Now dry, they’ve left some watermarks, it’s not bad enough to start over again but annoying none the less. Secondly, and more importantly, I need a strong light (the sun) behind me to reflect from the work in hand so that I can watch the paint build up with each pass. Whenever I’ve tried painting under overcast skies I’ve been disappointed with the uneven result. Especially when trying to obtain a gloss finish, getting the coat wet (without overdoing it and producing runs) I find quite difficult but am helped considerably by seeing the reflection as the paint flows. For this model I wanted to get a good gloss finish on those parts that would have been aluminium and a satin sheen on the fabric covered areas. I realise that high gloss on a 1930s aeroplane, even one which has had multiple liveries possibly into the 50s, wasn’t very likely but I wanted to try my best at getting a consistent shine on those bits which could shine. Plan A was to leave on the masking until the black had been applied. Having sprayed the red, I started to get worried after 30 hours or so that the 2K paint would be hardening and with little prospect of suitable weather for further painting, by the time the masking did come off the paint would chip and form a ragged edge. I decided that it would be better to remove the tapes and mask up again; more work but I felt easier about doing it. The same has been done with the inner cowls as its unlikely there will be any more painting done in the next couple of days. Seeing the result, it would probably have looked better with 2mm cheat lines instead of 3mm but I find its difficult to apply such narrow masks without distorting them – it’ll stay as it is!2 points
-
Example pictures. Propped up TE etc (easiest with non-tapered wing): Ribs pattern and jig described in my post above (tapered wing):1 point
-
Enough thinking so started drilling vents. then realised the shape would be close to the join so added triangles made from scrap. then roughly shaped and dry fit as some adjustments may be needed. Planking ? Two bits well it's a start. A good day as all went well after the couple of holes in a bad position. They are covered so no problem, even at two feet. ?1 point
-
I'm proceeding quite nicely with my first plastic kit build (Revell P47) for almost 50 years and am getting reasonably competent with my Paashe airbrush. I'm using Tamiya Acrylics and thinning them approx 30-50% with regular meths. No issues at all so far, paint drys quickly and seems to bond very well to the substrate after an over night cure. No problems with masking off areas and paint coming away. I did try using water as a thinner but found the paint took a longer time to go off and was more prone to runs in my inexperienced hands - I'm happy with the meths. I do have a cheap single action airbrush from Machine Mart which is way inferior to my double action Paashe and is so much more difficult to get a good result from - so beware buying very cheap stuff and making a rod for your back especially as a beginner IMHO. Took me twenty minutes to strip and clean the Paashe first time around, but can do it in under five now!1 point
-
Well I’ve decided to just go for broke and slope launch it. I’ll have one of my flying buddy’s launch it so I can be ready for any serious trim problems. Ive done maiden flights like this before and I’ve only had 1 incident and I threw it myself that time! ???1 point
-
Hi, Finished work on the body and printed it out and I am happy to make a start building it now. If all goes well I may make a larger version for flying outdoors. Steve. ?1 point
-
Now got some riveting done and the light grey base coat applied and flatted ready for masking the upper surface dark grey.1 point
-
Hi Basil, the pilot figure was pointed out to me by a forumite in this thread, back a few pages. He is from Max Grueter and is available as an STL file for €35 you then have to get it printed. Andy Meade has set up a small business printing them at the scale you require. The head is resin printed by a friend, another friend printed the body using normal 3d printing. Okay did a bit more on the cockpit, concentrating on the rear seat today. I have made a video of the process if anybody is interested? Cheers Danny1 point
-
The top and sides of the fuselage have been covered but I was holding off covering the bottom as I needed to complete the wiring for the landing and ground signalling lights and also solve how the closed loop cables were going to be installed once covering and painting were complete The rudder and elevator servos are installed immediately behind the cockpit, there is a small hatch to access them and also switch for the receiver. From the servos to the exit guides at the rear end is 57 inches, too long to feed cables straight through without them getting caught on the intermediate formers. I soldered two piano wires together, which is long enough to reach and intended to pull the cables through, but that drooped under its own weight and would not go far enough. The decision was made to install a small access hatch under the fuselage, just large enough to get my hand in, where I could guide the piano wire in a straight line. The hatch cover is a piece of 1/8" liteply with one side given a single layer of fibreglass cloth which will form a base for painting. Hopefully it will be unobtrusive once all is painted. The hatch simply spans two longerons and lined with some 1/8" liteply strips to form a seat for the cover and also gluing area for the gussets. 3/8" ply here may be overkill but they shouldn't break away under the strain of the small screws.1 point
-
John Don't do anything so drastic. I've just checked my wingbolt stocks and I reckon I have a few of those old Flair bolts and fixings -they are not in a package, so I can't be 100% sure, but they look right and trying a 6mm bolt (of which I have dozens) in the fitting that would be a very sloppy, unsuitable fit as you describe. The bolts have 35mm of thread below the cheesehead. If you would like to try these, I'm not likely to use them, so just drop me a PM with your mailing address and I'll pop them in the post FOC, if that would help you out.1 point
-
I have a very wing weary Ivan Pettigrew Chipmunk which is now 17 years old. My wood selection was not as good as it could have been, and she weighs 5lbs at 75" wingspan. It flies on 3S lipos and I can get 10 mins of flight from a 2700mAH pack. It gets used for training as it is large so easy to see, light weight so it can fly very slowly and has no vicious handling traits. Please don't think this is necessarily a gentle flier, sure it lands slowly but it can take off in less than 5 yards in still air, perform loops from level flight but I am still happy to fly her in 20mph winds with gusts at 25mph. I belong to a group of flyers who fly IP models in the UK & Europe, BIMBO's (British Ivan Model Builders Organisation), as does Mike. We have been visited by Ivan in the past during one of our get togethers in the south of England. True John, 4.5lbs is still slightly optimistic but with care, hopefully achievable. I have my own website which shows some of the IP planes I have built, they are all still with me and flyable. My website is here1 point
-
It's been some time since I've done any work on the 2 fins but now the interfacing tailplane is glassed these needed a bit of work to ensure they still fit snugly. Whilst I had them on the bench I fitted the 2 rudder servos and the aero covers which required some little hardwood mounts cut from the type of block you buy to mount cowls on fuselages. The small green tool I made to aid with fitting the blocks with the right recess - it was a right angle of the same thickness as the white plastic cover - shaped to allow you to hold the block in place with the green alignment tool flush to the surface - once each block is positioned you can remove the green tool and add some glue - worked well. The little fibrelgass rudder horn still needs to be fitted in the slot to the right - these parts are then ready for a final sand and primer.1 point
-
I wouldn't go as far as that Alan, you know me cannot resist the odd rivet or two ?1 point
-
The scale underside bits. All made in 5 mm XPS. The "Sabrinas" are surprisingly big but then each had to hold 300 30mm cartridge cases. The underside air brake looks (and was) a bit of an afterthought literally mounted on the fuselage underside. It obviously worked well enough as it was never changed in all the 1900+ Hunters that were built. Still waiting for the paint!1 point


.thumb.jpg.f2c91a4d75f6dfb67adbc58b36b7bc71.jpg)

