

Nigel Grant 1
-
Posts
146 -
Joined
-
Last visited
Content Type
Profiles
Forums
Blogs
Gallery
Calendar
Downloads
Everything posted by Nigel Grant 1
-
Wight Crusader v Maricardo v Aerobat
Nigel Grant 1 replied to kc's topic in Building from Traditional Kits and Plans
I built the RM Aerobat a few years ago but crashed it after only a few flights when I made the mistake of letting it get a bit far down wind and throttling back before I then turned back which resulted in dropping a wing and spinning in. Should of kept the power on. Still have the plan, ply rib template and a few bits so would like to do another one at some stage. Hoping to retire at some stage this year and get some time to do it. -
Wight Crusader v Maricardo v Aerobat
Nigel Grant 1 replied to kc's topic in Building from Traditional Kits and Plans
I found this thread when I was looking up info about the RM Aerobat. Only a couple of days earlier I had seen that the Wight Crusader plan and article had appeared on Outerzone, Wight Crusader , if any one is interested. Looks a similar build to the Ruhig Tigre that has been discussed on here in earlier times, which is also on Outerzone. Thick symmetrical wing and relatively light build. -
Pics from your free RCME plan build
Nigel Grant 1 replied to Ton van Munsteren's topic in RCM&E Plan Builders
Hi Ton Unfortunately the RCM&E takes a few months to get down here to the local model shop here in Christchurch NZ. I am looking for a new park fly model to build and your LEMON looks just the ticket. It looks like it has ailerons. Is the motor about 150 - 200W running off a 3s 1000 mah battery? Nigel -
Couldn't get on using home or works internet down here in NZ during the day. All good now though obviously. Nigel
-
The Duck shooting season opens here in NZ tomorrow - this would turn the table on the hunters -
-
I recently got an OS 46axII that had only been run a couple of times from a clubmate. I saw he had fitted a No.8 plug to it whereas they are supplied with a No.6, which is a hotter plug. When I ran it on the bench on Morgan's 10% it definitely rattled away with pre-ignition and threw the prop a couple of times. Fitting a No.6 made it come right. I had the same problem with an OS25SF a while ago. An OS F plug would upset it.
-
I've used SLEC Blue 4oz tank with OS25 2st's and get plenty of time so as the others have already said, that tank will be fine for a 30 4st. This thread is interesting as I have a SC30 4st NIB and have been wondering what would be a suitable plane for it. Peter Miller's original Peggy Sue looks a bit a bit of a handful for me flying wise, whereas this one looks good - interesting build and sedate flier. Have you any build photo's to post? Hopefully you'll give us a flight report.
-
What a great job you've done on this David. Will look forward to the flight report. What engine have you got in her?
-
La Coupe Des Barons 2023.
Nigel Grant 1 replied to David Davis's topic in Shows, Club Events and Competitions
The link in David's post above to the outerzone plan also includes a review by Peter Miller on the kit. Its a fun read and includes an inspirational colour scheme! The review takes you back to when the pictures were captured on a roll of film. The one Peter built went OK on a K&B 20 sportster. The more contemporary builds using an OS 35AX or 56 -4ST must be pretty hot. All the best for this years event David, will look forward to the report - go well! -
DB RICHTHOFEN - A Kit To Be Completed
Nigel Grant 1 replied to Nigel Grant 1's topic in Traditional kits
What a great photo John! It encourages me to keep moving with my project. Yes those wings are flat bottomed. I'll follow your advice and leave a touch of incidence on the bottom wing. I am going to use screwed on nylon horns for the ailerons. I had wanted to form the control horns the same as yours using 1.5mm glass fibre sheet but couldn't find any down here. One of the hobby guys suggested I make my own sheet between a couple of pieces of glass. -
DB RICHTHOFEN - A Kit To Be Completed
Nigel Grant 1 replied to Nigel Grant 1's topic in Traditional kits
The top wing is finished now. I don't think there's anything else that I can glue onto it so it is time to start thinking about the fuselage. I have noticed that the ribs that have been assembled into the wing are a bit different to the plan. They are, about 4mm deeper and therefore the wing is thicker. The center section is a bit narrower. The wing's are not quite flat bottomed and has a bit of shape from the spar forward. I will need to draw and cut new 6mm sheeting and doubler's to hold the bottom wing in place. The original design had positive incidence for the top wing but says to reduce it to 0deg if using ailerons. The plan shows the bottom wing would also have some positive incidence but since I will have to draw and cut new sides and doubler's I expect I might as well set that to zero as well? -
I have recently got a new set of varifocal glasses. We call them progressive lenses down here. This new set has a tiny bit of metal in each lense near the top on the outer edge and the clip-ons for sun glasses snap on with magnets. I use amber for the sun. Hadn't thought of getting a second yellow tinted set for grey cloud which at times can be quite tricky. Thanks for the suggestion Shaun.
-
Hi I have a Mini Robot built from a plan updated by Christian Moe which was in the RCM magazine. It has been a great wee plane both at the park and also I take it to the strip to start the day with if I haven't been flying for a while. As it carry's a SLEC bomb its always popular with the granddaughters. Must of done over 100 flights. The plan I used had the more typical arrangement for the tail plane of using cross grain at the tips and the elevator tapers from 40mm in the middle to 20mm at the tip. Uses a Turnigy 2822 motor and a 3S 1000 battery. Has plenty of power to take off grass quickly and for loops etc. I see on outer zone there is a second plan and article which details some modern development's. MinRobot
-
DB RICHTHOFEN - A Kit To Be Completed
Nigel Grant 1 replied to Nigel Grant 1's topic in Traditional kits
Needed to make up the strut hooks for the wings and thought it would be a bit of a fiddly job bending piano wire into small shapes. That was until I realised they are the same depth as my Z bend pliers makes. It was a very quick job to make up a batch and always fun trimming the piano wire to length with the Dremel -
Great work. I'm sure it will go well.
-
Hi Peter This one looks to be similar to your Miss Sizzles but with built up ailerons and wheel fairings. I'm sure both were good fliers - do you have preference as which was the better model?
-
DB RICHTHOFEN - A Kit To Be Completed
Nigel Grant 1 replied to Nigel Grant 1's topic in Traditional kits
Haven't had much spare time lately but was a nice day to be in the garage today so did some work on making the trays for the aileron servo's and the tabs for them to attach them to the wing. Even though this kit is old and has belonged to a few others I have made it my own now by slicing my finger this afternoon with the good old pro edge 11 and leaving my "mark" on the frame work! -
DB RICHTHOFEN - A Kit To Be Completed
Nigel Grant 1 replied to Nigel Grant 1's topic in Traditional kits
Thanks John and yes you are right. They are doublers as of course riblets are spaced between the main ribs. I have also made the same incorrect reference on 26 June where I am using a partial rib either side of the main one to support the wing locating dowel. I'll get on today and make a ply template as there will be a few to cut out. I've got some time today as although it wouldn't of been a bad day for a fly down here in Christchurch NZ, I am recovering from a head cold. New Zealand has been fairly isolated for a couple of years and now the borders are open and there are less internal lockdown restrictions, quite a few colds and flu's are circulating around in addition to COVID, which I've avoided so far. -
Steerable nosewheel on grass?
Nigel Grant 1 replied to Jeffrey Cottrell 2's topic in All Things Model Flying
I used a separate small metal geared servo driving the steerable wheel through a plastic snake which seems to protect the servo. Its had a few knocks! I set it up using Mike Holts advice from his writings on Futaba Transmitters. The servo is run through a spare channel on the receiver (5) which is slaved to your rudder channel (4). This lets you set up a lot of expo, on 5, so near the center of stick movement you only get a very small amount of deflection on the wheel, which is all you need as Brian says above. And then when taxiing at slow speed with full deflection you can still turn easily. You also use the sub trim on your spare channel to align your wheel so the model tracks straight as you taxi. -
DB RICHTHOFEN - A Kit To Be Completed
Nigel Grant 1 replied to Nigel Grant 1's topic in Traditional kits
I am going to put ailerons into the top wings using the outer three rib bays and the tip as suggested in the instructions. Often for a biplane with just one set of ailerons they are on the bottom wing but that wing had already been joined and running tubes for the servo leads would have been tricky and it has a bit of dihedral as well. I will join the top wing with just 1/2" under each tip which is what is recommended in the kit instructions for the aileron version. I have found the scale plans for a Fokker D6, which this kit seems to be close to, that has this configuration of ailerons. The D6 is essentially a radial version of the D7 which was the much more prevalent version. https://outerzone.co.uk/plan_details.asp?ID=2305 To drive the ailerons I am going to need a servo out in each wing and normally I like to run the servo lead, with an extension in this case, in a rolled paper tube. The tube is 15mm dia which of course is the diameter of the Dremel sanding drum. Normally a hole this size doesn't seem to matter in a deep symmetrical wing with capstrips reinforcing it. But in this case there are no cap strips and the rib where the tube will pass, behind the front spars is only 35mm, leaving 10mm of 2.5mm balsa above and below the servo lead hole. I am concerned this will weaken the wing and so I am thinking that I will glue in a series of riblets to strengthen the area. I hope the photo below shows what I'm intending as well as the size and the position of the hole. Of course I will precut the holes in the riblets and to form the ones in the ribs that are already glued in place I will use the 90deg attachment for the Dremel. As Peter Miller has said in other threads, you don't often use it but it sure is handy when you need to. -
DB RICHTHOFEN - A Kit To Be Completed
Nigel Grant 1 replied to Nigel Grant 1's topic in Traditional kits
I have pretty much finished off the bottom wing now by adding sheeting to the top of the leading edge and also webbing between the spars. Has stiffened up the wing a bit which has allowed me to correct the wash-in that was in the surfaces. Also hoping it will make covering a bit easier as I am planning on using HK translucent red which I understand has a high shrinkage rate if too much heat is applied. As in my last post, fitting the sheeting required paring a bit off the ribs back to the main spar and cutting the sheeting in. I have tried to use reasonably light balsa as I am aware all the extra detailing is adding on weight and I am planning on building in ailerons to the top wing also. It is tempting to cover the wing to see what the translucent film is like to use but I think it is proper to finish the whole aircraft first so I can get a "bare bones" photo of it. -
DB RICHTHOFEN - A Kit To Be Completed
Nigel Grant 1 replied to Nigel Grant 1's topic in Traditional kits
Finished detailing the center section with ply mounts for the bomb release and its servo. Also an aluminum tube to hold the 6mm wing locating dowel with a couple of extra riblets. I have sheeted the whole center section which involved paring 1/16th inch off the ribs and cutting the sheeting between the spars and leading/trailing edge. All stuff that wasn't on the original plan which was just nylon covered and banded on. After I have started the fuselage and fitted the ply plate with the T nuts to take the wing bolts I'll drill holes for the bolts through the trailing edge. The plate will have to be located carefully so the bolt holes don't end up up going through the rear dihedral brace. -
New Parasol Design, think will call 'Kestrel'
Nigel Grant 1 replied to Lindsay Todd's topic in Own Design Project Blogs
Lindsay's choice of pilot is always one of the interesting parts of his builds. I'll wait with interest. -
DB RICHTHOFEN - A Kit To Be Completed
Nigel Grant 1 replied to Nigel Grant 1's topic in Traditional kits
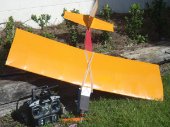
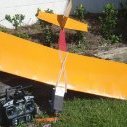
Good way to make a start on this was to set up the center section of the lower wing to take a SLEC bomb. Decided it was a good addition as the granddaughters were here the other day and had great fun out at the field with another plane I have one fitted to. Bit of a fiddly job but looks like it will work out alright. Will be a good accessory on the finished item I hope. It means the bottom wing will have to be held on by a front dowel and wing bolts. -
One component of a partially completed kit I have been given is the framed up bottom wing. The kit is an old DB Richthofen and the structure is open with no leading edge sheeting or spar webbing. I had been intending to fit LE sheeting on the top and webbing hoping to stiffen up the wing a bit to reduce the risk of warping before I use HK translucent covering film. The wing has been stored in various people's attics for a long time and I have found the right side in particular has over 6mm wash-in. I am wanting to get it flat or even a bit of wash-out. But I doubt leading edge sheeting and a web installed while the wing is pinned flat would enough to hold it straight when released from the board. I steamed the wing for only a short while and left it weighted for a few hours but that made no difference. Interested to know if others think that steaming it for longer or wetting down and then leaving weighted down for a lot longer may help.
