

Bob Jennings 1
-
Posts
485 -
Joined
-
Last visited
-
Days Won
1
2 Followers


Bob Jennings 1's Achievements
24
Reputation
-
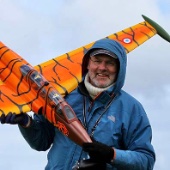
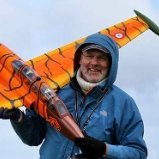
Hi Chris, I was inspired to build your little beauty. Here are some photos of mine in the Peak district.
-
- 56 replies
-
- 12
-

-
Smoothing out the brown paper covered foam and blanked off intakes Getting a droop on! Here's a big gap in photos and a leap in construction Almost there Rigged and ready Same scale C-17
-
Sorting the flappage Floodlights in place Floodlight cover pinned and glued Playing around with colour and shading
-
I think I overloaded this thread with photos... Nacelles dried and sanded Blending in the wing root fairing Blanked intake discs from rough beginnings Taking shape
-
Well, it's been a long time since the last post and there has been some development! Here's a photo update. Wings were cut by Phil at Cloud Models. And a grand job he did too. Filling in the space for the wing root adjacent to the flaps Wings are taking shape here with the huge built up surfaces all with recessed Robart hinges Starboard side root Positioning the nacelles and exhaust pipes Intakes starting to take shape Using up some old packing foam Helping the shape and firming up the foam with some Polyfilla Onefill. Agricultural means of ensuring a good Gorilla glue bond! Back to the main fus Making up the fuselage wing for fairing Overall fuselage taking up a lot of space in the shed! Large builds seem to require a lot of holding devices. This is about a quarter of my clampage stock!
-
Canadair F4 Sabre XB812
Bob Jennings 1 replied to Chris Barlow's topic in PSSA Mass Build 2020 - North American F-86 Sabre
Just had a look through the entire blog. Some brilliant solutions, tips and advice. A cracking build and I'm really looking forward to seeing this in the flesh. Well done. It's inspiring. I'll be trying the peel-ply on the 'rod. -
Everyone is raising their game now. I haven't gone to town on this one. I lost my mojo halfway through and I just wanted to get it finished. I made a bit of a gaff on the final lacquer coat, spraying too close and melted some of the paint on the nose. The tanks turned out at 90g each and with the airframe and all the gear plus some lead, flying weight with tanks is 2225g. Somebody tell me this is ok!
-
Bob Jennings 1 changed their profile photo
-
Here's my Hellenic Flame Sabre. I'll have some more details once I get the thing balanced!
-
Bob Jennings 1 joined the community
-
Fouga magister 1/4.5 moulded from scratch
Bob Jennings 1 replied to dirk tinck's topic in Electric Ducted Fan
Great work Dirk, your shed time is amazing. Maintaining the drive to get it done is impressive. -
Nice one Steve. Great finish!
-
A really spectacular build you have here Chris. Impressive craftsmanship and attention to detail. Where do you keep all your balsa dust and shavings???
-
Bobs F86 Sabre
Bob Jennings 1 replied to Bob Jennings 1's topic in PSSA Mass Build 2020 - North American F-86 Sabre
Back to that tailplane! I had too much play in the set up so dived in with the Dremel to free up the brass tube. This needed tweaking for dihedral and I epoxied the joiner into the tube. Happy with the fix and its all squared up. I had a fettle of some Sabres at the Lleyn bash to get an idea of the feel of the tailplanes and they were solid compared to mine. I'd obviously not been thinking straight in the rush to get it done! One thing that surprised me. I swapped the tailplane panels over and they fitted much better. At some point I must have muddled them up. (Over 55 now so some befuddlement is expected I suppose). I did manage to get a nice sharp transition into the fuselage with a smooth blend into the fin with the tailplane fairings. A good session of sanding, filling and checking. That's it so far. -

-
Bobs F86 Sabre
Bob Jennings 1 replied to Bob Jennings 1's topic in PSSA Mass Build 2020 - North American F-86 Sabre
The impression is just right to my eye. It saved me a bit of time and hassle. Plus it made sense to do it this way as I'm a bit arty-farty by trade. This means I can close up the cockpit and crack on! All sealed and secure. Innards won't be seen again for a while. I twisted a small brass tube in places to represent smooth rivets on the canopy frame. Again, an impression of scale detail. I'm not going to count them, and I know I haven't allowed for the sliding portion of the canopy frame! I used RC Modellers glue to create the bond and a thin line of epoxy on the front edge. The pencil lines are an indication of an idea I have for the panel lines as I did on my ME109. Thin lines of tape over the first cut back primer coat, then a final spray over the taped lines. This coat then gets cut back with fine finishing paper to reveal the tape surface. Peeling the tape off leaves a shallow groove in the primer. Its surprising how this catches the light once the top coat is on.
