
John H. Rood
-
Posts
284 -
Joined
-
Last visited
Content Type
Profiles
Forums
Blogs
Gallery
Calendar
Downloads
Everything posted by John H. Rood
-
 Posted by Andy Meade: Use the same colours but a different tail number ... and a different pilot!
 -
Rare frosty snow-capped peaks behind Malibu! Chris, I just returned from my mom's 90th birthday celebration this past weekend. She was a design engineer at NAA Los Angeles Division, working on the F-86D and F-100A programs. Met my dad in the engineering group there in 1955; five weeks later, they married, and in 2019 they are alive and still together! Seven kids, the 1960s, the Beatles, Vietnam, the works. Here's from a few years ago: Best wishes on your audacious and excellent 2020 Mass Build path!
-
Chris, just in case there is a nomenclature question re: “Sabre”, “Sabre Dog”, and “Dog Sabre”: The F-86D, known as the Sabre Dog or Dog Sabre, was actually a significantly different airframe than the F-86 Sabre. Most visibly in its radome nose, but also its larger fuselage. Here is a vintage 1950s photo of each of them together, an F-86 and F-86D, and the F-86D is the bird nearest the camera. Similar, but different! Gordon & Martin’s design and kit for our 2020 Mass Build is for the F-86 Sabre, and its many variants, but not the F-86D “Dog” Sabre. Modelling an F-86D would require a redesign, most especially of the fuselage.Hope this info helps! Edited By John H. Rood on 27/10/2019 16:26:31
-
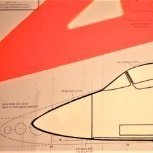
F86 "Gamma" Build
John H. Rood replied to Martin Gay's topic in PSSA Mass Build 2020 - North American F-86 Sabre
"Gentlemen, now that I have your attention, direct your gaze now toward this fabulous speed brake gizmo..." --- Miss NAA Sabre -
Gorgeous model there, Phil. No doubt she'll fly like the goddess she is.
-
F86 Build blog
John H. Rood replied to MADOG PILOT's topic in PSSA Mass Build 2020 - North American F-86 Sabre
Excellent, Mad-Dawg !!! -
Right you are, young man! No splitter fairings -- my sloth doth reigneth -- there is a method to my madness! Meanwhile, here's an A-4B prang aboard the USS Great Orme. Excellent reference on shapes and details! ps -- Maybe it thinks it is a PSS model or something, abusing Mr. Meade's custom 3D-printed refueling nozzle and all?
-
Today I was trying to insert images from my Flickr account but apparently I still haven't figured out the elusive secret mojo here! So, here are some images via my album here on RCME. I am now at the point of shaping the fuselage with the help of cross-sections and photos. Check out these interesting shots from NACA wind-tunnel tests "way back when": And this one of a NAS Los Alamitos-based reserve A4D also gives a nice reference view of the A4D-1 and -2 (A-4A/B) engine inlet. Note, too, that this aircraft lacks the gun at the wing root fairing: Edited By John H. Rood on 16/10/2019 19:55:47
-
My 64+ years-old prostate collaborated with a 20+ years orange tabby cat to wake me up at 0300-odd something hours this morning so I made the mistake of picking up my phone and here was this new post from California’s Planes of Fame museum! Caution: Viewing may cause loss of sleep and increased passion for the 2020 Mass Build!
-
My parents met at North American Aviation's Los Angeles Division in the early 1950s and worked in the engineering effort on the F-86D and F-100A programs. My mom was an engineer on the yaw damper fix for the F-100A, a very serious concern at NAA in the wake of famed Pearl Harbor hero and NAA test pilot George Welch's death during a demonstration flight in an F-100A. She left NAA in 1956 to have five more Rood kids in addition to my sister and I; but my dad stayed on through the X-15, F-108, B-70, SST, B-1 and many more design & development programs at NAA. Believe it or not, in some respects North American Aviation at Inglewood was a relatively "small" shop back then; my father gave me this book some years ago as a fascinating insiders look at some of the goings-on there.
-
Can't deny it -- there is NOTHING quite like a new scale modelling treat arriving in the post. And is this one ever a goodie! Just HAD to give it a quick fondle. Beautiful!!! I know, I know... I'm a happy love-slave!
-
Peter, today I saw this photo on Mr. Cooke's latest report; I'd call it JUST PLANE BEAUTIFUL !!!
-
Posted by Steve Houghton on 09/10/2019 15:44:47: ”...Aren't these a bit thick...” Steve, I doubt this will bring any further enlightenment to the subject, but... my wife, friends, colleagues, they all ask that same question about my powers of insight, analysis, and action. 🤣 Photo c/o LIFE magazine archives. Edited By John H. Rood on 09/10/2019 19:00:03
-
F86 Build blog
John H. Rood replied to MADOG PILOT's topic in PSSA Mass Build 2020 - North American F-86 Sabre
Nice one, Ven! And welcome mad dog pilot, to the Sabre glider mass-build madhouse! This shall be an adventure for all of us.. -
So with my vast talent for mixing things up badly, I labeled each of them as to port/starboard/fore/aft: Then tracing the aft cross-section from intake bulkhead "A-1" gets the sanding underway: Next I managed to remember that the early Skyhawks had a shorter intake ass'y, and its entry lay perpendicular to centerline, not canted like the later A-4E/F et al. So, after making the adjustments, I cut and glued and shaped and here is what I ended up with:
-
1st October: Just 31 days before the mass-build maelstrom begins!
-
Fuselage: Making the engine intakes. Just in case someone reading this has never done this kind of thing before, the sheet balsa parts you see here are sections of what will become a "block", stacked together, glued, and finally shaped to resemble an aircraft engine air intake. The trick, however, is to make OPPOSITE halves. And, though they might APPEAR to be identical, they're not. Look closely at the vertical line... it runs at an angle! So, at least for me, it takes some attentiveness here to not screw up this simple-looking task when gluing the parts together! Me? I SCREWED IT UP! I've had to re-do my starboard set. One must remember to make two halves, two OPPOSITE sides, and meanwhile the correct side profile must be maintained. Look closely at the side profile on the plans... note the downward "droop" angle on the intake. That's ALSO true when you look at it from for and aft: the fuselage section droops downward at those intakes. Edited By John H. Rood on 28/09/2019 05:42:27
-
Entering the LOOKS KINDA LIKE A MANTA RAY’s FACE phase of the wing build.
-
Epoxied the wing panels together; dihedral and alignments all seem good so far.
-
F86 "Gamma" Build
John H. Rood replied to Martin Gay's topic in PSSA Mass Build 2020 - North American F-86 Sabre
About that Titebond “Quick & Thick”: The fine print says it is NOT for structural applications. -
F86 "Gamma" Build
John H. Rood replied to Martin Gay's topic in PSSA Mass Build 2020 - North American F-86 Sabre
Peter, thank you. It's been so long since I've done any real woodwork that I have forgotten lessons learned in the past. It's a long ways back from the House of Sin. So busy talking, instead of actually building. So I have now dusted off my glue stash and found that I need to replenish the Super 'Phatic et al; and today I learned of a new product from Titebond: QUICK & THICK -- new to you all? Heavy? I shall give it a try here and there as I now finish up my A-4 Skyhawk 2016 Glacial-Speed build. Product promo video: https://youtu.be/XLjE9Bbk-bw p.s. Peter, your build blogs are GREAT! Tons of helpful stuff, and lots of dry savage wit. Edited By John H. Rood on 24/09/2019 17:43:21 -
Just about “there” with sanding the TE ass’y to shape. Quick dry-fit of the goods for the neighbors.
-
F86 "Gamma" Build
John H. Rood replied to Martin Gay's topic in PSSA Mass Build 2020 - North American F-86 Sabre
Martin, thanks! -
Wing Trailing Edges: channel routing and rough-sanding now pretty much complete; tip washout looks good so far; aileron torque rods are doing their thing.
-
Attaching the aileron torque tubes with JB Kwik epoxy. The stuff’s a dark sticky grey-black mess so I decided to mask off the surrounding area. Prior to this I had to refurbish the torque rods as it has been so long they’d become oxidized/corroded/whatever and were not moving freely. Gave ‘em a thorough cleaning and light lube with machine oil, and trimmed everything to size. Scuffed the outside of the torque tubes and routed out a channel in the balsa for to seat them in snug.
