Peter Miller Posted January 24, 2022 Share Posted January 24, 2022 35 minutes ago, Peter Jenkins said: Amazing what you can find in your shed. Just for Peter Miller, my venerable Phantom with PAW 149. Originally built in the early 80s to teach my sons the art of control line flying. Neither their enthusiasm nor the Phantom survived for long. It's since been repaired but never re-flown! I only had Phantom Mites with an ED bee but that was back in 1954. 1 Quote Link to comment Share on other sites More sharing options...
Peter Jenkins Posted January 24, 2022 Share Posted January 24, 2022 8 minutes ago, Peter Miller said: I only had Phantom Mites with an ED bee but that was back in 1954. I also only had a Phantom Mite with a Mills 75 but that was only in 1963. It was all I could afford on the proceeds of a paper round! ? Quote Link to comment Share on other sites More sharing options...
Peter Miller Posted January 24, 2022 Share Posted January 24, 2022 30 minutes ago, Peter Jenkins said: I also only had a Phantom Mite with a Mills 75 but that was only in 1963. It was all I could afford on the proceeds of a paper round! ? Talking of combat. A Happy memory. 3 up combat in Aden. Temperature up around 50C 2 Quote Link to comment Share on other sites More sharing options...
Paul De Tourtoulon Posted January 25, 2022 Share Posted January 25, 2022 (edited) Back to control line still in my garage the last flight around 6 years ago,( video on youboob ) it's very difficult getting ether nowadays,, Edited January 25, 2022 by Paul De Tourtoulon 1 Quote Link to comment Share on other sites More sharing options...
Rich Griff Posted January 25, 2022 Share Posted January 25, 2022 (edited) Tell me about it... Carlube cheapo easy start smells very ethery... Seen somewhere john dreere easy start has 70 percent ether ? Caster seems difficult to get also, ipn too... Local chemist shops think I am a terrorist... Edited January 25, 2022 by Rich Griff 1 Quote Link to comment Share on other sites More sharing options...
Peter Miller Posted January 25, 2022 Share Posted January 25, 2022 I see ether is advertised on Ebay. Don't know if it is a suitable type. Weston UK sell diesel fuel I am told. Quote Link to comment Share on other sites More sharing options...
Rich Griff Posted January 25, 2022 Share Posted January 25, 2022 Hopefully mt brand and formula will remain. I asked Weston's and was told in writing ( email ) that there is no castor in any of their fuels...that was about Feb/march 21 Quote Link to comment Share on other sites More sharing options...
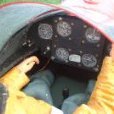
Paul Marsh Posted January 28, 2022 Author Share Posted January 28, 2022 4 Quote Link to comment Share on other sites More sharing options...
john stones 1 - Moderator Posted January 28, 2022 Share Posted January 28, 2022 Nice Paul. ? Quote Link to comment Share on other sites More sharing options...
leccyflyer Posted January 30, 2022 Share Posted January 30, 2022 My first foray into the world of SEMFF depron semi-profile parkflyers. There are quite a few of these at my club site and they fly very well, with lots of fun for a minimal outlay. Plans are downloaded from the net, printed as a tiled PDF, stuck to a sheet of 6mm depron and the parts cut out, laminated together and shaped and that's about it. I struggled with the surface finish on the depron and probably ended up adding too much paint. Nevertheless the model balanced perfectly with no ballast, so it can't be too overweight. I'd hoped for a maiden flight in the calm before the storm this morning but on setting up the throws first thing I found that the piano wire elevator pushrod was just too wimpy and deformed to a bow far too easily. That's now been replaced by a carbon rod now, which is much better, but the maiden was scuppered. However my clubmate Bob, who has built loads of these, was kind enough to donate a flight of his SEMFF fighters, to make space for making even more and I've now got a stern chase of Bf109E, Zero, Bearcat and P-51D, all beautifully finished, making a dash for it across the ceiling. 6 Quote Link to comment Share on other sites More sharing options...
Eric Robson Posted January 31, 2022 Share Posted January 31, 2022 Looking good Brian, Getting depron is the hard part, I am now using Maker Foam from Elite Models, my problem is I never settle for a profile and set out to plump it out and end up spending more time on something that had I kept it simple would have looked just as good once in the air. Eric. Quote Link to comment Share on other sites More sharing options...
Peter Jenkins Posted January 31, 2022 Share Posted January 31, 2022 Wow, great workshop Leccyflier! 1 Quote Link to comment Share on other sites More sharing options...
john davidson 1 Posted January 31, 2022 Share Posted January 31, 2022 careful, it can get obsessive! 1 Quote Link to comment Share on other sites More sharing options...
leccyflyer Posted January 31, 2022 Share Posted January 31, 2022 Too late for that John.? I do bemoan the availability of the real Depron from back in the day - I still have some small scraps of the white 3mm that I used to use and it has a proper skin on it, not like the easily dinged dermis on the grey stuff. Thanks for the tip about washing the surface of the grey - will see if that helps next time. Quote Link to comment Share on other sites More sharing options...
Tosh McCaber Posted January 31, 2022 Share Posted January 31, 2022 Looking forward to seeing it fly on the field Leccy. I’m sure that I have seen some entries regarding finishing Depron– I’ll have a look. As you may have seen, the finish on my B&Q substitute Depron Buschtrottle is pretty well dented and scored, despite reasonable care having been taken! 1 Quote Link to comment Share on other sites More sharing options...
leccyflyer Posted January 31, 2022 Share Posted January 31, 2022 I've seen the various recipes for filler/primer Tosh and had a dismal failure with the old HSB finishing system, which used to work pretty well with the real Depron back in the noughties. I think John is onto something with there being a coating on the surface of the grey stuff which might benefit from being washed off with an appropriate solvent, such as isopropanol. Quote Link to comment Share on other sites More sharing options...
Eric Robson Posted January 31, 2022 Share Posted January 31, 2022 The fuselage on my Me110 and the fuselage and wings on my Seafury are black depron covered in brown masking paper from Toolstation applied with PVA . The Seafury has had a lot of flights now and is still good. 1 Quote Link to comment Share on other sites More sharing options...
Tosh McCaber Posted February 1, 2022 Share Posted February 1, 2022 Hi Leccy, Here's the page that I saved from a duiscussion on finishing Depron from McG6969- hope that it helps- (also- hope that it woeks- haven't done this copy paste/quote on here before! Quote Link to comment Share on other sites More sharing options...
Tosh McCaber Posted February 1, 2022 Share Posted February 1, 2022 (edited) Hi Leccy, Here's the page that I saved from a discussion on finishing Depron from McG6969- with thanks- hope that it helps- (also- hope that it works- haven't done this copy paste/quote on here before! McG 6969 Members 5.1k Posted July 12, 2015 Hey Foxfan, hello to all, I've already been posting this before but I thought this could be of help regarding finishing techniques for foam or Depron. This method is not really intended to add some structural strength though, but still very applicable where no lamination is required. Freddie B's Secret Sauce... Not such a big secret, as Freddie B - an American foamie guru - himself talked about it in an RCgroup’s earlier thread. Here are some photos to help 'show and tell' in case some of you'd want to try this. Basically, it’s a filler & primer coat (all-in-one) that doesn't weigh much but works really well. He does this on his foam builds often when there is no covering, lamination or other coating involved. While many have been amazed by Fred’s finished airframes, this was the process he used. Let’s have it in sequence.1). Take some light weight spackle (Polyfilla or cellulose based filler) and put a nice size plug in a little mixing bowl. This time the plug of filler is about the size of a nut. 2). Next add some Polycrylic clear varnish (water based of course), about the same volume as the plug of light weight spackle. 3). Get some Talc Powder. Baby Powder or Foot Powder, but the Baby kind smells best… Watch out because many powders are Corn Starch, which we don't want! Talc is the magic that made balsa filler work in the old days of tissue and dope finishes. It is very fine and does a great job of getting those tiny imperfections filled, but sands away nice. Note the 'pile' of powder about equals the volume of the light weight plug we used too. 4). Add two or three drops of acrylic paint (craft paint, water based), and it can be white paint, but often you can use a colour to see the work in process and the finished results shows up better. Anyway, use a colour that works for your intended top coat. Light for light topcoats, gray for everything else. You can use Yellow in the primer if you are painting Yellow top coats, because Yellow (and Reds) don't always cover well. 5). Now mix it well. It is very thick, but get it creamy and all one colour and texture, working out any chunks. Now add water until it is like very thin whipping cream, thin shaving cream, or even thinner like a very thick paint. Brush this on your pre-sanded foam, making sure to completely wet everything and force mixture into any hollows, dings, scratches, etc. Let this dry. Then sand it all with some 180 grit, and 220 grit papers, mounted to some sheets of beaded white foam. The foam sanding blocks are flat, but 'give enough' to not cause grooves and scaring. Just make sure to remove sanding dust often and use a reasonable pressure while sanding. When you have sanded most of this formula away, you will see some original foam, but also many areas of filled and flush mixture and the surface will be very smooth. Little weight gain, yet ready for top coating with paint. You can sand with even finer papers, depending on what top coat paint you will be using. This is good enough using craft paints, but if you intend to spray with Model Master or Tamya paints, you could go to 320 or 400 grit paper. All three kinds of paint work well with this process. I’m truly convinced by Fred’s method and really worth trying this out on a piece of scrap foam or Depron. Last photo is a sample on a scratch build FFF (Folding Fan Foam) Russian Mig that Freddie B built with his filler/primer method. Happy filling Chris Brussels / Belgium Edited February 1, 2022 by Tosh McCaber 1 Quote Link to comment Share on other sites More sharing options...
EarlyBird Posted February 1, 2022 Share Posted February 1, 2022 Quote Link to comment Share on other sites More sharing options...
GrumpyGnome Posted February 1, 2022 Share Posted February 1, 2022 Hi Tosh Your links to pictures don't seem to work as they are stored on the 'old' forum...... GG Quote Link to comment Share on other sites More sharing options...
Tosh McCaber Posted February 1, 2022 Share Posted February 1, 2022 You're right unfortunately, Grumpy! Even in the original entry. However the descriptive instructions are pretty clear. I've haven't tried it out yet- but after I buy my supply of talcum powder,(!), I'll let you know how it went with me! 2 1 Quote Link to comment Share on other sites More sharing options...
leccyflyer Posted February 1, 2022 Share Posted February 1, 2022 Thanks Tosh - you'd sent me that previously and it sounds very similar to the HSB finishing system that I used on the wee Mustang, to no avail. Quote Link to comment Share on other sites More sharing options...
GrumpyGnome Posted February 2, 2022 Share Posted February 2, 2022 14 hours ago, Tosh McCaber said: You're right unfortunately, Grumpy! Even in the original entry. However the descriptive instructions are pretty clear. I've haven't tried it out yet- but after I buy my supply of talcum powder,(!), I'll let you know how it went with me! Yeah, you're right. Hopefully your experience will be better than the seemingly endless layers of primer and filler on my yet-to-be-finished Seagull P47 ..... ? Quote Link to comment Share on other sites More sharing options...
Andy Stephenson Posted February 2, 2022 Share Posted February 2, 2022 A method I heard about which eliminates filling and sanding was explained to me at meeting at the BMFA national centre. This is to get a completely smooth finish in one go by glassing. The glass tissue is laid on and epoxied as normal then a silicone rubber sheet about 6mm thick is laid on the wing and allowed to drape over the edge where weights are hung to pull it tight. This effectively moulds the epoxy over the weave of the cloth. I would imagine this would leave a gloss finish if the silicone sheet is smooth enough. For painting it might still be necessary though key the surface for good adhesion. Has anyone tried this and does it work satisfactorily enough to be a practical. Quote Link to comment Share on other sites More sharing options...

Recommended Posts
Join the conversation
You can post now and register later. If you have an account, sign in now to post with your account.
Note: Your post will require moderator approval before it will be visible.