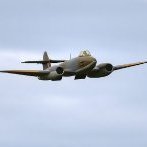
Andy Meade Posted April 16, 2018 Share Posted April 16, 2018 Hi all! Well, this is the start of my build thread for a mk iid Hurricane for the PSS mass build. I should come clean early, and mention that the parts I'm starting from are already well under way - I have the bits of the beta build that Phil and Matt put together to prove out kits, and fixed so many problems from. So basically, mine might not look like yours! I've gone for the mk iid with underslung 40mm cannon, as I think that looks far more evil. They will dropped before landing either via eflight release mechanisms (if space allows), or a pin-and-latch system if it doesn't. I can then also fit a couple of 3D printed 250lb bombs for the bombing comps too. Here are a few more pictures for inspiration, actual model progress shots to follow Onwards! Quote Link to comment Share on other sites More sharing options...
Andy Meade Posted April 16, 2018 Author Share Posted April 16, 2018 A quick check at lunchtime revealed that the wing is too thin for the e-flight release units, so an alternative will be drawn up today on SolidWorks that will utilise a single 9g or less servo to release the payloads. Oh, found an actual real-life picture of JV-Z on t'internet: Just goes to show how little you should trust the plastic kit bashers - their camo positioning is all wrong, oops! Edited By Andy Meade on 16/04/2018 13:14:31 Quote Link to comment Share on other sites More sharing options...
Phil Cooke Posted April 16, 2018 Share Posted April 16, 2018 hehe 'look out lads its the Scale Police!' Good to see you on-board with the Hurri project Andy, I look forward to seeing this one take shape! Quote Link to comment Share on other sites More sharing options...
Harry Twist Posted April 16, 2018 Share Posted April 16, 2018 Great choice Andy, I hope you will be mimicking the exhaust plume stain on yours! Quote Link to comment Share on other sites More sharing options...
Peter Garsden Posted May 2, 2018 Share Posted May 2, 2018 Also following. Did you see my gentle request for gun parts on 3D printing for us none printer owning chaps? With a monetary contribution to your dog food fund of course? Quote Link to comment Share on other sites More sharing options...
Andy Meade Posted May 2, 2018 Author Share Posted May 2, 2018 Ooh, sorry Pete didn't see. I have also drawn up the reflector holders for the landing lights, and some 250lb bombs. Will do the guns next. Quote Link to comment Share on other sites More sharing options...
Andy Meade Posted June 7, 2018 Author Share Posted June 7, 2018 Some work at last on the mk IId. Nose blocked up and filled, ready for final sanding to shape : Top of the fus, cut to a straight line. Just getting ready to install another snake here : A slight bow in the sides - this will be fixed with a sub former : LE's and most of the TE's - well, the false ones anyway - glued up : I make no apologies for the mess of the bench - it's like a Hawker factory in there at the moment, with the Hurricane, Sea Hawk and Typhoon all under construction, as well as glass work on the C17. Phew! Quote Link to comment Share on other sites More sharing options...
Phil Cooke Posted June 7, 2018 Share Posted June 7, 2018 Good to see some progress here Andy - similar state to my airframe now too after my holiday break... we must all get pedalling - it will soon be September! Quote Link to comment Share on other sites More sharing options...
Andy Meade Posted June 9, 2018 Author Share Posted June 9, 2018 Should be easy enough from here - there's not a lot of aircraft in this, thankfully. Right then, so the addition of a web (as per Dirk and Harry) to allow the joiner some purchase, was added : Here are some fus mods to take the extra snake, and a sub former to stop the bowing of the sides at the top : The other tray : I added the top sheet, then gave her a good first pass with the hand plane and permagrit blocks : And now the extended inlet / filter housing. Sketched up on the plan, then transferred to lite ply : Slots marked up then cut into the chin : Test fit. Yep, GEFTS! (Good Enough For The Slope) : Liteply blocked up with 1/2" sheet, ready for carving and adding onto the fus tomorrow : Quote Link to comment Share on other sites More sharing options...
Peter Garsden Posted June 10, 2018 Share Posted June 10, 2018 Looks like you may have the same problem as me Andy - fitting the cooler to a 3D curve - wish I hadn't rounded mine off. Quote Link to comment Share on other sites More sharing options...
Phil Cooke Posted June 10, 2018 Share Posted June 10, 2018 To be fair Pete - if you had done it the other way, I'm sure it wouldn't have looked right - the air filter was an 'add-on' to the full-size original nose profile so what you and Andy have done will produce the shape more accurately IMO. Quote Link to comment Share on other sites More sharing options...
Andy Meade Posted June 10, 2018 Author Share Posted June 10, 2018 They're only slope soarers guys, it's not the WJM :D plenty of car body filler to the rescue I think. Quote Link to comment Share on other sites More sharing options...
Andy Meade Posted June 12, 2018 Author Share Posted June 12, 2018 Some carving, glue, and a touch of lightweight filler later, the intake is done. Just needs to dry, then a quick tickle with 800 grit to smooth things out Quote Link to comment Share on other sites More sharing options...
Andy Meade Posted June 26, 2018 Author Share Posted June 26, 2018 bit more tinkering with JV-Z these past few days. 40mm cannon pods - these started off as liteply centre sections, a shape drawn up from various views of the items on t'internet : These were then blocked with 1/2" medium sheet and wood glue. Clamped up, then left to dry: These were then planed and sanded to shape, and carbon tubes inserted to the approximate length of the real thing : The good lady wife thought I was building a small pod and boom glider - close to it I think! The tip panels have had LE's added, and ready to be joined up to the centre. For the best bond, I used Gorilla wood glue, and added a triangular piece of balsa to bond the joiner to the bottom skin : Other panel next, then I can skin the centre section. Quote Link to comment Share on other sites More sharing options...
Andy Meade Posted July 17, 2018 Author Share Posted July 17, 2018 Dont worry, it's still moving along! Centre panel skin on, tips joined, TE blocks being glued on with torque rods: Some detail on the rudder (ribs and nav light): Start of the wing fillet in 64th ply. I was going to do this in foam, but decided on all-wood: Done! Soft balsa front and rear, blended in: Quote Link to comment Share on other sites More sharing options...
Andy Meade Posted July 23, 2018 Author Share Posted July 23, 2018 Well, I started the glassing last night, and all went well. With any luck I'll get the glassing complete this week and be in primer by the weekend. I'm sorting a few extra scale details in between epoxy curing, the first of which is a tail wheel. I drew this up in Solidworks, then printed it on my old faithful Up Plus. Finished piece that needs a bit of tidying up before paint : I'll attach this with either a small magnet on the top, or a press fit into a carbon tube in the fus. Quote Link to comment Share on other sites More sharing options...
Alan Gorham_ Posted July 23, 2018 Share Posted July 23, 2018 Wow! Quote Link to comment Share on other sites More sharing options...
Andy Meade Posted August 13, 2018 Author Share Posted August 13, 2018 Lots of progress this past 2 weeks - wing and fuselage fully glassed and in primer, now it's time to fit her out and do some detailing. Aerial masts and nose 'umps added: Aileron servos mounted: Some more printed parts - this time the exhaust stacks to my own design: Gun pods and radiator magnetised mounts final gluing up: Next up - cockpit fit out, some more detailing, then final paint. I might just make it! Quote Link to comment Share on other sites More sharing options...
Phil Cooke Posted August 13, 2018 Share Posted August 13, 2018 great progress Andy, looking good! Quote Link to comment Share on other sites More sharing options...
Flyer Posted August 13, 2018 Share Posted August 13, 2018 Looking good Andy. How many magnets would you recommend for attaching the radiator? Hoping two will suffice. Ade Quote Link to comment Share on other sites More sharing options...
Andy Meade Posted August 13, 2018 Author Share Posted August 13, 2018 Hi Ade, I used two, running span-wise. I found a great supply of large magnets on Amazon, but they are quite heavy unfortunately. With 12 magnets now on-board, it's added a decent amount to the weight. Quote Link to comment Share on other sites More sharing options...
Andy Meade Posted August 13, 2018 Author Share Posted August 13, 2018 A couple of "bench flying" shots at lunchtime, just before I took the gun pods in to the shed for a coat of primer. Quote Link to comment Share on other sites More sharing options...
Andy Meade Posted August 17, 2018 Author Share Posted August 17, 2018 Not a huge update, but I'm away on hols for a week on some south Devonshire slopes, so the build will sit stationary for a little while. Exhaust painted up, ready for fitment : Canopy glued on, HVAC tape ready for framing. Now she's ready for the top coat all over. Quote Link to comment Share on other sites More sharing options...
Harry Twist Posted August 17, 2018 Share Posted August 17, 2018 Lovely work Andy! Enjoy your hols, I've just got back from a week away, so I get rolling again with my Hurri this weekend. Ps I like the gun pods! Quote Link to comment Share on other sites More sharing options...
Andy Meade Posted August 28, 2018 Author Share Posted August 28, 2018 Hi Harry - thanks fella, there isn't a lot of info out there for shape, so some artistic licence has been taken! Hmm, some photos seem to be missing, ah well. Bottom grey/blue has been sprayed, then masked off. Top surface sand colour has been sprayed and masked off. Time for the brown! Fus same position : Masking off : Not long now. Decals and panel lines started this morning, so she is a bit further along than this, but give you the general idea : Quote Link to comment Share on other sites More sharing options...

Recommended Posts
Join the conversation
You can post now and register later. If you have an account, sign in now to post with your account.
Note: Your post will require moderator approval before it will be visible.