
Lee Smalley puts some furlough time to good use to get to grips with a new radio system from FrSky
Words & Photos >> Lee Smalley
I hate Open TX, there, I have said it.
Enjoy more RCM&E Magazine reading every month.
Click here to subscribe & save.
But before you all start throwing the phone at the wall, I know Open TX is a very flexible, powerful and adaptable system. However, I am still scarred from spending nigh on two hours trying to reverse a servo on a new member’s transmitter, from over five years ago.
So, when it came to looking at an alternative to my beloved Graupner MZ32, FrSky was not a brand I immediately looked towards. I knew it was reliable, I just couldn’t get my head around the programming. In this Covid world, a few of the more premium brands/models had to be cast aside; I simply could not justify the nearly 2K cost for the transmitter, let alone the cost of all the receivers I would need.
Therefore, it was a surprise to me, whilst browsing the T9 Hobbysport website (I do love a good glider), I clicked on this new X20 thing and watched the Ethos video. This looked nothing like any FrSky system I had ever seen. I suppose the best analogy I can think of is this: if Open TX is MS Dos then Ethos looks like Windows 95!
With my interest more than piqued, I investigated the costs of the transmitter and the various receivers. I also spent a good few hours on social media doing some homework. Decision made, I took the plunge and spent my hard-earned furlough money on an X20S combo, which came with an R8 Pro receiver. My reasoning for this impulse buy was that I needed an alternative radio fairly soon and I believed that I could sell it on for minimal loss to my pocket should I not get on with it. Plus, being on furlough, I had plenty of time on my hands to play with a new toy.
IN THE FLESH
It is not my intention to go into a nuts and bolts review here, as that would need more words than are available and I would find it utterly boring to read anyway. So, I am going to just give you an overview and a basic user experience of the X20. You can then visit the website links at the end of the article where you can get any extra information you need.
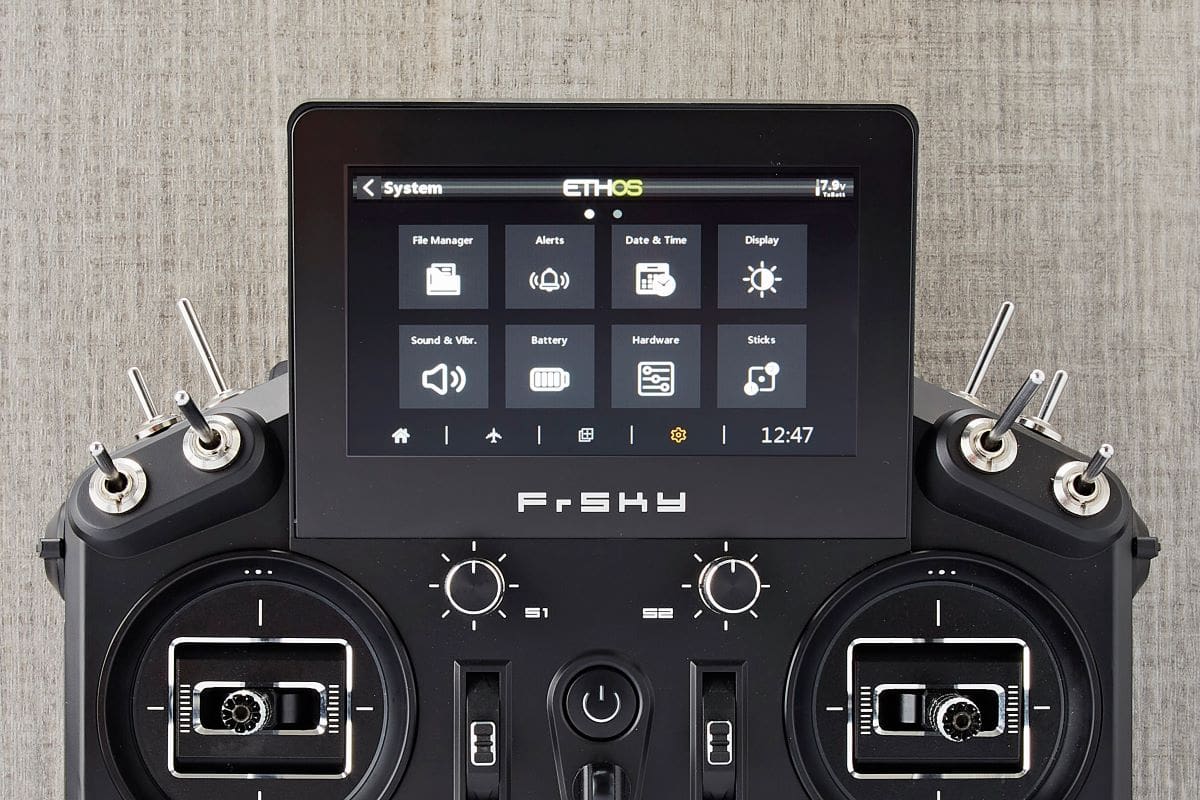
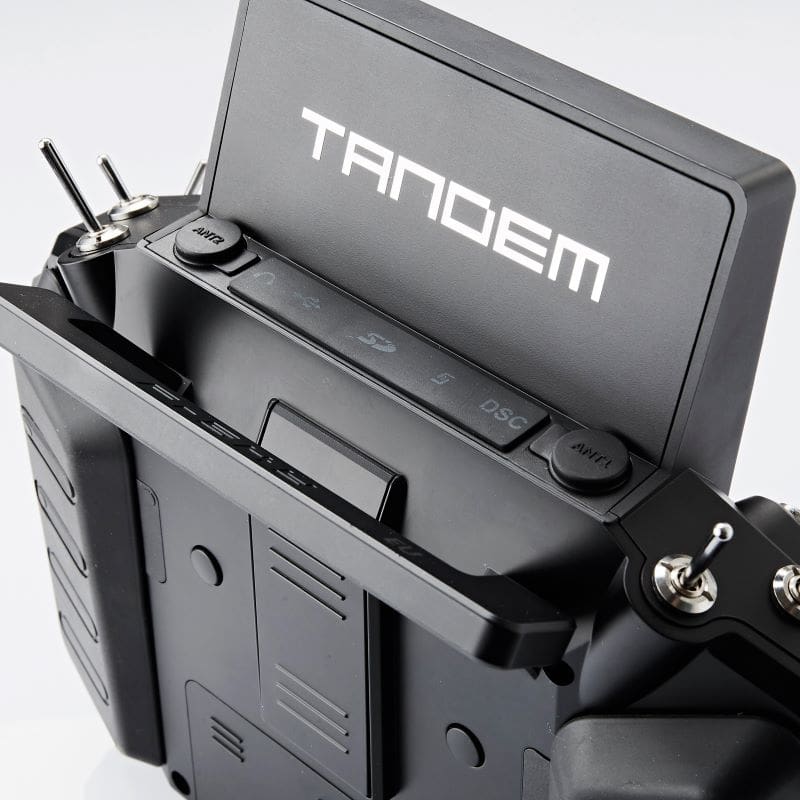
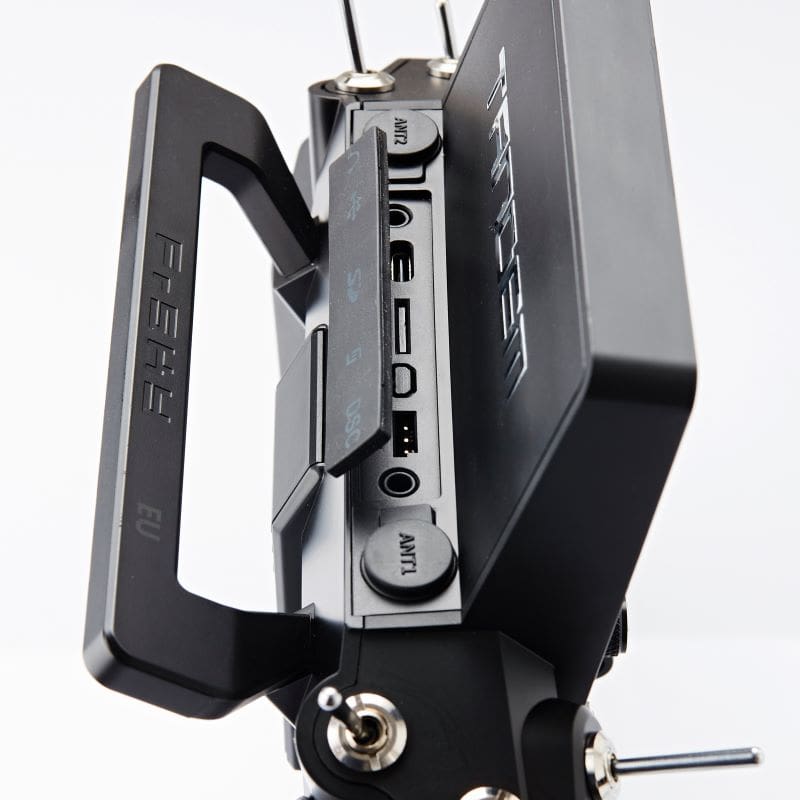
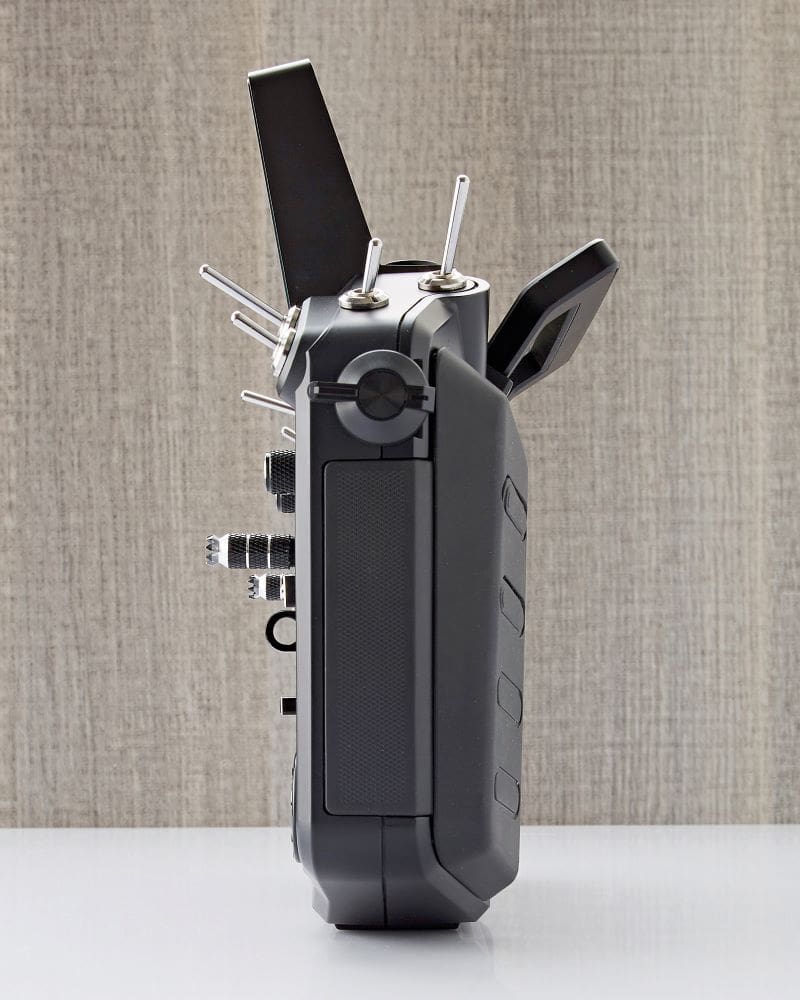
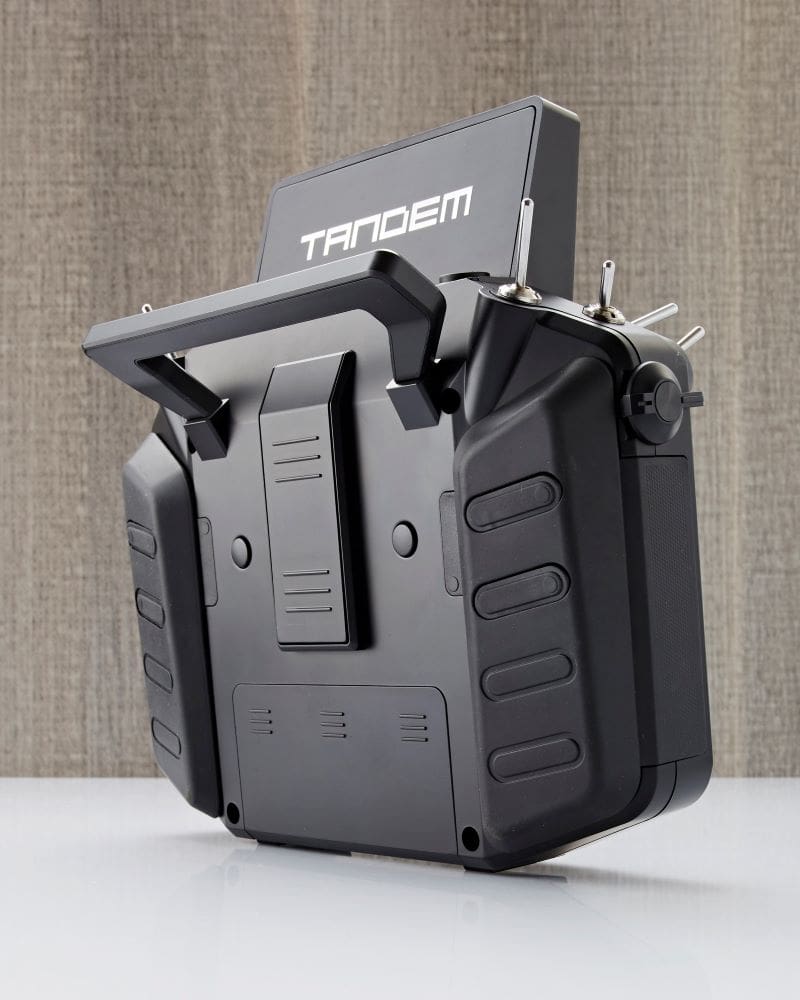
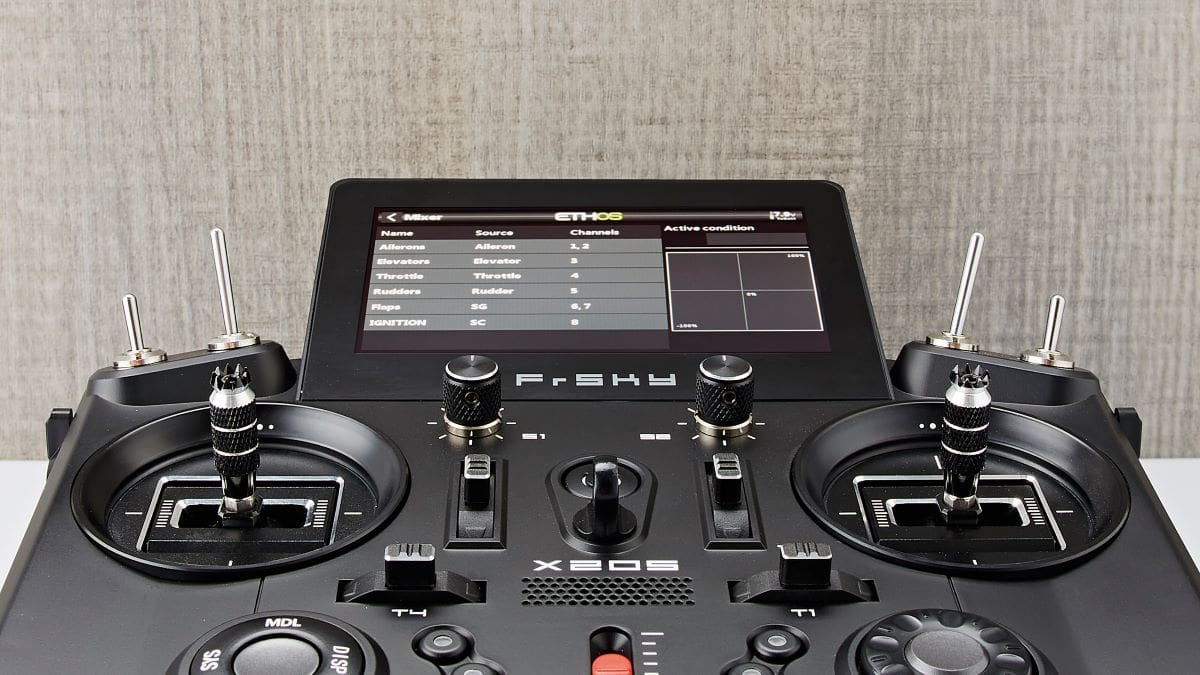
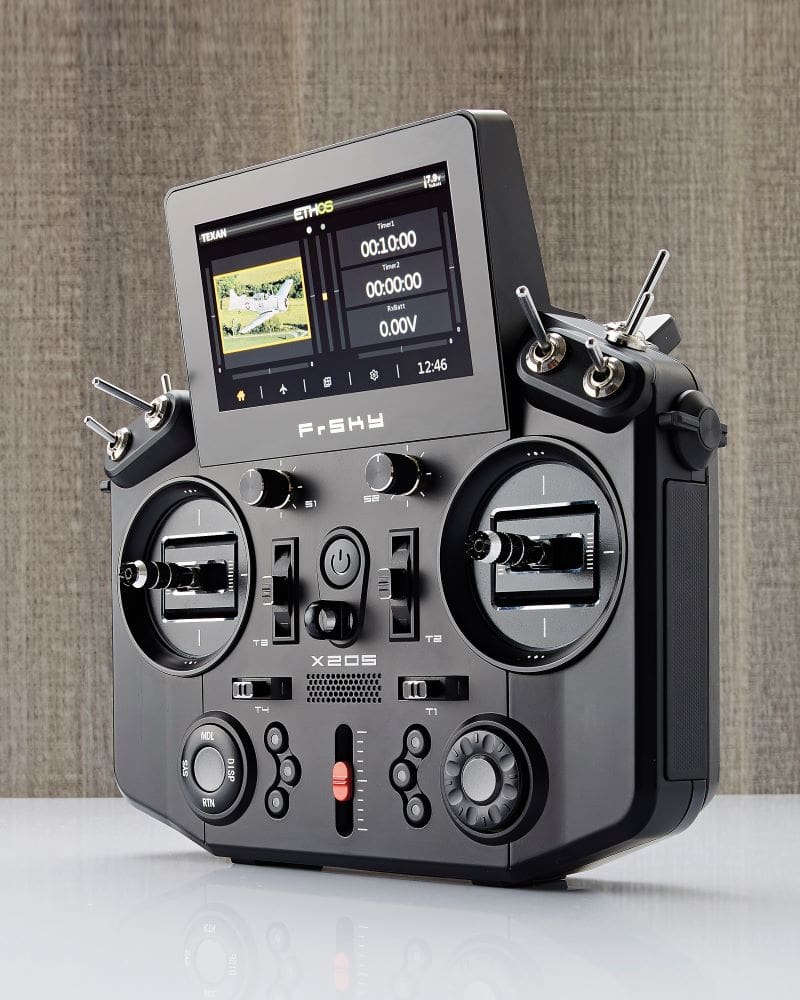
As the name implies the FrSky Tandem X20 is a dual-band telemetry radio system capable of operating simultaneously on 2.4Ghz and 900Mhz. It comes pre-installed with FrSky’s new operating system ‘ETHOS’. The transmitter is supplied in a nice soft-shell case that should provide good protection. The transmitter itself has more than a nod to Jeti in terms of overall styling, with a nice clear, colour touchscreen up top and more switches and buttons than you can shake a stick at, all of which are freely assignable to any task you see fit. The scroll wheel at the bottom is especially welcome when navigating the menus and provides an alternative to the touch screen should you wish.
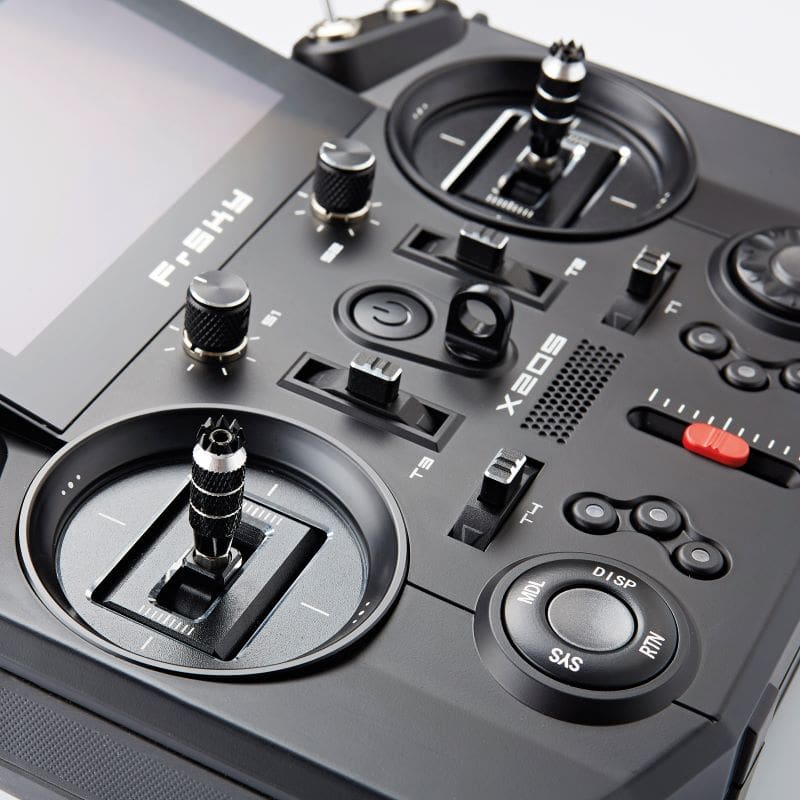
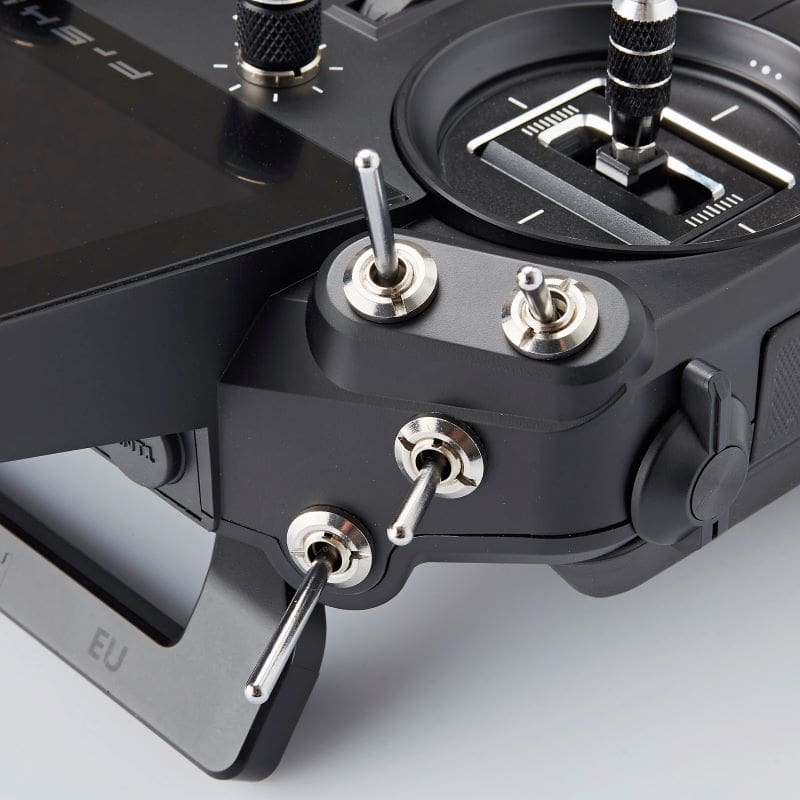
The transmitter sits nicely in the hand and whilst it is a bit smaller than my old MZ32 it has a solid robust feel to it. It comes with quality plastic extension pieces that fit snugly on to the sides to widen the transmitter for those with larger hands. All the switches and buttons feel of good quality and click solidly. Only the scroll wheel falls slightly below this level of feel, but it has proven trouble free all the same. The carrying handle doubles as an antenna (one of two) and there are rubber covers on the top and rear of the unit, which hide a plethora of external connections.
A quick press of the power button and the Ethos operating system boots up in less than five seconds; the display screen really does look nice and clear. The sticks have a quality feel about them and are adjustable for tension through small rubber covered apertures in the rear case; you can even cant the sticks outwards a small amount if it suits your fingers. Sadly, if you fly Mode 1, like me, then you will have to separate the case very carefully and change some springs around, as all transmitters get shipped in Mode 2.
Most buttons and switches fall fairly easily to hand and I particularly like the momentary push buttons on the rear of the case. I can see them coming in very handy.
All in all, the feel of this transmitter far belies its price point, and I was very impressed. But enough of the fondling, it’s time to see how easy it is to set a model up – and let’s do it without reading the manual, like a proper modeller!
NEW MODEL
On the main touch screen there are a few familiar icons. The aeroplane icon, funnily enough, takes you to the model select screen. A quick press of the model select icon and you see a big + sign; another finger prod of this icon brings up a series of steps to go through (the model setup wizard. Here you are asked a few questions, like the number of ailerons and type of tail etc. You work through these and then add a name, and even a picture if you feel like it.
When finished the basic model setup is done – wow! A quick check using the outputs icon and you can already see the channel outputs moving as you twiddle the sticks. Well, that proved very easy. Clicking on the output channels then allows you to add curves, expo, delays, change stick/switch assignments, plus many other things.
After I did a few model setups, I decided to bind a receiver in a real model. Actually, finding how to turn the 2.4Gig on took me longer than setting a model up! However, pressing the RF system icon on the main screen is where you find the options that do all that stuff; the bit that befuddled me a tad was that I had to register the receiver before I could bind it. Basically, you hold a button down on the receiver and then power it up, then in the RF menu you press register. This immediately registers and spots the type of receiver in use. Then you power the receiver down again, select bind on the transmitter and once again power the receiver up, but this time without pressing any buttons; this immediately binds the receiver to the model memory, and we are done. Not too much of a faff really, just a bit different from what I am used to.
I have not tried the 900MHz side of things yet, but this is just another small satellite type receiver that is registered and bound in the same manner as before, but this time it is done whilst connected to the main receiver through an FPort lead. Ultimately it should provide more redundancy, more range and more piece of mind in this busy RF environment that we share.
ELECTRIC GLIDER
Getting slightly too cocky with the X20, I decided to try and programme an F3F style glider fitted with an electric motor. I have always found this to be the most challenging type of programming I do; it calls for four or five flight modes, with flaps coupled to ailerons, ailerons coupled to flaps, flaps and ailerons coupled to elevator, all of which have their own differential and throws. This alone is enough to give you a banging headache, but then you add in a throttle stick that you don’t want to be a throttle stick in landing mode!
Suffice to say it’s a proper test of you and the transmitter. Normally I get a fresh brew, a few biscuits and then settle somewhere quiet for a few hours. So, you can imagine my surprise when I had finished the majority of the programming and my brew was not even cold!
I started by using the model setup wizard, telling it the correct number of flaps and ailerons etc. I then created the flight modes and assigned these to the switches I wanted by just flicking the relevant switch. When it came to creating the mixes, I was staggered to find that in glider mode there were all of the mixes I wanted, already built into the transmitter. All I had to do was to change the amount that the channels moved and to assign the mix to a flight mode! I can honestly say that to set this up on the Ethos X20S was even quicker than with my Graupner system and that is some achievement.
IN THE AIR
All this fancy stuff is fine but how does it actually work in the air? I have a well-defined path to prove a new radio system: first, it goes in a simple foamie and gets chucked around. When I am happy the install is good (and the telemetry provides feedback of good signal strength) I then try to break it. I go as high as my eyes will allow, listening out for any telemetry warnings.
Once that is done, I install it in one of my composite models. Due to the design of the glider’s fuselage, it forces the Rx to sit on top of a speed controller. To compound this, the composite material it is surrounded by has quite a bit of carbon in it.
Once again, I repeat the tests, keeping a close eye on the telemetry. If all tests are passed and the telemetry is reasonably good, the system is, in my eyes, cleared for use. Currently this is where I now am with the X20.
Just recently I unintentionally tested the toughness of the diminutive Archer four channel receiver when my E2K racer burst into smoke after only a few minutes. I almost got her back before the ESC finally gave up and my new Slipher racer bit the dust on finals. Almost everything was destroyed, including the motor, but despite a few bent pins the Rx survived and gave a great range test – not bad for a receiver costing less than £30.00!
FIELD USE
When flying the transmitter is nice to use, if a little different from my previous transmitter. Initially I did find the trims a bit weird to find, but my muscle memory is slowly getting there. The trims, by the way, are defaulted to fine adjustment per click/beep, so you might want to ensure you set this to medium or coarse for a maiden as I ran out of trim on one of my models during a check flight.
The transmitter is easy to hold in the hand or with my preferred neck strap. It is not so heavy that you cannot stand there piloting a glider in the air for a long time without straining your back.
There are more mixes and options than I can mention here, but I almost never have a problem when I want to do something odd. And FrSky offer plenty of telemetry sensors and receivers for anything I may want to do now or in the future.
IN SUMMARY
The Frsky X20 Ethos has everything I want in a transmitter, with good looks, a fast boot up response and easy operation. It has more channels than I can shake a stick at, with more mixers and flight modes than I know what to do with, and a very solid RF link so far.
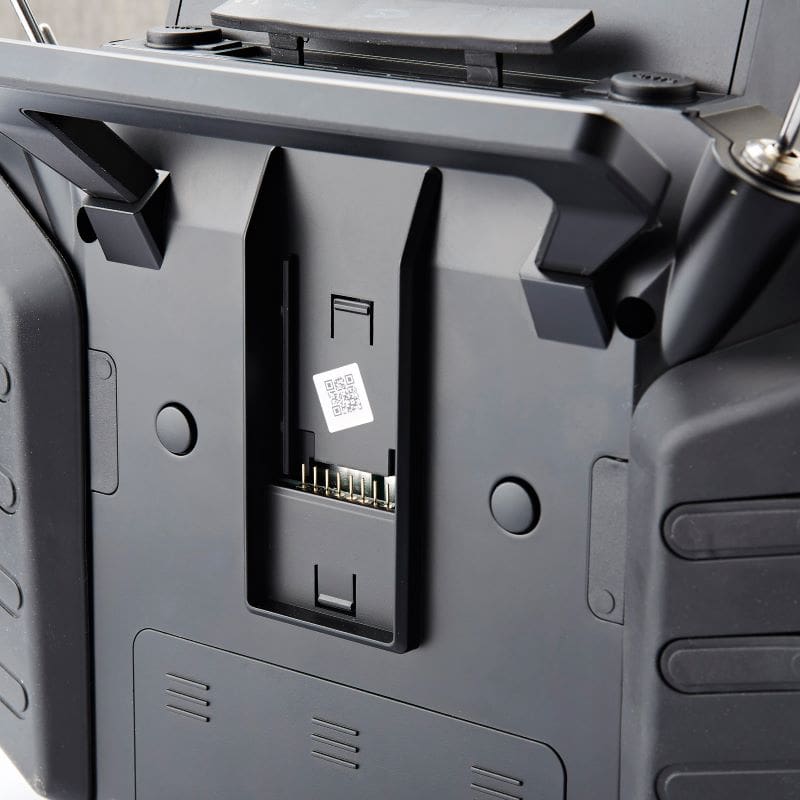
Receiver costs are acceptable and there is a wide variety of receivers and telemetry sensors that you can use. If you have certain older FrSky receivers, other than the current Archer system, you can, with the addition of a module connected on the back of the handset, still use those you already have.
Battery life is excellent, and I can charge it with a simple 1A USB C charger, so I can even plug it into my van and charge it whilst I drive to the patch. A full day’s flying barely scratches the battery indicator on the main screen.
Whilst dyed in the wool Open TX users may dislike the Ethos sytem, I would suspect that less tech minded souls like myself may finally be able to look at this FrSky system and seriously consider it. There is now even a full English manual for you to ignore should you wish!
Whilst no system is perfect, and every new system requires some learning by the modeller, the Ethos system has proven to be really very good. It has UK support through T9 Hobbysport; they have great knowledge about the products they sell and are very helpful too.


