
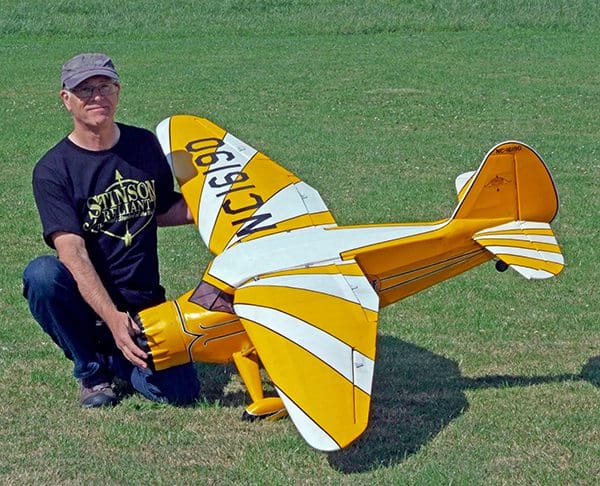
Ian Perry gets the nod about a bargain priced builder’s kit in his local model shop.
words >> Ian Perry
words & photos >> Ian Perry, Michael Dudley
Enjoy more RCM&E Magazine reading every month.
Click here to subscribe & save.
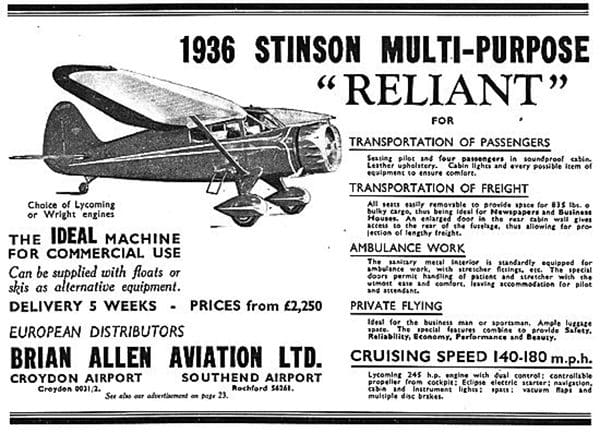
The Stinson Aircraft Company launched the Reliant SR series in 1933, with the SR-8 variant being produced in 1936. Around 300 SR-8s were produced. The ‘Gullwing’ version first appeared on the SR-7, which was also introduced in 1936 and the double taper wing had been used successfully by Ford on its Trimotor. Stinson wanted to ‘freshen’ its production line, so the Gullwing was introduced, making the SR series Stinson’s most popular range.
The Stinson had both Civilian and Military operators across USA, South America and UK. These included the RAF and Fleet Air Arm.
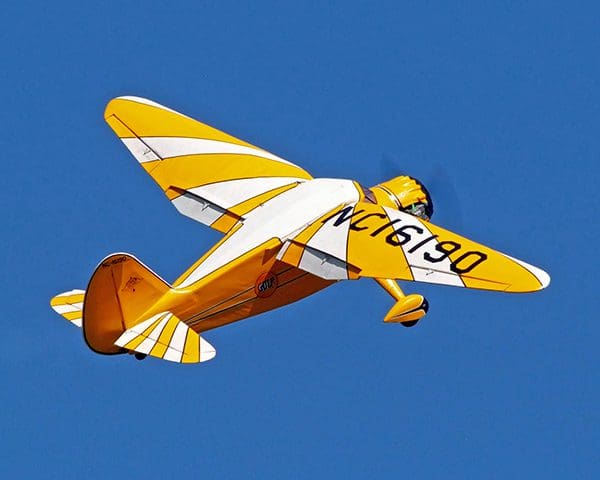
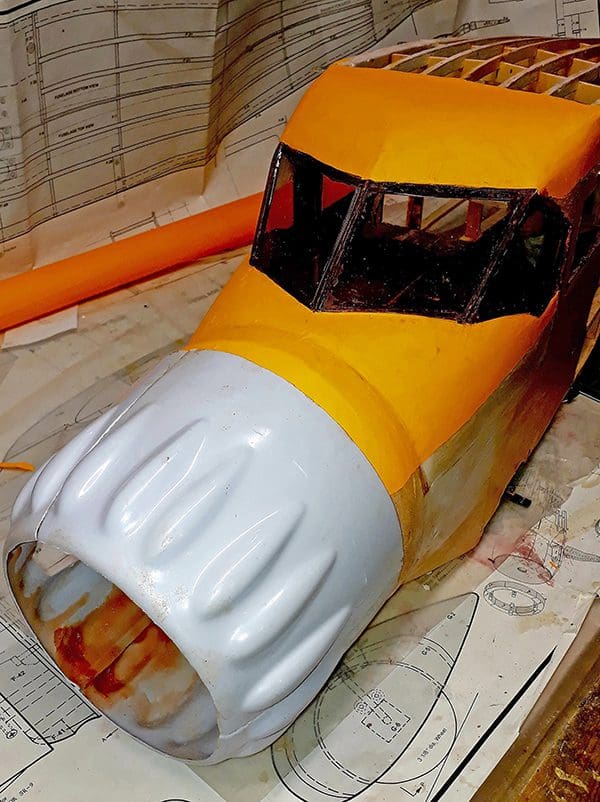
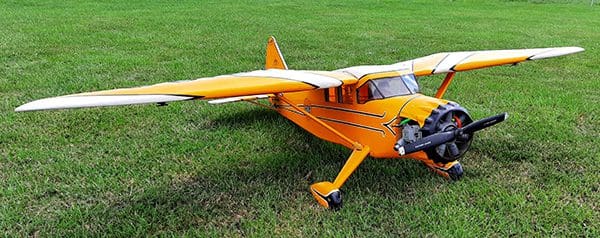
My model is based on a SR-8B, which utilised a Pratt & Whitney Wasp Junior SB producing 400hp. With a wingspan of 41.6 feet, she had a single pilot and was able to carry four passengers within a maximum range of 850 miles. The model replicates NC16190, operated by Gulf Oil.
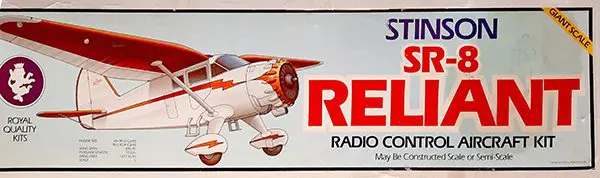
ROYAL STINSON
The plans of my Royal Stinson kit are dated 1978. I assume the kit was manufactured within a year or two of that date, making it some 40 plus years old. By pure coincidence the Laser 150 used in the model is 30 years old. My pilot is 20 plus years and don’t ask about the wheels! This Stinson is a real ‘retro’ lady!
The airframe is covered in Cub Yellow Solartex, which sadly is no longer manufactured. As the factory doors closed, I purchased several rolls in anticipation.
BARGAIN FIND
Having retired a few years ago, I had been speaking to my cousin and well-known model designer, Dale Tattam, regarding a ‘bigger project’. A few days later Dale called to say there was a secondhand Stinson kit for sale in a local model shop. I popped in and secured the deal for £100. Bargain!
There is a very healthy market for second hand Royal and Marautuka kits (the same kits, branded for the US and Japanese markets). They typically sell at around $350 – $450. Most are found in the USA, but Royal kits also come up for sale within the BMFA classifieds. There is also a strong following on Facebook via the group ‘royal airplane kits / marutaka rc model’.
Having originated in the 70s, the Royal kit is a traditional wood build. Some of the wood blocks were substantial, being 6″ square by 2″ deep. What amazed me, if you aligned them, you got the full cycle of tree growth rings! Also included were a preformed metal undercarriage and a three-part ABS plastic cowl. Three large plan sheets completed the pack.
Reviewing the plans, I realised that the wing plan was for the right wing only. Rather than building on the back of the plan, I went down to the local photocopy shop. A £5 note later and I walked out with a flipped 100% copy. Perfect!
Construction commenced in October 2019 and the first flights were undertaken in July 2020 when our flying site opened again after Covid restrictions eased.
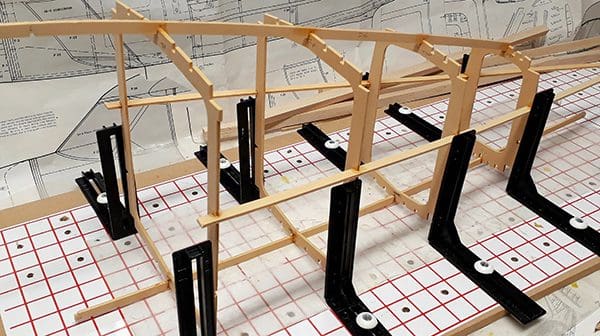
WING BUILD

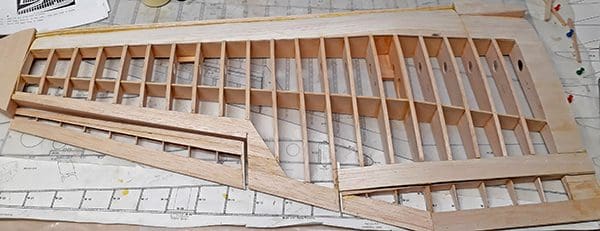
The wings were assembled on a building board to ensure they were warp free. Basic assembly is straightforward for a traditional builder. The more complex area is that of the flaps. These are not included in the kit. The plans have a simple line drawn showing their location; if you want more than that it’s down to the builder! Looking at Stinson pictures, I decided split flaps were appropriate and drew these up. I constructed a simple test flap to prove the concept and hinge locations prior to full assembly. It was a slightly heart wrenching moment to cut out the rear of the beautiful wing to create the flaps.
FUSELAGE BUILD
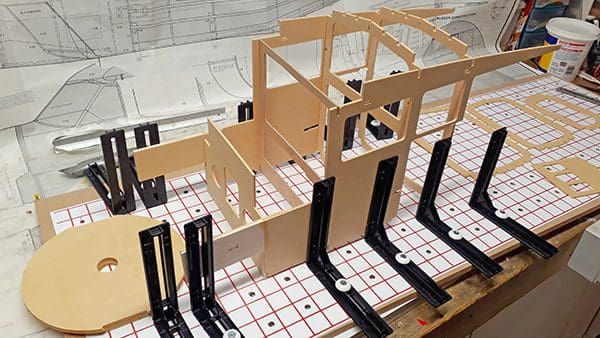
This was interesting. It was built in two halves, front and rear. A jig was used to ensure everything was square. Being a large model, anything slightly misaligned would really show and be a problem. Other than epoxy and a little cyano to ‘tack a joint’ where necessary, I used aliphatic wood glue throughout the build.
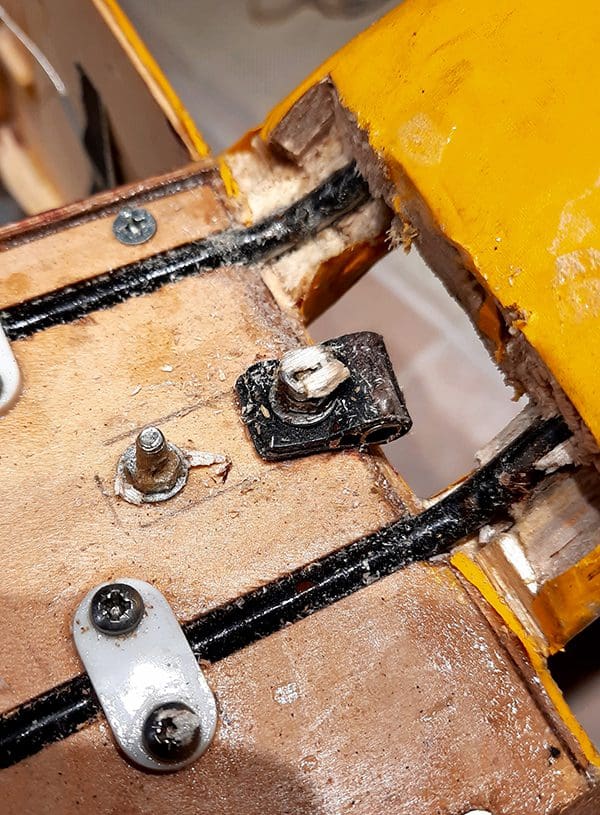
One thing that I did not like (I still don’t) were the wing fastenings. Two short parallel aluminum plates, separated by a hardwood block, are fitted to the front and rear of the fuselage wing seat. These protrude from the fuselage side by 2cm and slot into two hardwood sockets in the wing. The wing is then secured using 2 x 3mm bolts dropped through the plates and the wing is then fastened with captive nuts. There are no dihedral braces or the more modern carbon tube to support the wing. It all seemed a little weak. The struts are functional, supporting the wing. However, it has not presented any issue in operation
A set square was used extensively during wing to fuselage alignments. Everything was set at 90 degrees. There is no dihedral. The wing profile is very similar to a Lysander, with a reverse taper towards the fuselage. The wing ribs are some three inches high at their maximum.
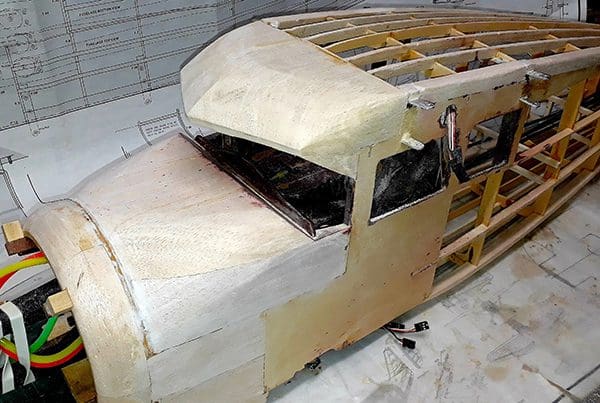
The biggest and most time-consuming challenge was gluing, then sanding, the numerous balsa blocks that made up the cockpit roof, nose blocks and under belly. I procured a Proxxon orbital sander, which worked well in creating piles of balsa dust. Without this I think I might still be sanding!
COWLING & ENGINE
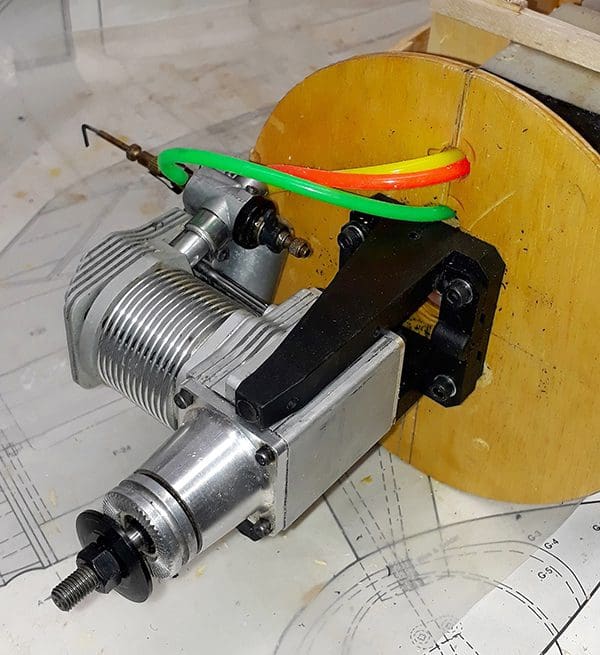
The ABS cowl came in three parts. These had to be cut to shape, then glued together. I reinforced each of the joins using glass fibre cloth. I had decided to install the Laser as a side winder, in part because I could not fully enclose the engine. Another reason being access to the carburetor and associated parts – and I don’t like fuel dripping from inverted engines!
The Laser was another secondhand purchase. Luckily it was just 30 minutes up the road. It turned out that the seller happened to be one our old club members from some years earlier. It was advertised as a Laser 120 but club member Neil Tidey cast his eye over it and declared it to be a 150. There is a 5mm height difference!
COVERING
With the news that Solarfilm was closing their business, I purchased several large Solartex rolls. These included Cub Yellow for the Stinson, as this was the closest match. I would normally use Balsaloc to seal and prepare the balsa ready to apply the covering. As this was in short supply, Cousin Dale suggested using MDF sealer. I purchased a 500ml tin for £5 at a high street store. This worked really well. I applied it neat, although it can be thinned with water. With a couple of coats and lightly sanded, a good surface was achieved and the Solartex sticks well.
SPATS & STRUTS
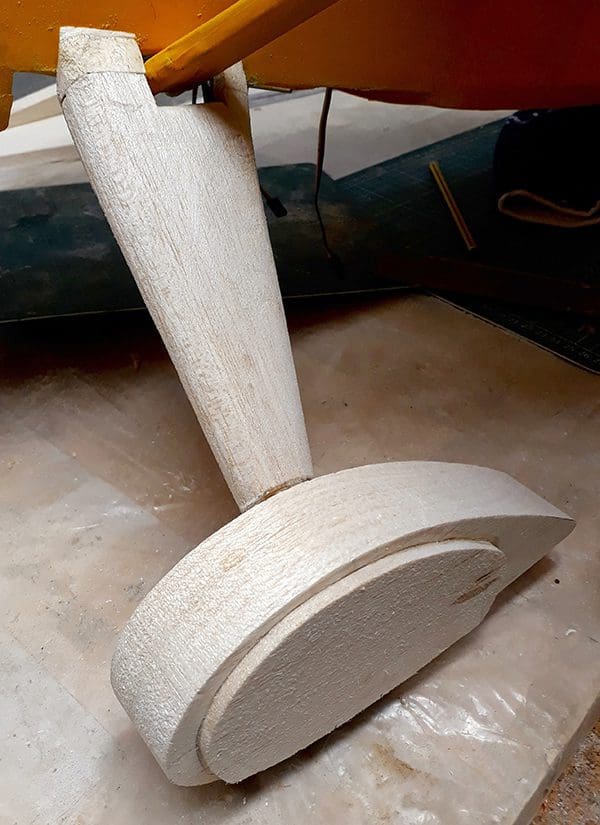

The spats have been a nightmare. Building them and sanding to shape was easy, the issue being that the wing struts fit through the spats and are anchored to the bottom of the fuselage. You are then meant to insert a 3mm bolt sideways into a captive brass tube. I spent hours trying to get it all to fit.
In the end I decided to be radical. I cut out the original fittings and constructed a new fitting secured with conventional captive nuts and wing bolts. Problem solved. It’s very strong and provides solid support to the wings.
ARTWORK
My original thoughts were to finish the Stinson as Fleet Air Arm FK877/N69745, this being yellow overall, with a red cowl with FAA insignia. However, looking at the detail, this is an AT-19 reliant with a smooth cowl and a third set of windows. I needed to find a true SR-8 scheme.
Hunting the web, I came across some CGI artwork for a flight simulator. This was NC16190. After further searches, using the registration number, I came across original black and white pictures of the aircraft and associated information. As a result, I am now the proud owner of a very pretty Stinson SR-8, NC16190, as operated by Gulf Oil’.
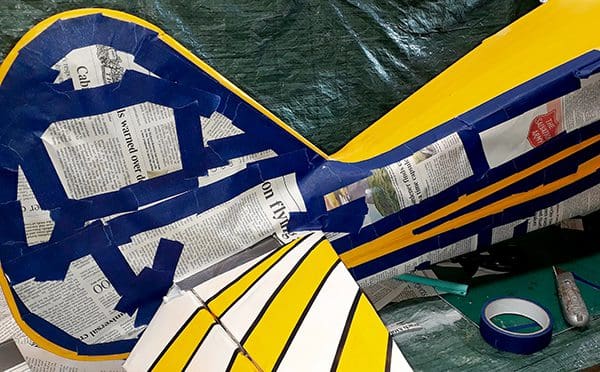
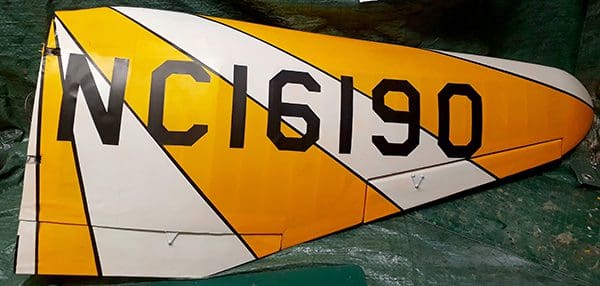
The paintwork is all airbrushed using an Iwata spray gun. I used Xtracylic (acrylic) paints. These spray well. I thin the paint vey slightly with Xtracrylic thinners. I used Tamiya masking tapes. Masking up took many hours as each of the white sunbursts were edged with a 4mm black panel line.
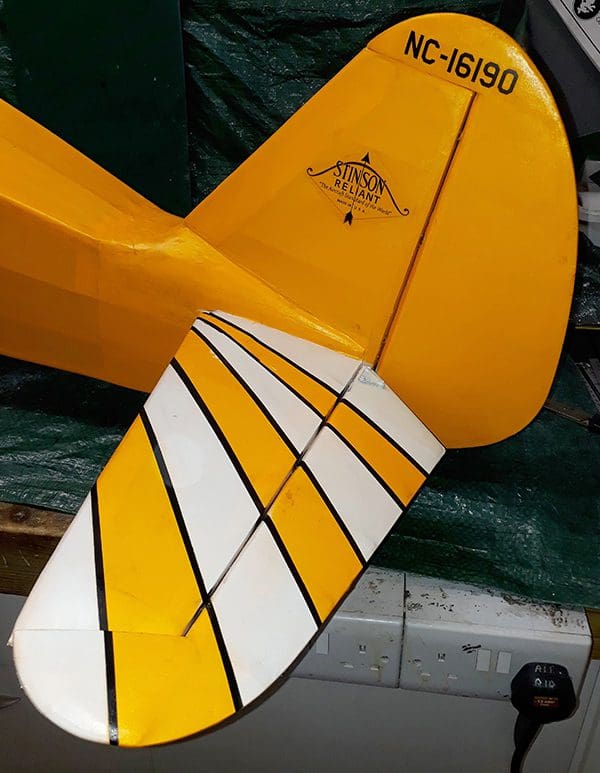
Insignia (Gulf Oil logo, registration numbers, Stinson Logo) were printed onto vinyl computer paper using an inkjet printer. Once printed and dried the images must be sprayed with fixer to prevent ink bleed when varnishing. Two types of vinyl were used – clear backing and white backing. Clear is see through, which was needed for the Stinson logo, allowing the cub yellow to be seen. The white backing was used for solid colours (registrations and Gulf logo).
The airframe was then fuel proofed with two coats of satin varnish. The Xtracrylic paint is not fuel proof!
FLYING

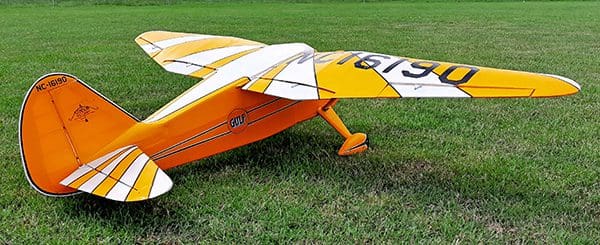
Left and right-hand static views.
The first flight required quite a lot of retrimming the elevator to gain level flight, along with a tad of left rudder. The biggest issue was poor aileron response. On landing, additional aileron was dialed in to the transmitter. Subsequent flights have shown much more authority in the turn. Turns are better with coordinated rudder and aileron.
The flaps work very well. She does not balloon when deployed. Being of split type, there is no air bleed through the hinge line. They are very effective in slowing her down. Partial flap increases lift nicely and shortens and improves the take-off run.
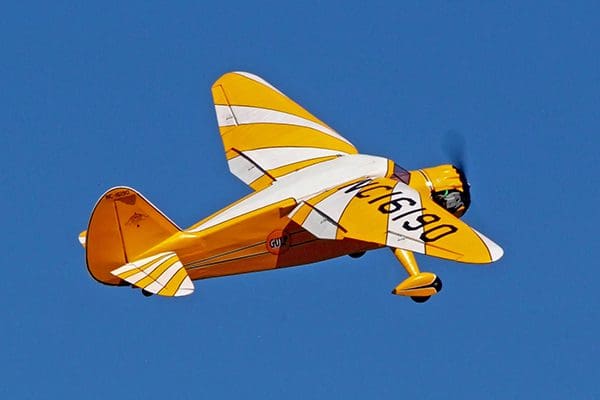
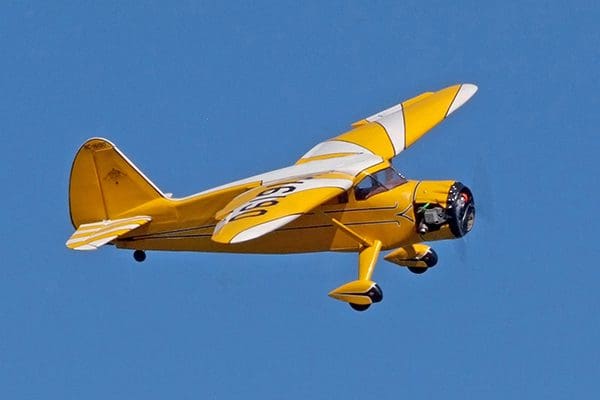
As you would expect the Laser 150 runs like a well-oiled sowing machine and swinging a 16 x 8 Master K series propeller the SR-8 is very adequately powered. With the 150 up front the C of G was spot on. No additional weight was needed to obtain the balance point, which is 8cm from the leading edge, right on the front wing mounting block.
SUMMARY

My Stinson is not a competition scale model. That was never the goal. It is a typical ‘club build model’, to be enjoyed at the field. It is a conversation piece, where techniques can be discussed with other club members and, hopefully, it will provide just a little inspiration.


