
In this installment of his regular One Man & His Shed column, Dave Goodenough stuns on the catwalk before embarking on another selection of workshop-based advice and guidance.
Let’s start with a frightener… Does your wife/partner/tamer/nurse/doctor enjoy your hobby? Do they take part, just nudge you along disconsolately or simply put up with your particular bent? My wife of, oh so long, has borne my obsession with this wonderful hobby for over half a century of tolerance and forbearance. In short, she’s a gem.
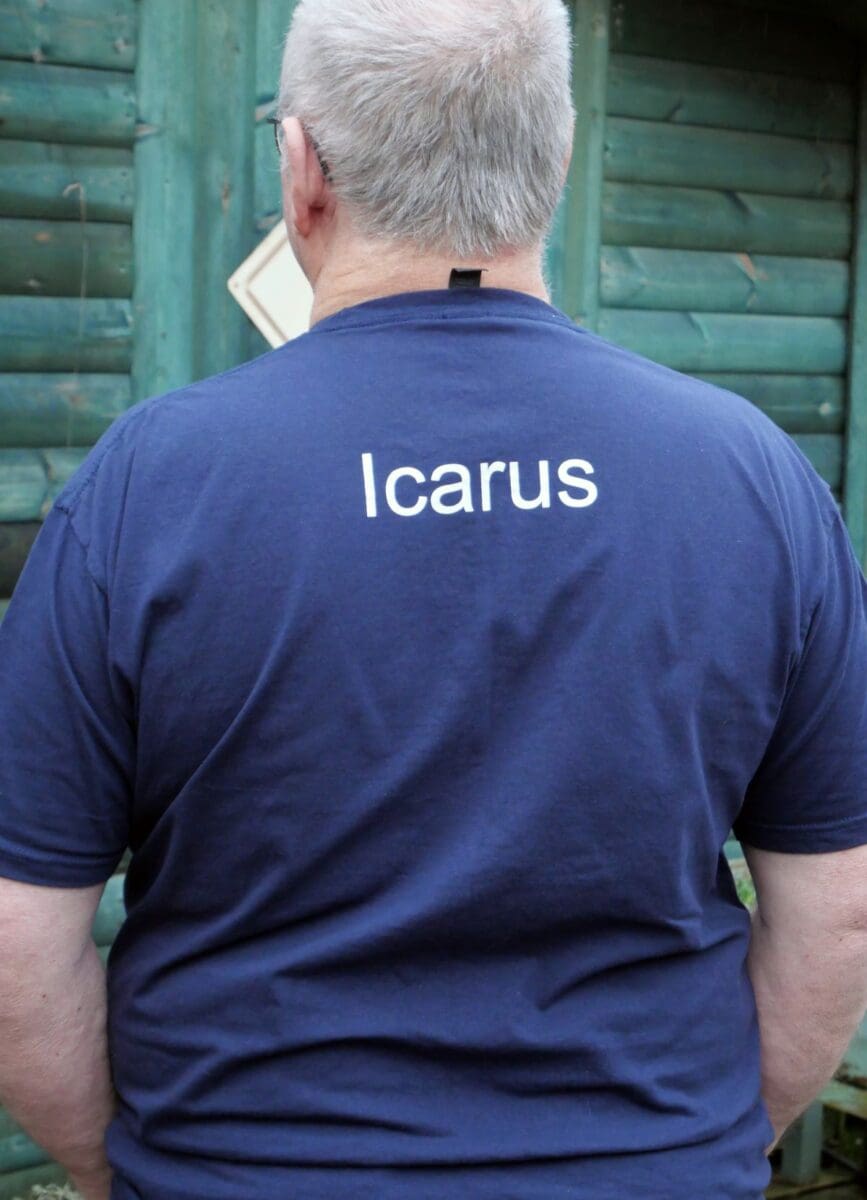
However, a week ago I had cause to rethink my ignorant lack of understanding her. She presented me with a gift that marks me out and nails me good and proper as a dedicated R/C model aviation nerd, even getting a dig in with her single word nom-de-plume. The pictures say it all, the red face is well-earned, and I’ll wear the tee shirt with humility.
Enjoy more RCM&E Magazine reading every month.
Click here to subscribe & save.
Icarus indeed!
STUCK UP?
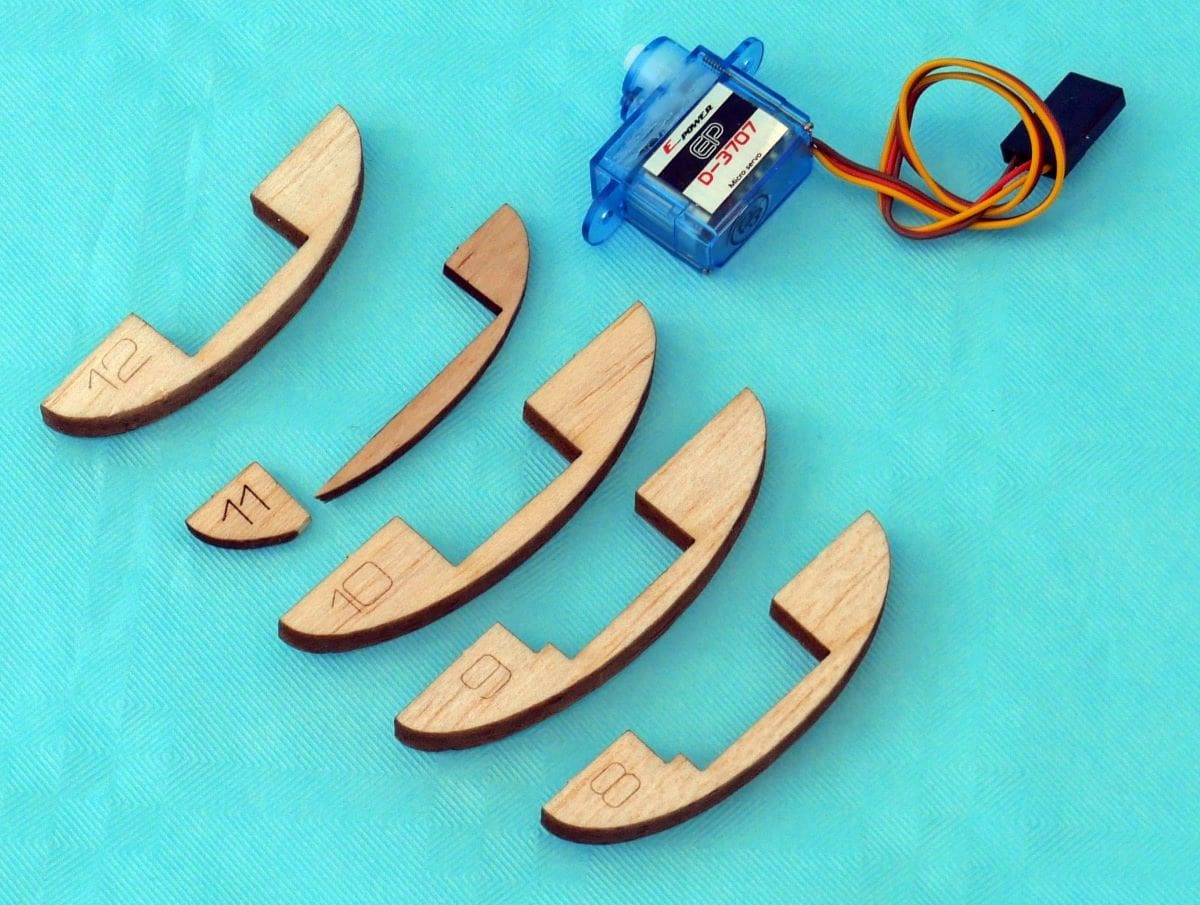
Sometimes your ‘I’ll do it my way’ glands get you in a bit of a pickle. With small servos in the nano and micro range of 1.7 g to 5 g being in many cases incredibly cheap and very reliable, I tend to buy the things in multiples of up to ten at a time. Being fatalistic about them I expect a failure rate of about 10% when I pre-test them: you DO pre-test, don’t you? Building in a dud servo is very annoying and digging it out from a supposedly permanent mount is both destructive and frustrating. It’s worse when you’ve been a total ninny and managed to ruin a tested and perfectly good servo by screwing up the installation.
I perpetrated such dimwittery on the little foamie I was building, where the 3.7 g servo was simply glued to the undersurface of a foam wing. It worked fine when on the servo tester but refused to move once the Gorilla Glue Clear had set. Cue wailing and gnashing of teeth, then the use of a 10:1 magnification loupe to eyeball the sullen servo. There it was! A little drool of glue had oozed onto the splined servo arm shaft and capillary action drew the tiny dribble into the servo innards. Some inventive sliding of a craft blade under the servo body risked both fingertips and the Depron wing, but off came the little operator with minimal wing damage. The ruined servo was binned but its lead and plug were saved for future use. Another servo was carefully spot glued and aligned, this time without gumming up the works.

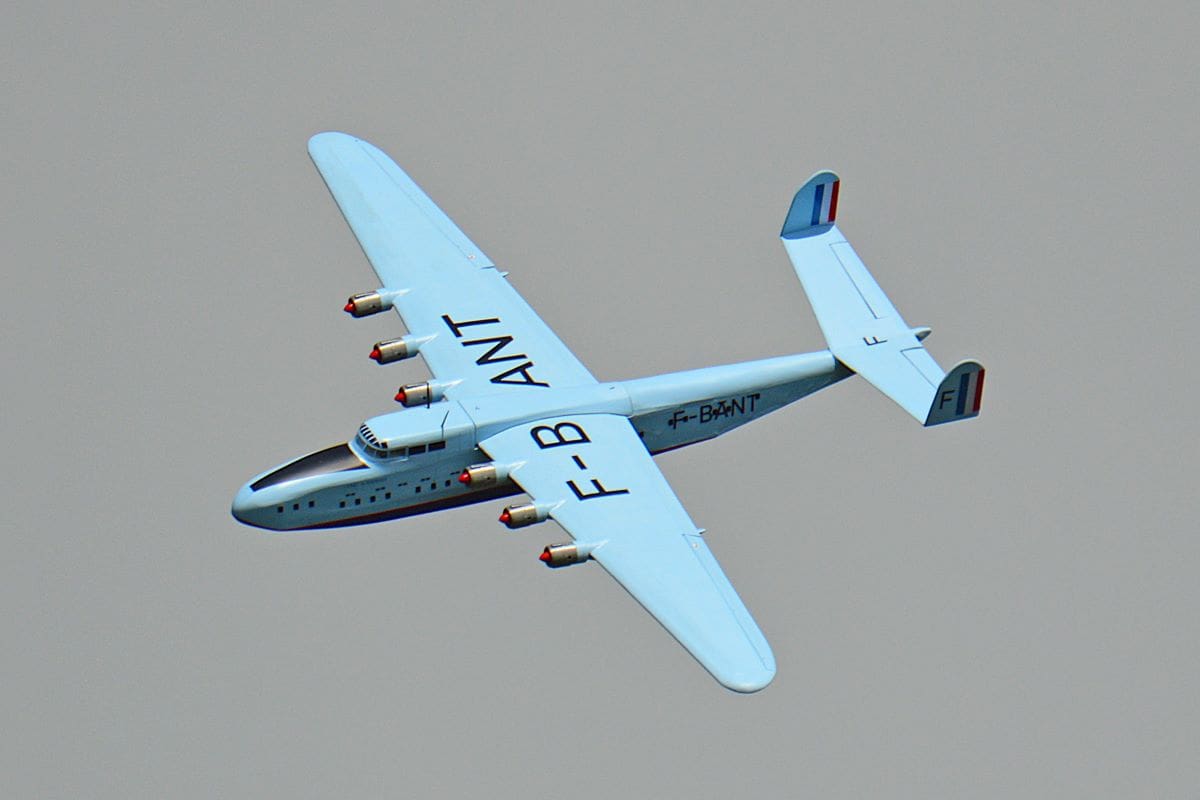
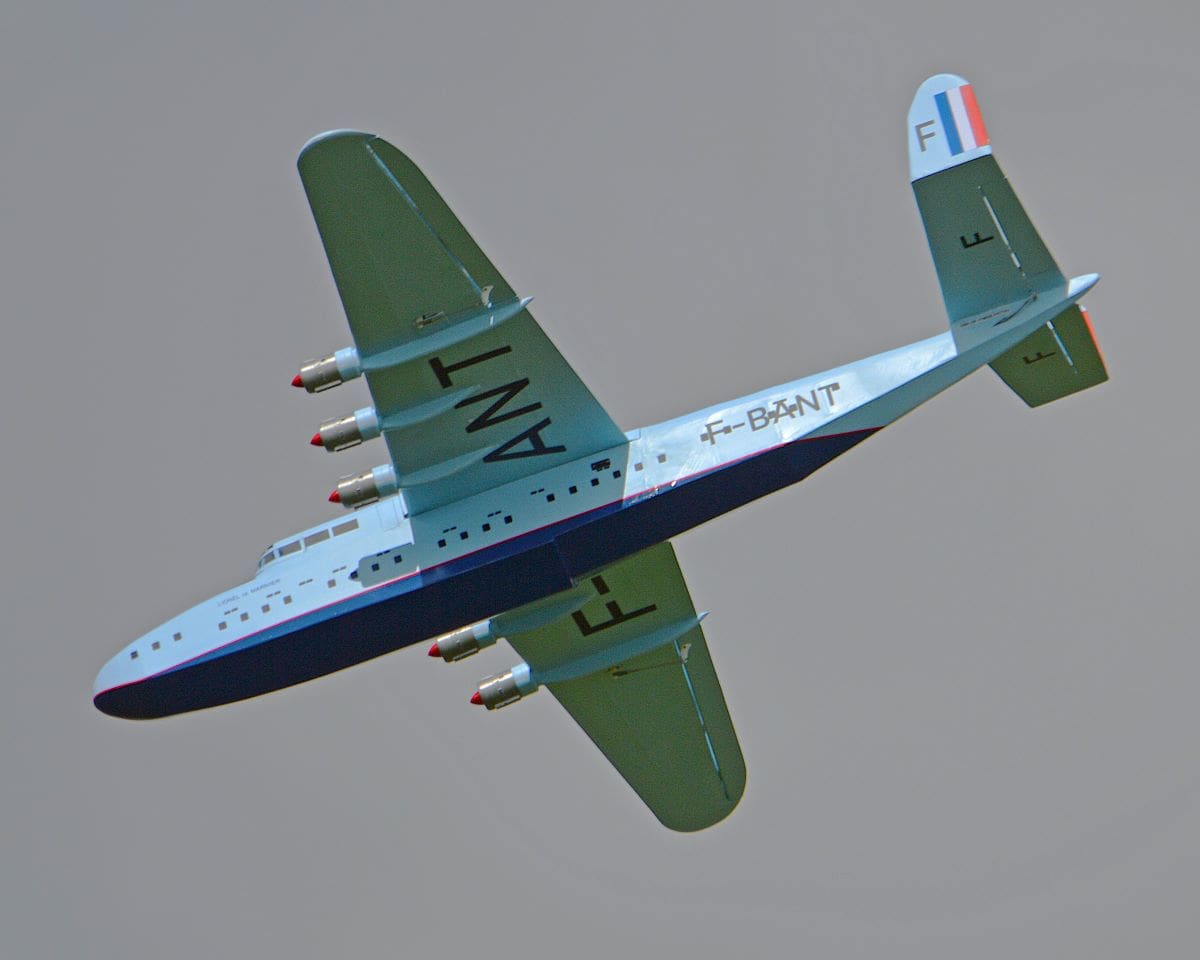
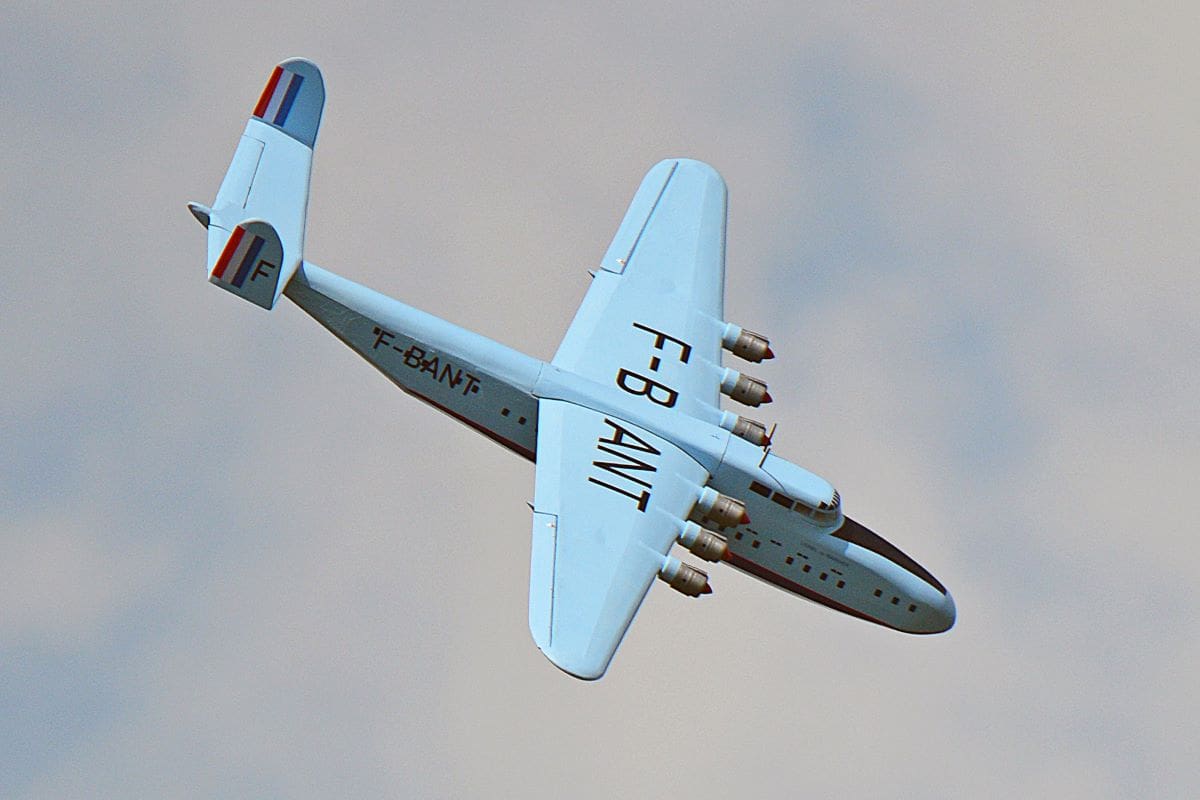
FRENCH FLOTATION
A few months ago, I highlighted a clubmate’s model refurbishment, showing what can be achieved with even an old and scrofulous looking second-hand model, providing the basic structure remains sound.
Phil Stone’s Latecoere 631 flying boat finally made it to the LMMGA ‘Gate’ slope on a cold and blustery day, was prepped and, with a mighty heave from Harry Twist, cast out unto the perils of the sheep besmirched slope.
Never mind the weakened knees and shaking digits, Phil mastered the gorgeous gusset-strainer and with just a little finger trembling Tx trimmery, settled his French Fancy into an increasingly adventurous flight. Becoming ever more comfortable with the big boat, our man began to toss this sleek product of the mid-20th century years over ever larger volumes of sky, until a stretched low turn over an area of reduced lift saw the beauty sink towards the sea of grass and slide to a stop. An out-landing, true, but not too far to trudge for recovery.
With nil damage we had a happy Phil and another lovely model to grace the skies in the future. Have a look at the in-flight photos and see what you think. Isn’t it a super sight to see? Just remember, if Phil can do it, so could you. There’s slumbering life in them old airframes. It’s up to you to wake ‘em up!
Espied alongside the Latecoere was the new Stone-designed BAE ‘Hawk’ in virginal white Correx plastic. I’ll be having a chat with Phil about this novel construction and also his use of 3D printed detail parts for the model. I may be an old dog but I’m open to learning new tricks and his treatise, in the September to November 2024 issues, will point the way!
BEGINNER’S BUNDLE
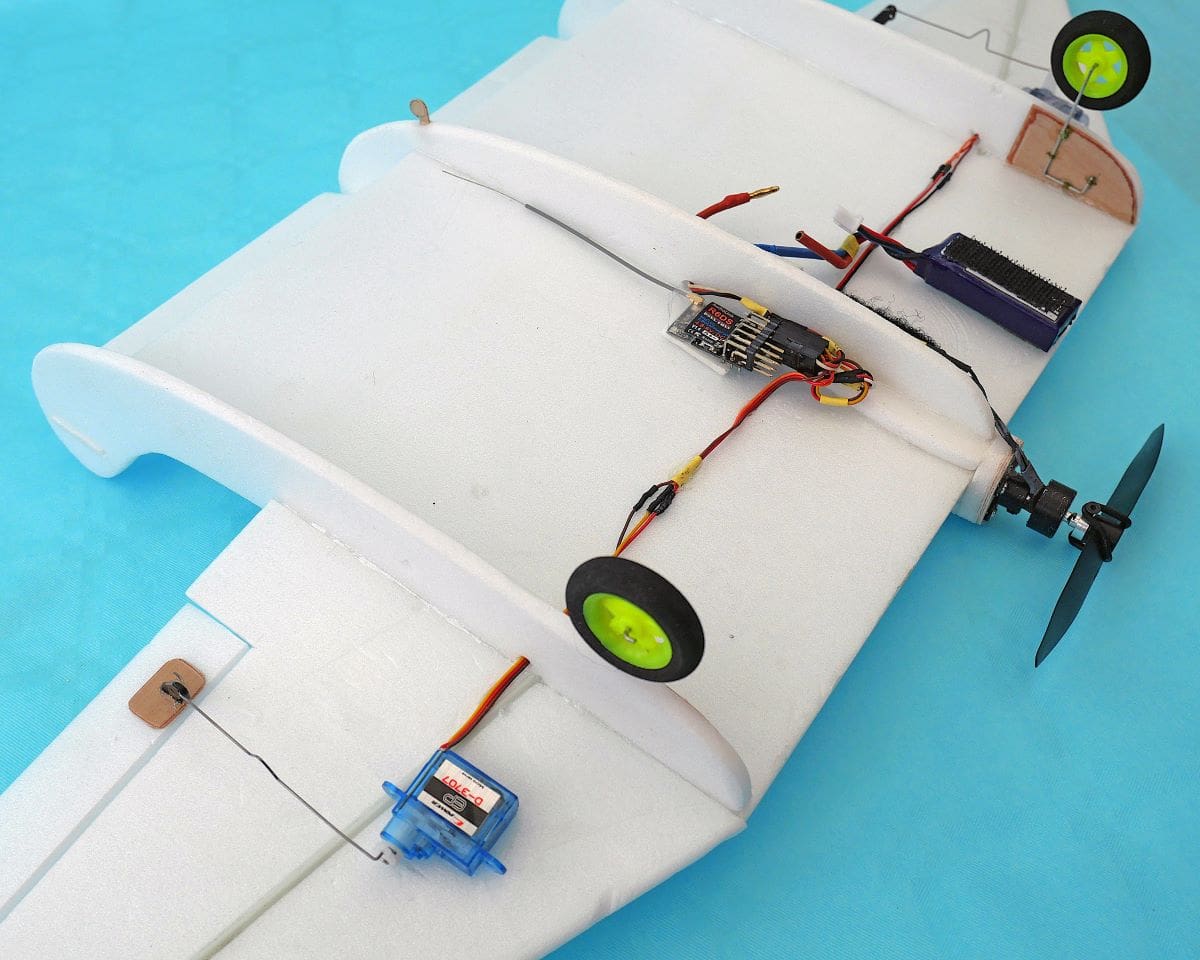
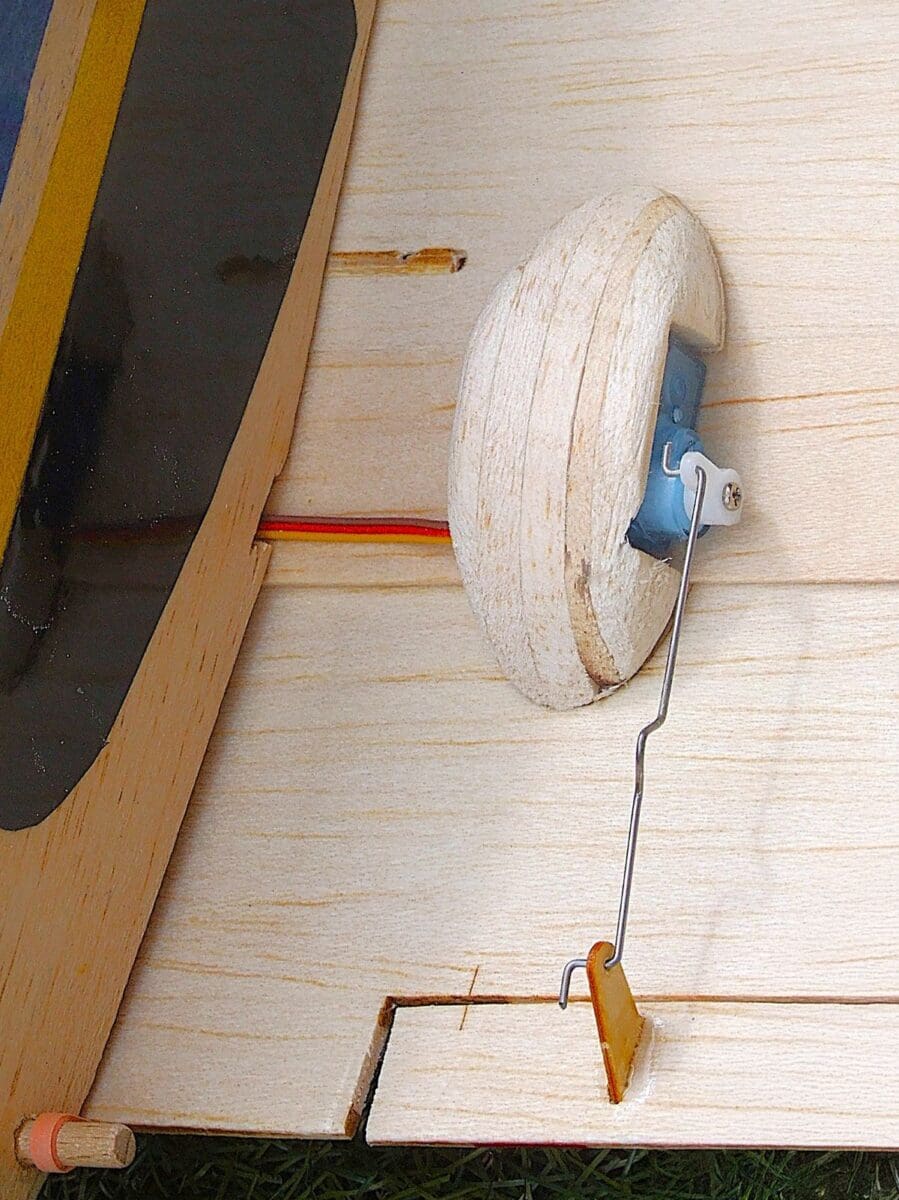
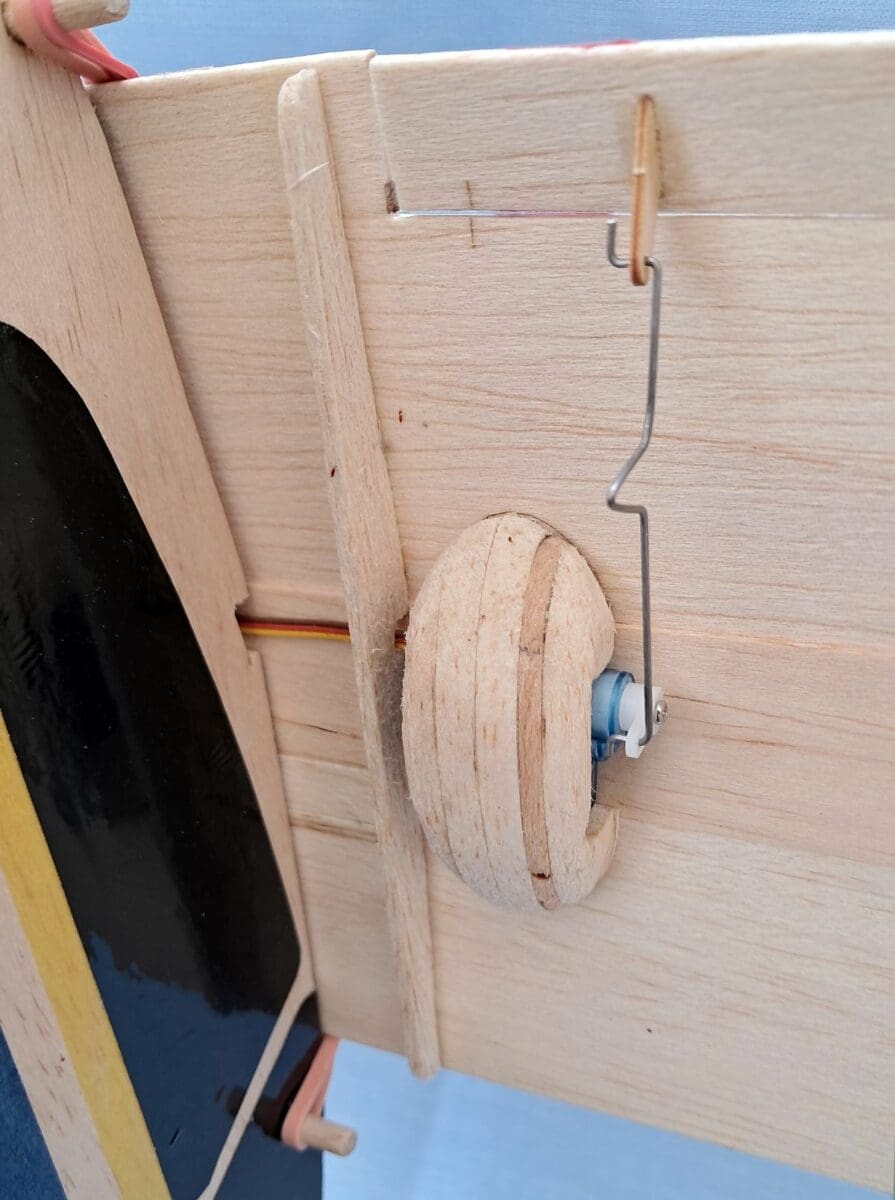
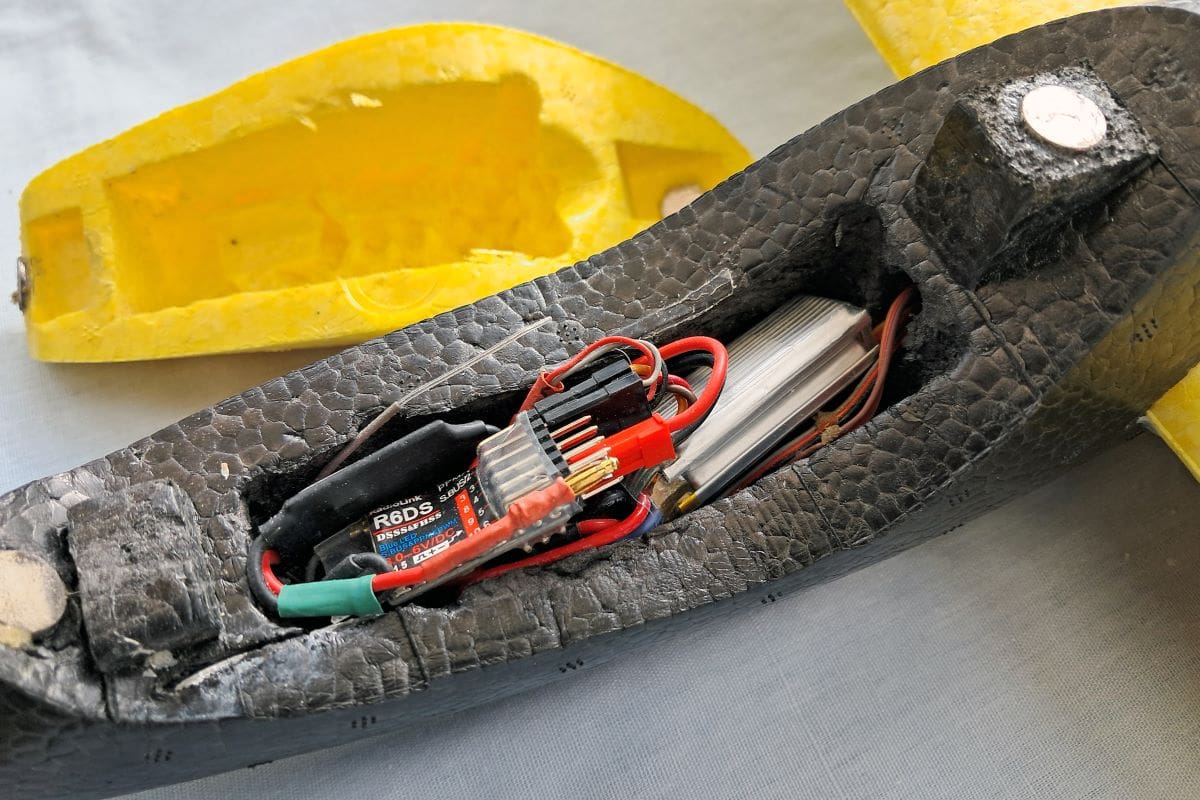
The very simple Depron model of the Burnelli B-1000 I’ve been building reached the stage of assembling the basic electronics. Apart from the hiccup with one servo along the way, as described earlier, all has gone well.
Power is via a 5 g, 2000 kV outrunner, a 4’’ x 2.5’’ prop and a 6A ESC (because it was available). With virtually all modern transmitters having an elevon function only two 3.7 g servos are needed to control roll and pitch, your basic left/right and up/down. One drawback is the festoon of wires and plugs attached to the servos, ESC and receiver. On a small model like the B-1000 that amounts to a lot of superfluous wire and, of course, weight. So, what to do?
Easy answer – and hold your breath – cut it off! We covered simple soldering a while back and that’s the only real skill you’ll need, other than the ability to manipulate small parts and components.
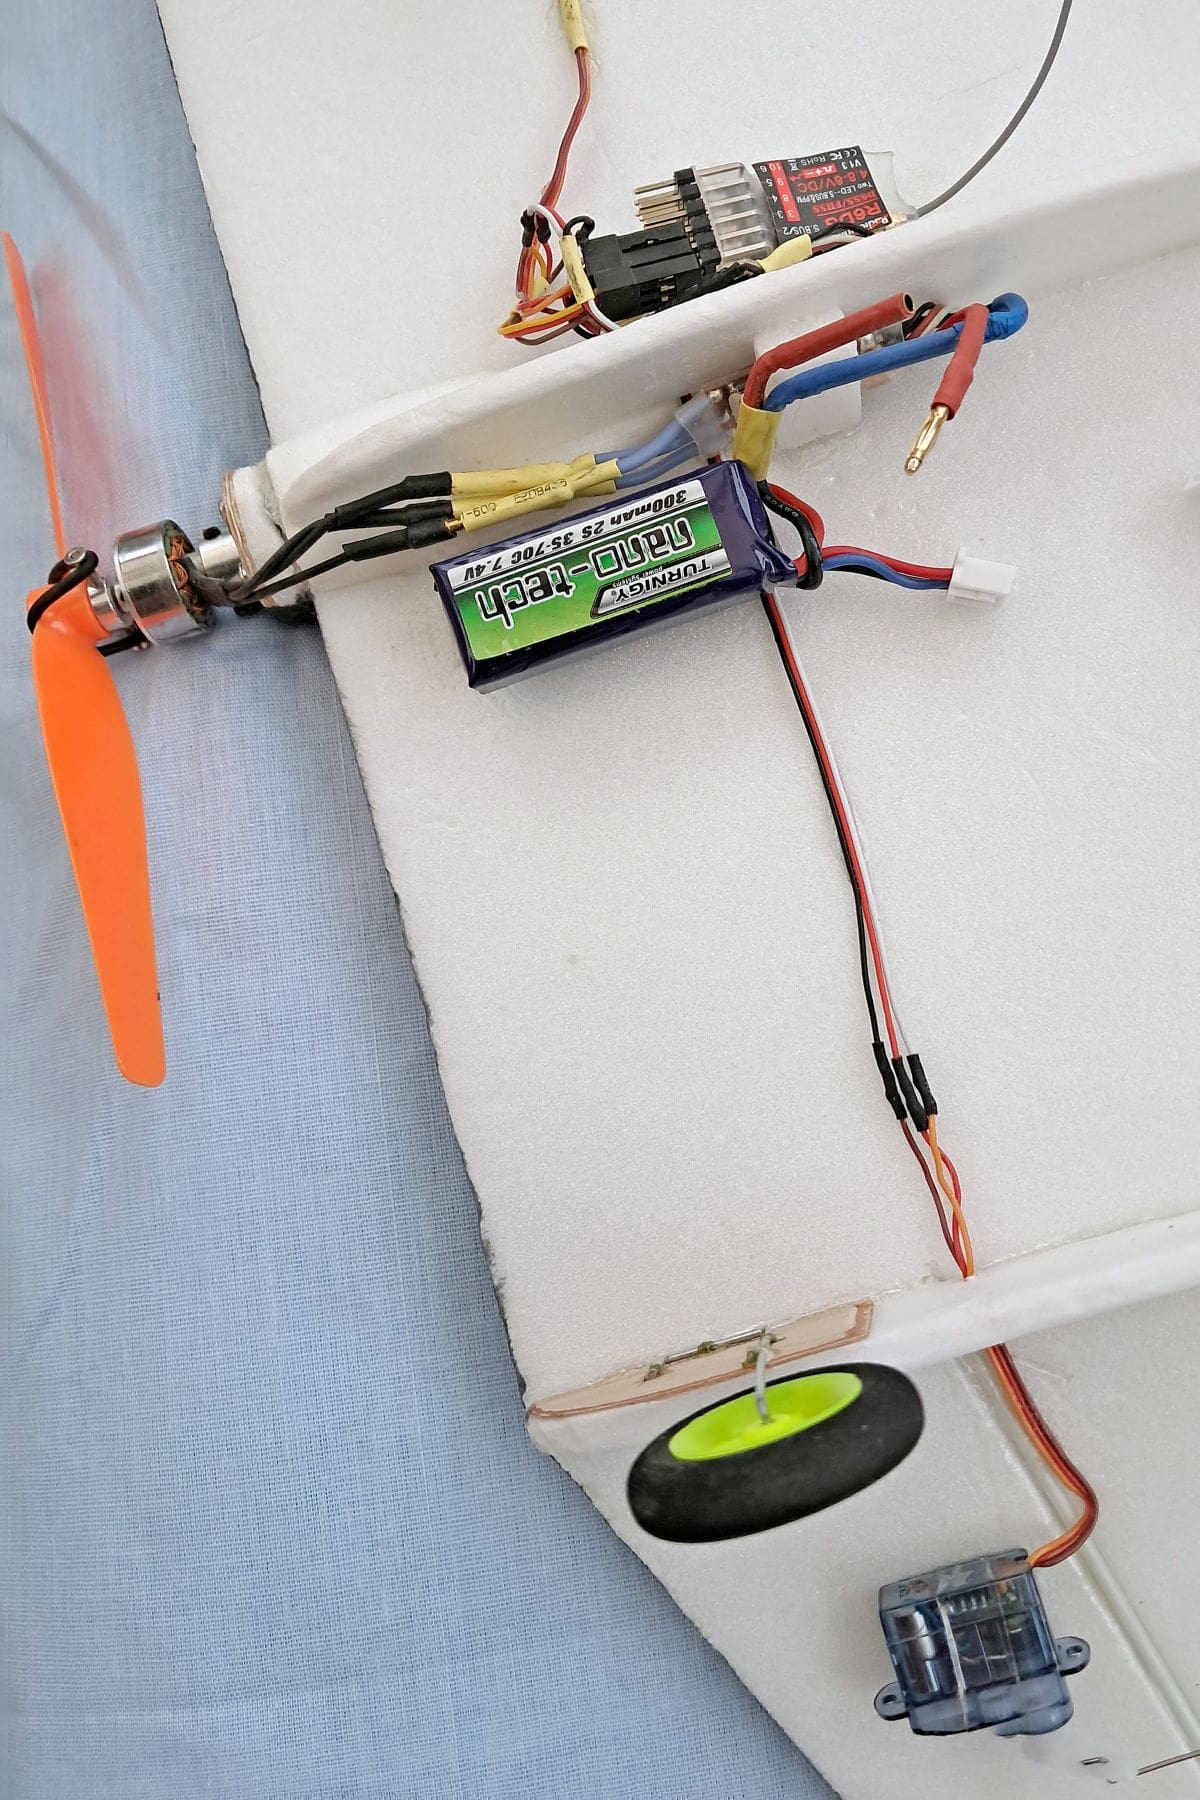
The photos show how the servo leads were cut, extended and, after soldering, shrink tube covered. The three ESC motor and power input wires were shortened and its signal lead to the receiver reduced too. It may look drastic but around 8 g to 10 g was shed in the process without affecting anything electronically, providing the wires were soldered ‘like-for-like’. It goes without saying that you never, ever cut the receiver aerial!
With all the control components adhered with either foam-safe cyano, double-sided foam tape or Velcro, the power source battery was left until last and simply held with more Velcro and used as an adjustable weight for Centre of Gravity adjustment. I used an old 300 mAh 2S LiPo simply because it was spare, but you could use a smaller, lighter battery.
With a conservative CG balance at 25% of average wing chord it was off to the long grass to test the as yet unpainted model. But you’ll have to wait for that…
REGRESSION THERAPY
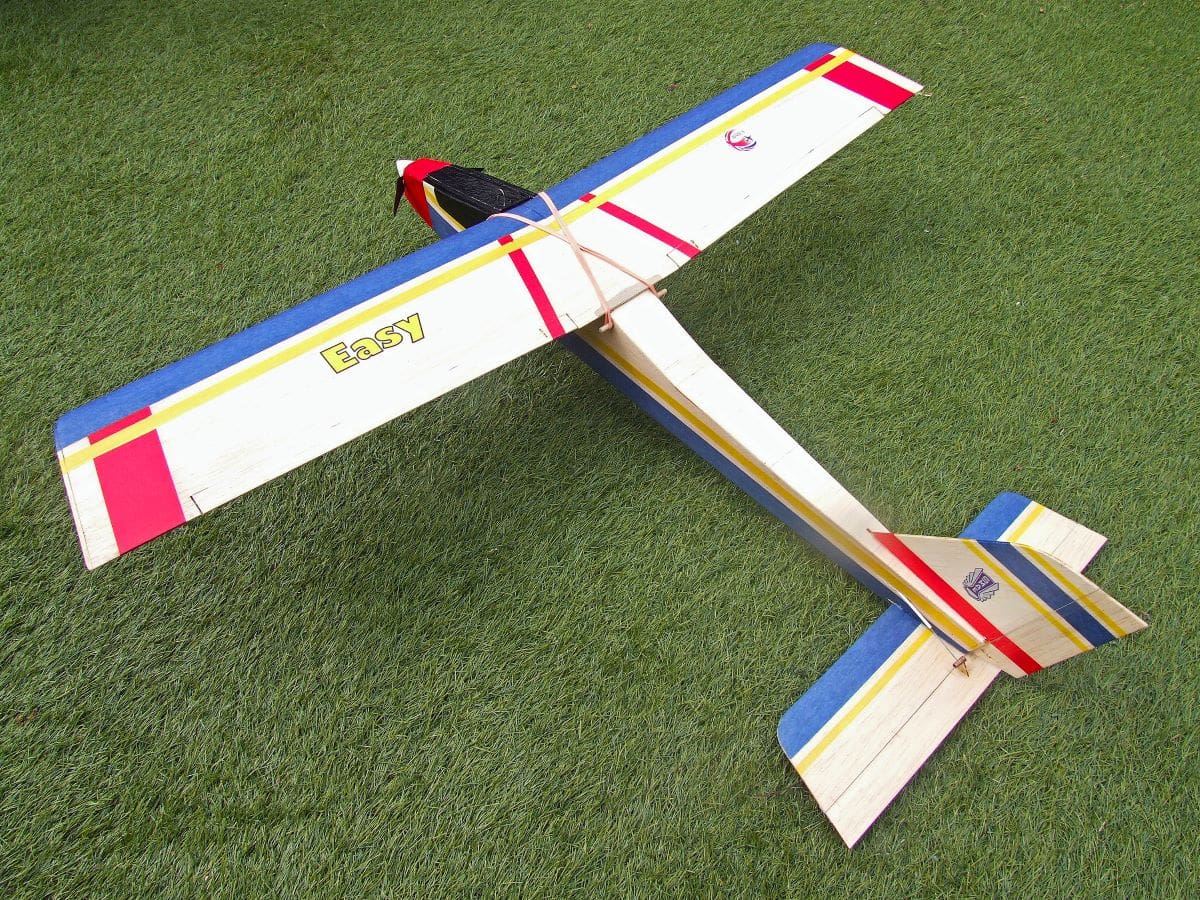
Recently I got in touch with my simple side. Some would say that’s a normal state of affairs for my overwrought mind! I saw a discounted offer for the Crafty Products Hiesbok ‘Easy 2’ that I’d mentioned before and shelled out a reduced amount of coin to purchase it. It’s sold as an easy to build and fly model on the beginner’s spectrum, but I had a far darker deed in mind. Designed to take minimal power and be oh-so gentle, I intended to ginger it up a bit for some cheap fun at the patch.
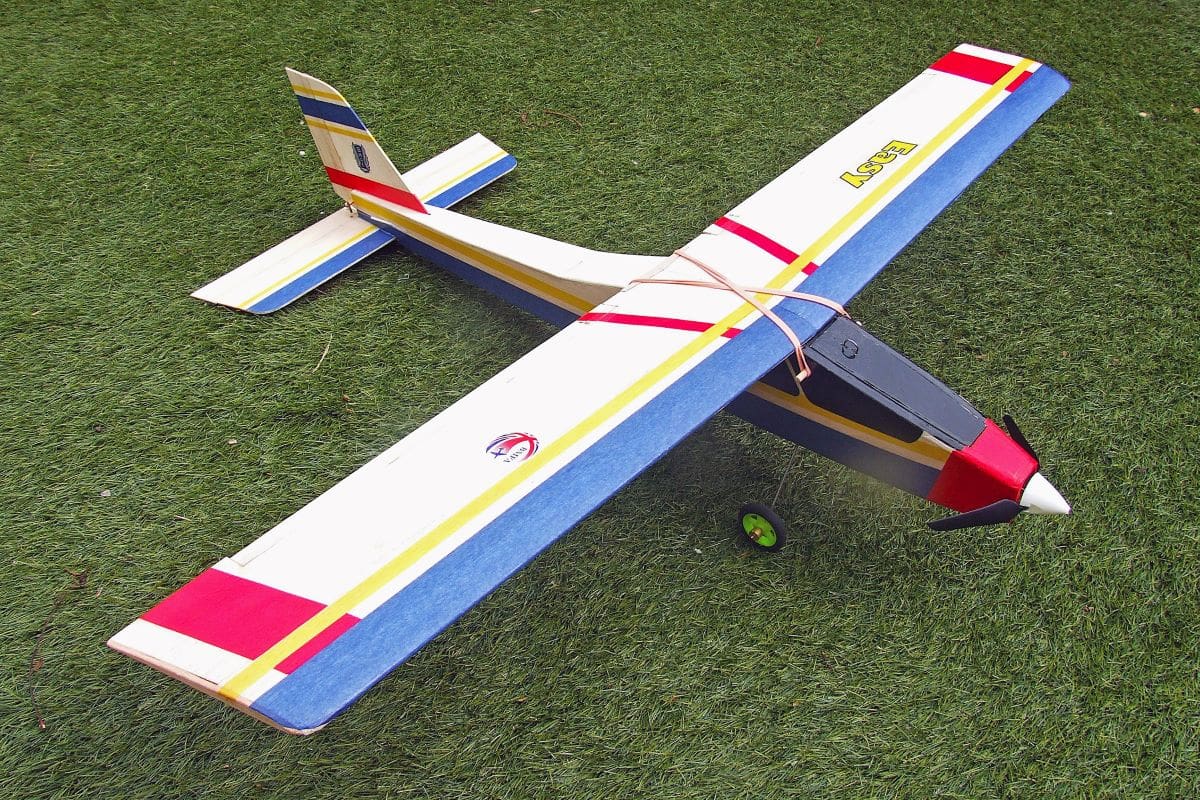
A rummage through the ‘useful’ drawers brought forth adequate oomph of around 50W or so, enough to whip up a minor frenzy in the little model but not so much that I’d rip the wings off.
Ailerons are de rigueur for most ‘throw it all over the sky’ models and I initially resisted the already marked-for-use ailerons. The wing is of ‘Jedelsky’ construction, all balsa, with a pre-shaped front section and a thin sheet rear, just as with the ‘Lilienthal 40’ that I built and modified for illustration purposes last year. The model’s construction is designed to be ‘beginner tough’ so I had no qualms about putting a bit more grunt through it.
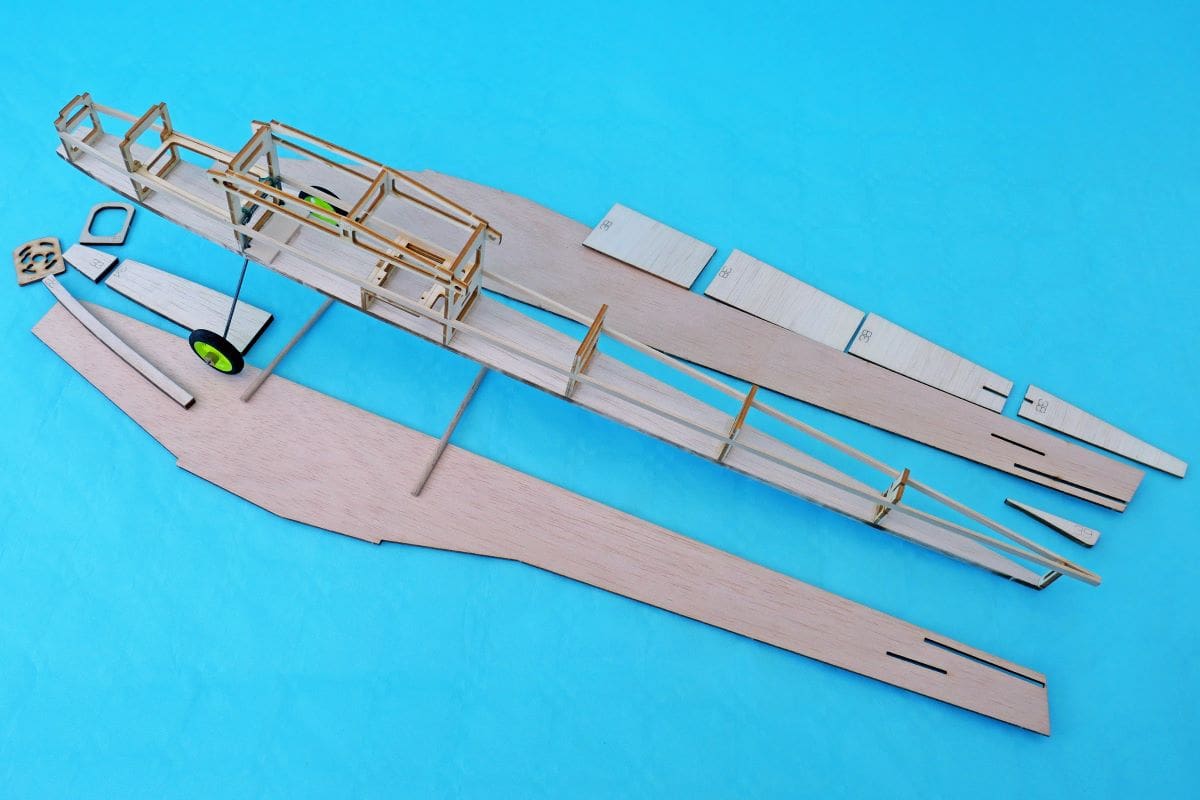
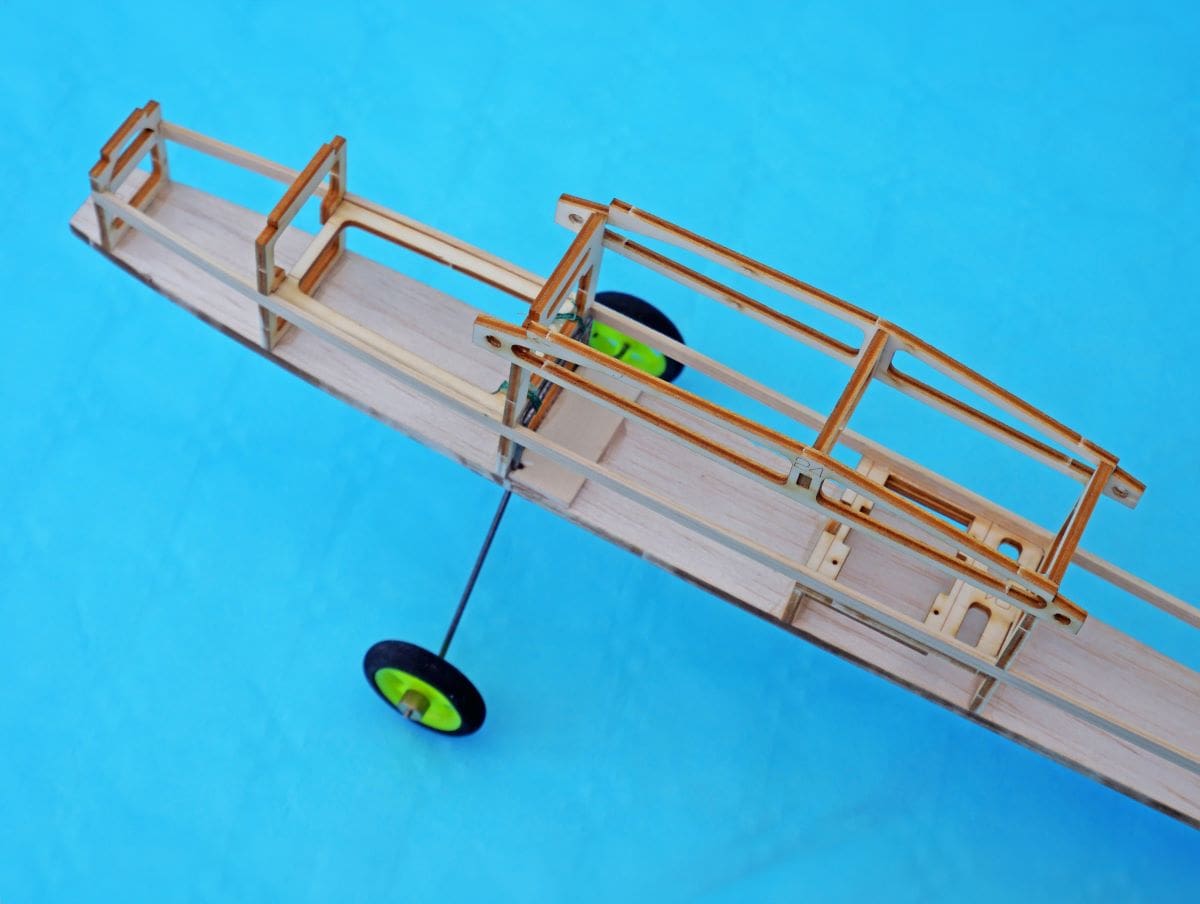
A build log isn’t needed for this kit. It’s dead simple to assemble and completely logical. The laser-cut parts are the best I’ve ever used and the coloured plan is a doddle to follow if you’ve built a previous model and ‘got your eye in’ at working with a plan. Odourless cyano glue was used as I became sensitised to standard CA glues some years ago and I only ever use odourless for my, now, minimal usage, mostly on foamies and small models.
Wing and tailplane covering was done by using remnants of tissue from other model builds, to keep the overall construction cost down. A random pattern can look quite attractive and makes flights easier to follow. The fuselage was similarly covered with tissue as it both strengthens the structure a little and gives moisture resistance.
All the covering and doping was completed with the acrylic varnish/tissue method outlined several months ago. Wet out an area of the model with water-based varnish, lay the tissue carefully in place and brush/stipple the piece gently, working out any wrinkles with care. This method adds little weight, renders the structure water resistant and adds a bit of crash resistance.
Of course, you could always use the basic beginner’s option and build the model as a rudder/elevator device. It would be a great second model or a ‘first beginnings of built-up construction with a bit of covering’ plane.
FLING-N-FLY
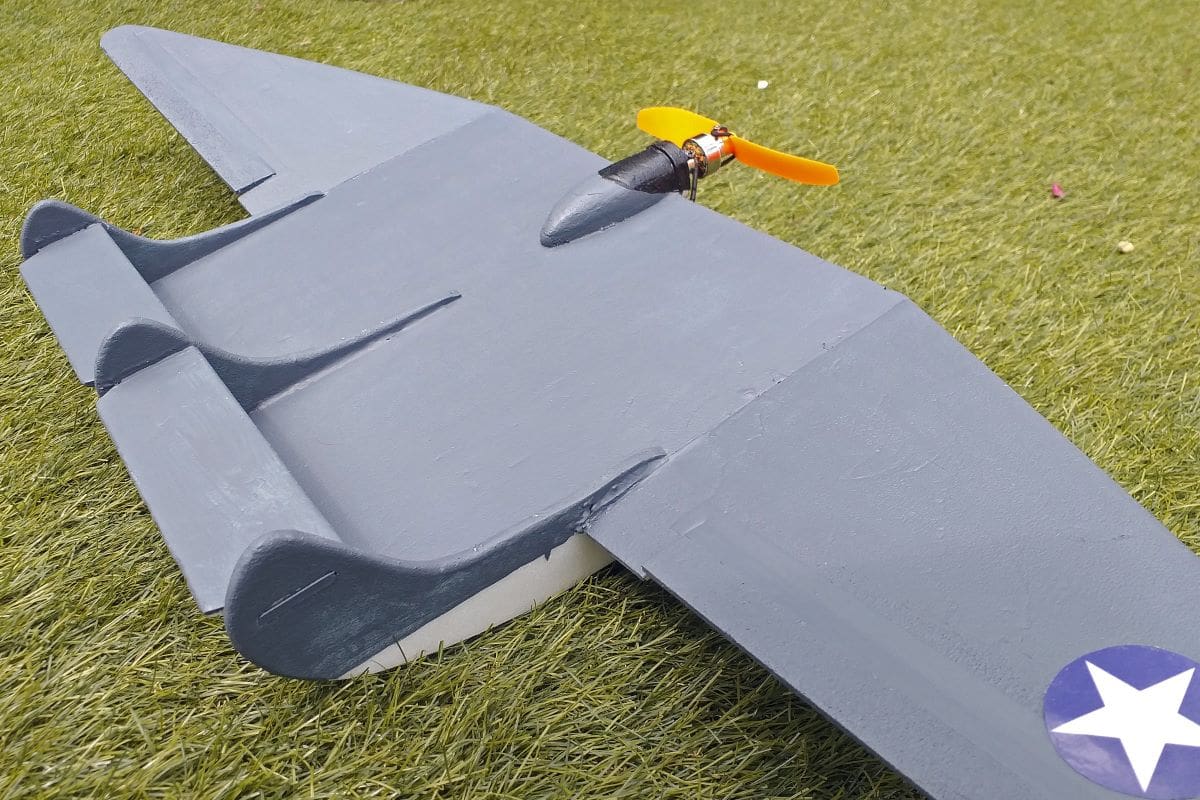
Sometimes the simplest of playthings can be convinced to become more than the original concept, especially when the model concerned was thought to be beyond further use. Foamie chuck gliders have been ‘done’ for R/C previously and pictured here before.
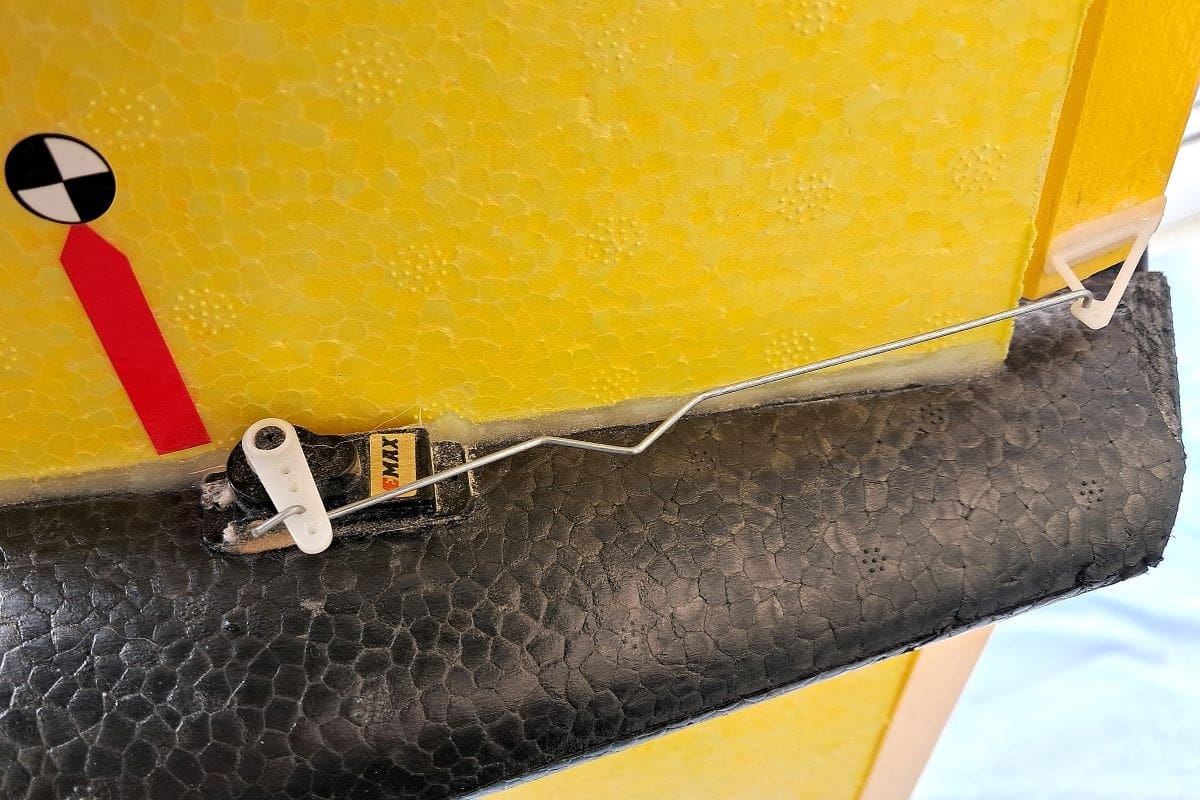
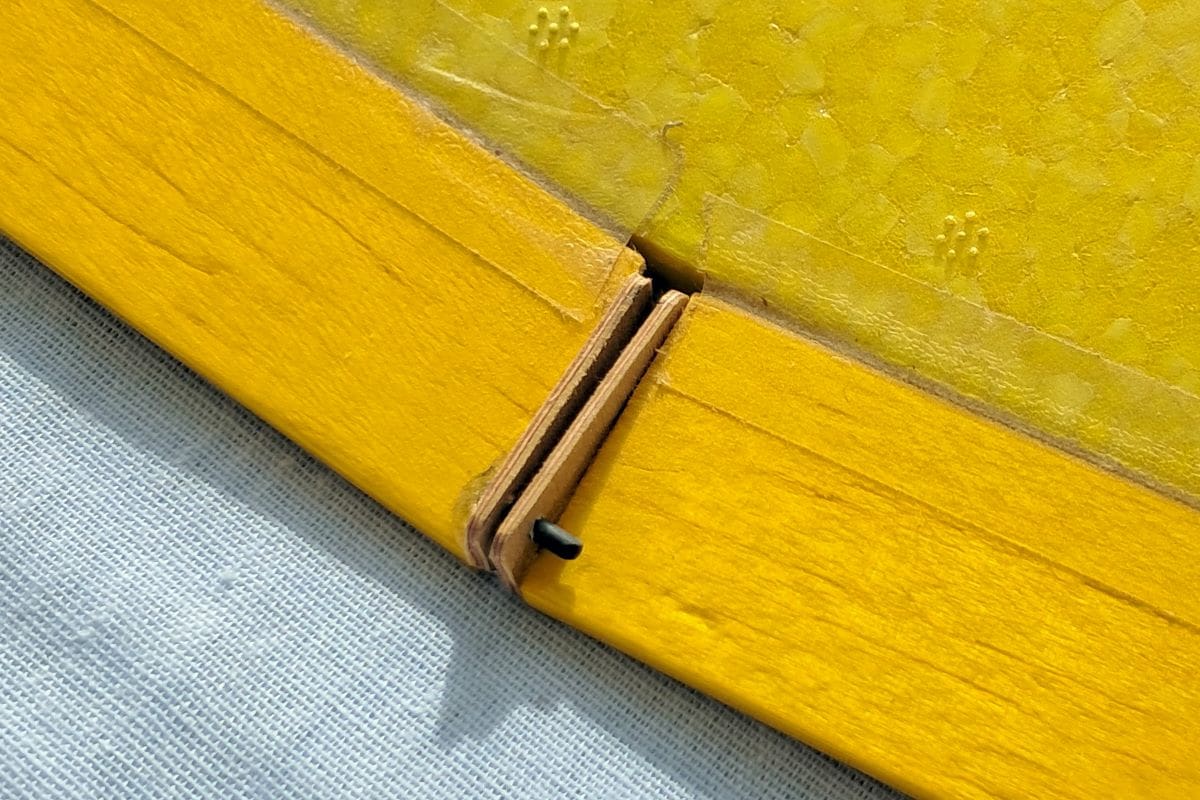
My little R/C converted Mk.1 Lidl chuck glider had suffered from poor storage. Okay, I admit it, I lost it amongst all the other stuff! After finding the poor thing bent up (the fuselage was horribly deformed) I had a bit of lateral thought, so I cut it off – the rear fuselage that is. Knowing that some directional guidance was a necessity, a spare piece of 1/16’’ balsa sheet was pressed into service as a fin, glued into a slot cut into the stubby fuselage tail after some black film offcut was ironed onto the balsa.
The previous iteration of the glider had ailerons fitted and it was but a few minutes work to change the transmitter settings from aileron to elevon. Well, that was it really. All done and it just needed balancing before testing.
A cheap mini receiver, a 300 mAh 2S LiPo and a tiny UBEC (to drop the operating voltage from 7 to 8 volts down to 5V for the servos) were shoved under the hollowed-out ‘canopy’ and a fingertip balance of the plaything gave an approximate Centre of Gravity of 25% wing chord, spot on for first test flights.
The final check was for weight – a mere 200 g. With the relatively large wing area that means the model will fly in a breeze little greater than a fa**… err, natural bodily function.
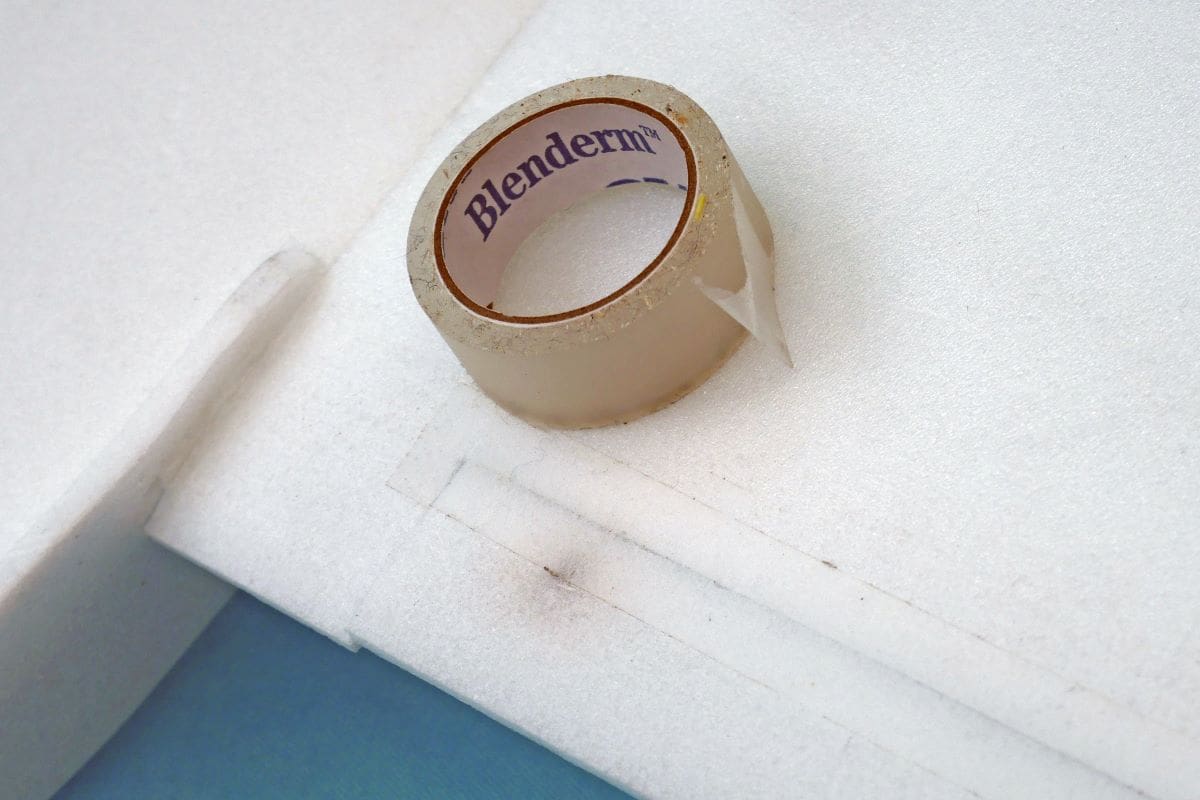
The Lidl glider, as sold, makes for possibly the simplest and easiest R/C conversion of any model I’ve found. They cost so little that you can afford to mess one up and buy another to get things right the second time round. There’s even a Facebook group dedicated to the things. The Mk.1 thick wing trailing edge is perfect for using a piece of 1’’ x 3/16’’ balsa trailing edge stock as ailerons and elevators, or elevons, easily hinged with Blenderm self-adhesive surgical tape. The nearby photos should tell all, even the simple adaptation that allows for the wingtip taper and dihedral break.
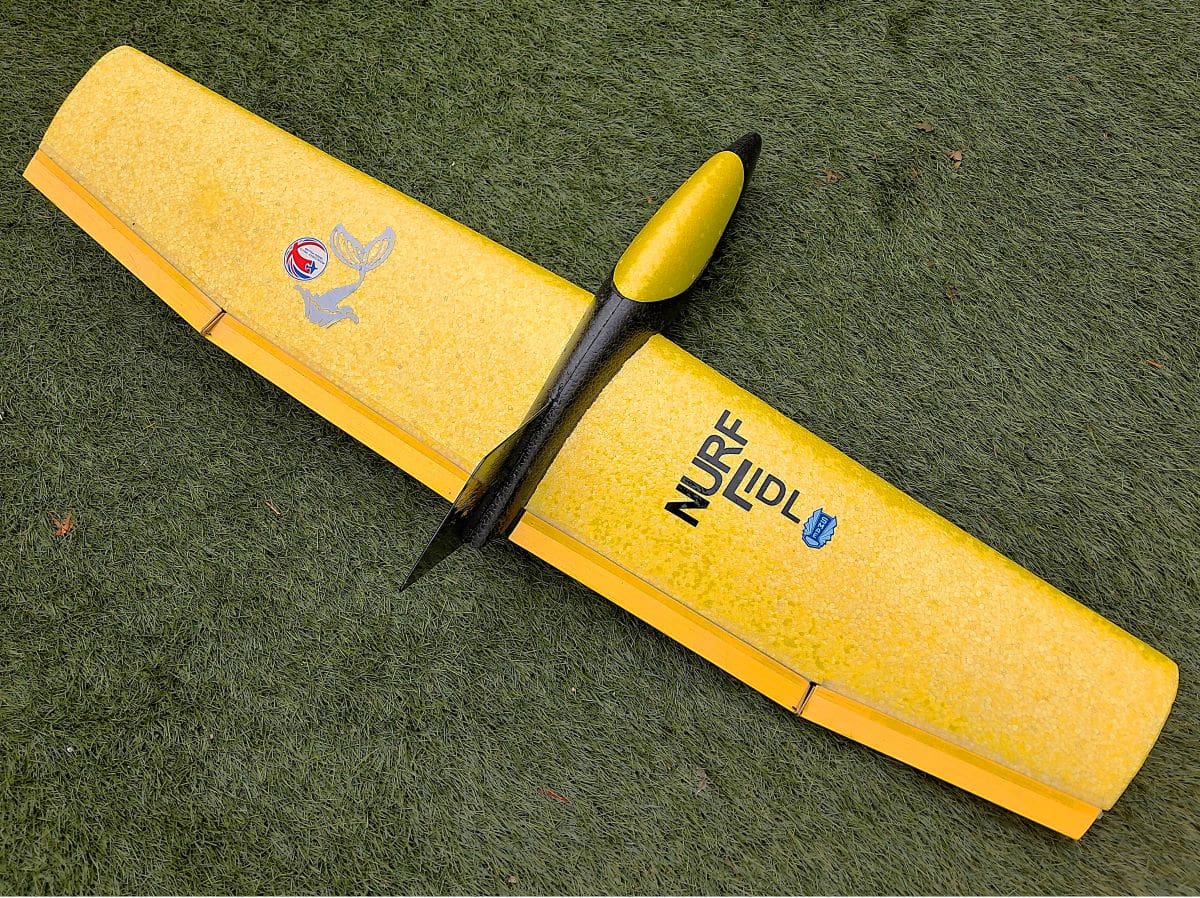
NURF-LIDL
The German for tailless is ‘nurflugel’ and it didn’t take much to translate that to ‘Nurf-Lidl’ for the truncated toy. Taken to the slope edge, to an outpouring of derisive comments, I gave the thing a little push and hung on tight to the tranny. Some tentative twiddling of the transmitter sticks kept it airborne whilst the trims were altered, after which I just had fun. The comments changed to ‘Can I have a go’ and the little bendy toy was wrung out and bounced across the landscape a few times. ‘I gotta get me one of them’ was muttered and the consensus ended up as ‘great fun’. Why don’t you give it a try when you next see them on the shelf?
TAILSKID
I make no claim to have anything in common with that man of genius, other than one annual anniversary – I share a birthday with Albert Einstein. Another thing to mention is my belief in his statement about being deeply involved in a process that gratifies and improves:
“That is the way to learn the most, when you are doing something with such enjoyment that you don’t notice that the time passes.”
Spot on for our hobby, don’t you think?
Useful links
Hiesbok ‘Easy 2’ https://craftyproducts.co.uk
Den’s Model Supplies https://www.densmodelsupplies.co.uk


