
John Stennard returns to indoor flying – and having fun hovering around the sports hall floor too!
Words & photos by John Stennard
Our weekly indoor flying sessions were well established when I came across the Airbug hovercraft, originally sold by Flying Wings. While the air was always full of aircraft there was an empty space on the floor – well, for most of the time! We were in our local hall venue at the time and this was a standard one badminton court size with a generous perimeter and a stage. After demonstrating the Airbug there was a flood of interest and Airbug sessions soon became an established part of our evening fun.
Enjoy more RCM&E Magazine reading every month.
Click here to subscribe & save.
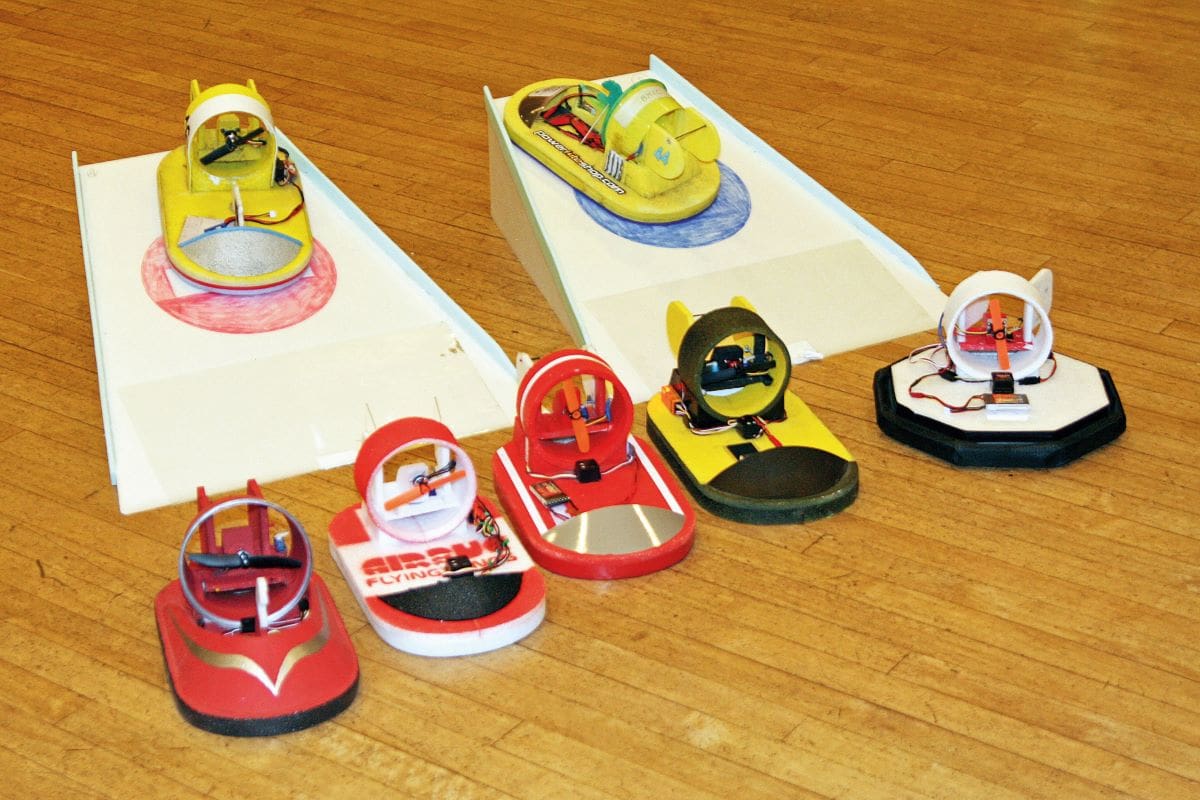
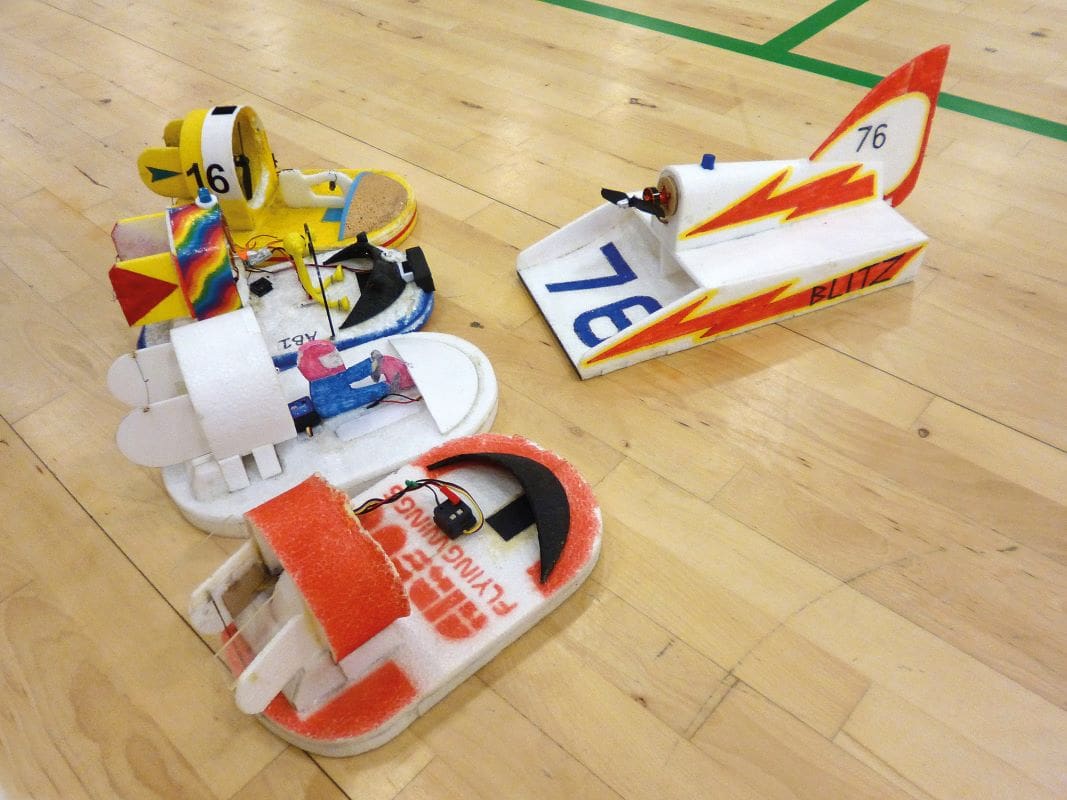
Now, nine years on, the Airbug is still our most popular fun hovercraft. The Chiticat also has a following but there are fewer of them, self-destruction often being an issue. So Chiticats are not used at the same time as the Airbugs and have their own manic session. Vectorcraft and quad based Whoover type hovercraft, both commercial and home built, have appeared, plus a number of ingenious ‘scratch-built’ designs. These are quite happy circulating with relative safety amongst the Airbugs.
Our hovercraft are quite basic foam fun models with a single motor providing both the lift and thrust. If you are interested in more sophisticated hovercraft, I suggest you visit the Model Hovercraft Association website. A web search will also produce plenty of commercial RTF versions.
LOCKDOWN MODELS
When the indoor season ended prematurely due to Covid restrictions I was left with plenty of flying machines but just one very battered and worn Airbug. I decided to use some of the increased amount of home time to build a new Airbug. Eventually the project expanded to three new hovercraft!
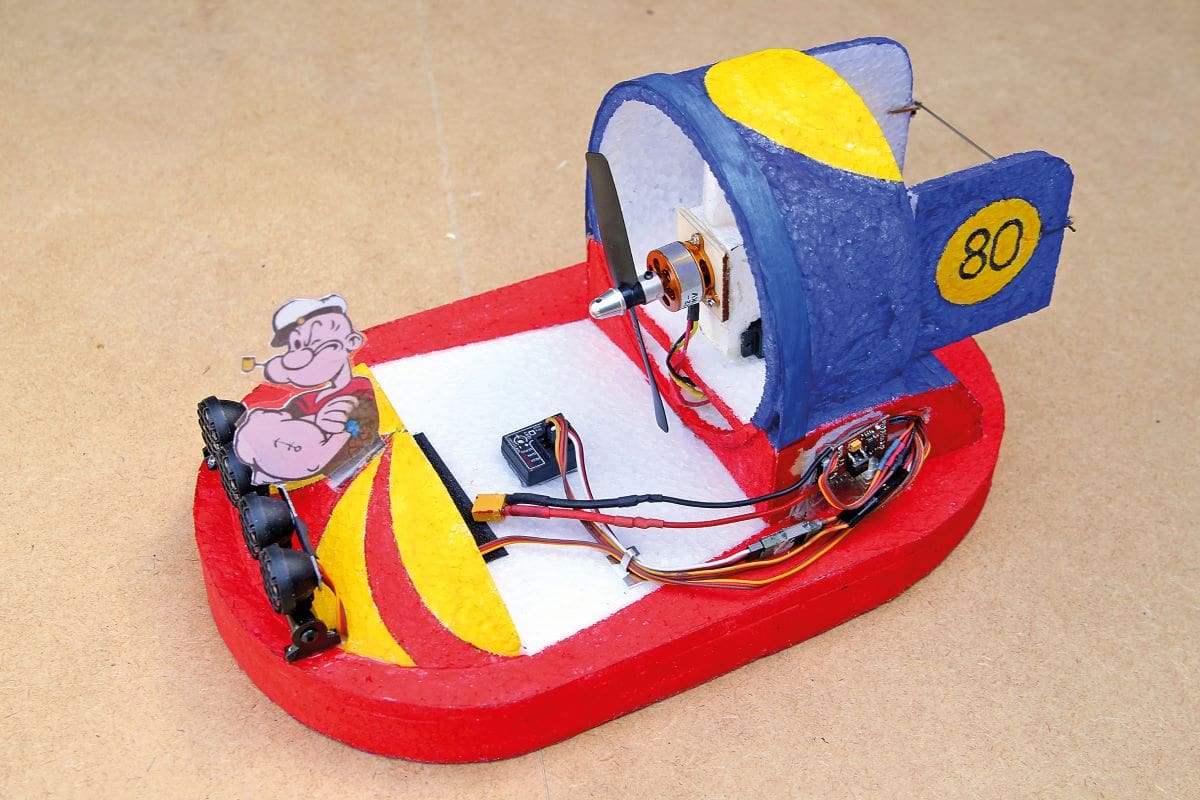
I had a stock of EPP foam and plenty of hardware, but I came across a problem when I could not find my set of Airbug plans. A web search failed to find any but on the Model Hovercraft Association website I came across a similar model. This uses a single motor and is called the Kiddy Craft Mk III. The Mk III suggests the basic design has been around for a while and the original plans show a brushed motor. The plan is for a model larger than the Airbug, so I scaled the model to around 50%. This resulted in a model 290mm in length, against 340mm for the Airbug.
In retrospect, I should have made the model at least Airbug size. The result of using the 50% reduction meant that the shroud was 90mm (3.5″) while the Airbug is 120mm (4.75″). This obviously governs the prop size and motor size. On the Airbugs I use a high kV motor, of 2500-3000 kV, with a GWS 4″ diameter prop. The KC Mk III would need a smaller motor with a similar or higher kV and a smaller prop. But I decided to build the model and worry about essentials like the power unit later!
The KC Mk III was designed to have an authentic skirt but at my reduced size I decided to not incorporate this. Certainly, our Airbugs manage perfectly well without a skirt. The other different feature was that this hovercraft only uses one rudder as opposed to two on the Airbug.
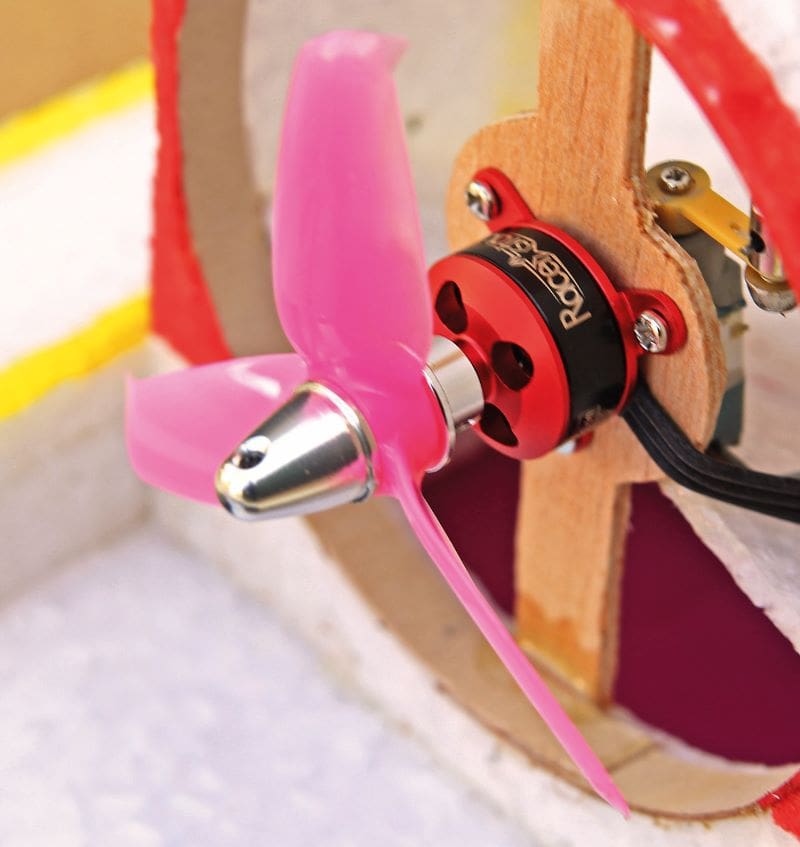
Building it was not a problem, but I quickly reached the motor mount and steering servo stage, so I had to make some decisions. The shroud needed a 3″ diameter prop and I decided to use a Race Star ‘Race Edition’ BR1504 2800kV motor. An online search uncovered several different 3-inch three-blade props so that problem was solved. These are quite vicious looking little things – more about their potential danger later.
Mounting the steering servo was a bit tricky due to restricted space and the mounting position. After much head scratching it ended up behind the motor mounting pod. I fitted a small Spektrum Rx and, on this model, a 10A ESC, plus the usual gyro. I always use the SkyRC GC 301 car gyro on my hovercraft. It’s a very small device and functions really well. Both the motor and gyro are from Banggood (which I’ll refer to as BG from now on). A 3S 450 – 600mAh LiPo provides plenty of power.
I covered the underside with ripstop nylon but eventually removed this. A minimum of lift is required as the surface friction from the edges of the EPP hull is negligible. I added some model car accessory lights powered via a spare channel on the Rx.
Test flights without the benefit of a lot of space were promising. And the prop? Ah, well… a throttle nudge at the wrong time resulted in three very neat and almost surgical cuts to my thumb. Ouch! These blades are really sharp and moving fast, so beware!
HOVER & QUAD COMBOS
Whoover type hovercraft, using parts from a micro size quad, work really well. There are loads of designs online and they are ideal for small space hovering. But, like the other micro size types, they do get a bit lost in a four-court sports hall. But it is quite practical to use an FPV camera on these and they are fun to pilot in this mode.
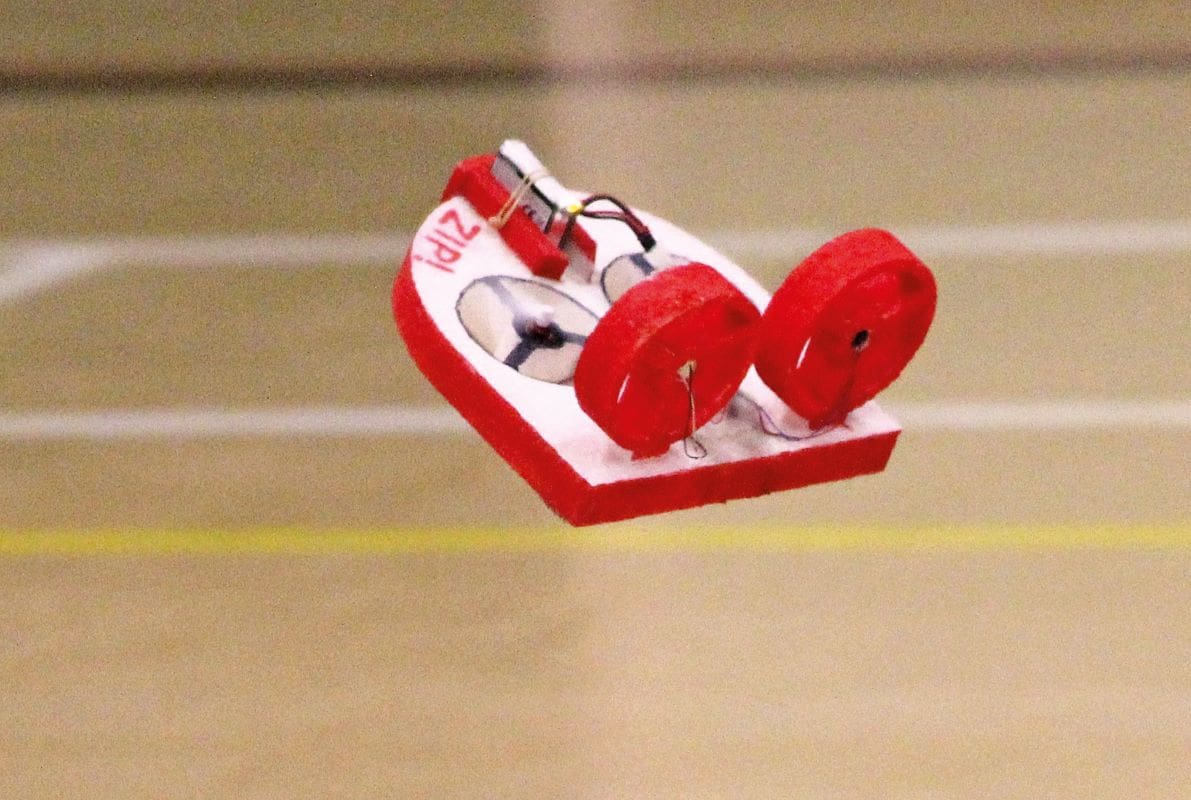
Now here’s something a bit weird… I also made a slightly larger model of the Whoover type, called the Zip, with more powerful motors and larger props. I found that with a fresh 1S battery it would actually take off! Airborne control was limited but it would turn. Once the initial power surge declined it descended to the ground and became a normal quad. Perhaps this quad had dreams of flying!
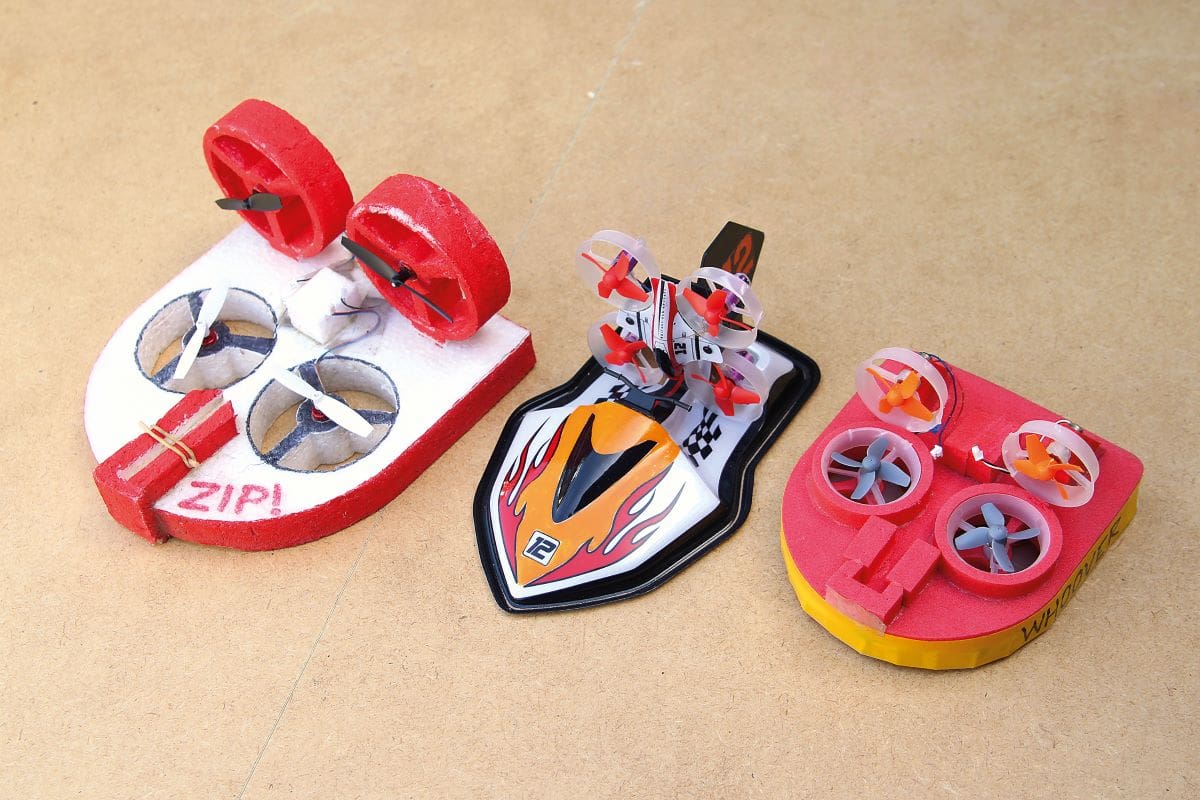
Commercial combined quad/hovercraft also work well and are easy to control. Again, great for small spaces, although I have used mine as a ‘reserve’ hovercraft in case my Airbug is ‘hors de combat’. I can vouch for the fact that these small quad-based hovercraft are pretty resilient!
ANOTHER ONE!
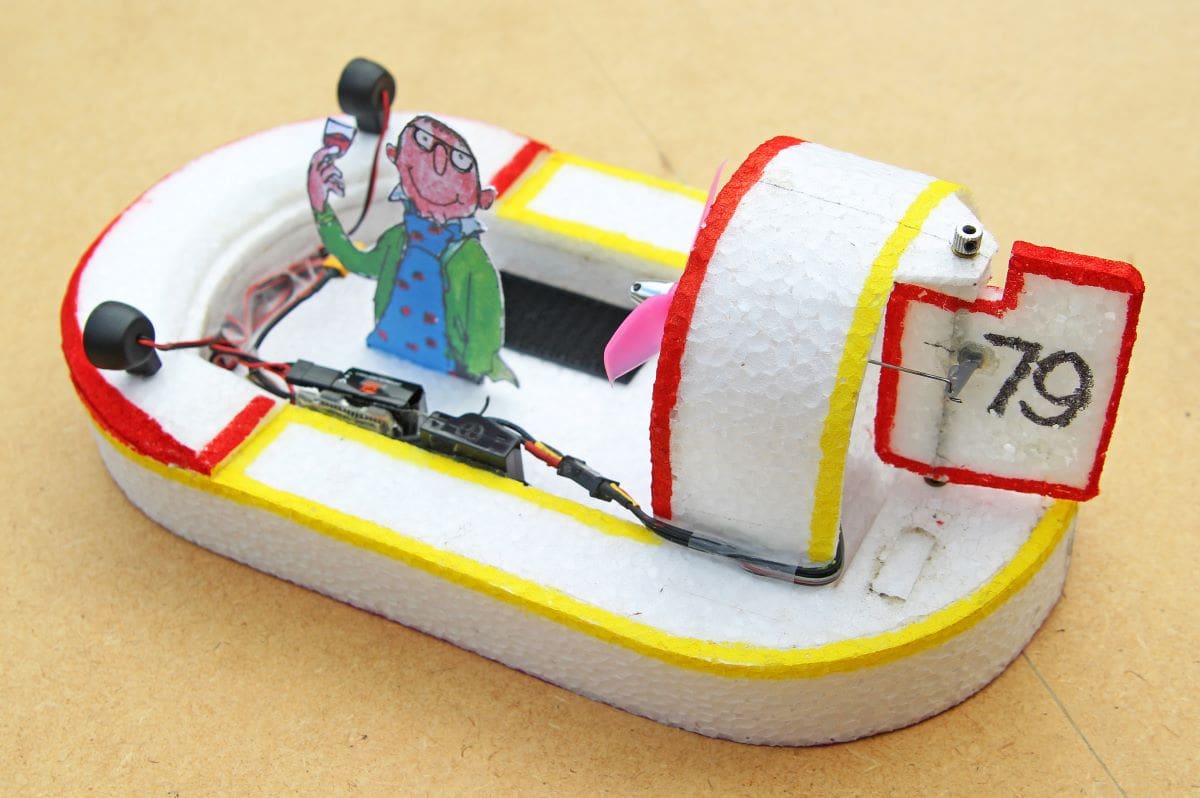
With time to spare and the garden the best it has ever been, I decided to build another hovercraft. Some time ago a plan for a micro Vectorcraft was published in this magazine. This was based around the clever little Graupner Vectorcraft unit, which was designed for use in micro size aircraft.
No one in our club had a Vectorcraft unit so I made the model using a micro-Rx and a motor mounted on a micro servo. I found it very difficult to control other than at low speeds. Without a gyro the model tended to weave all over the place as the speed picked up. I decided to try another tack and fitted the Vectorcraft with micro radio gear, a fixed motor and a rudder. Again, it worked well at lower speeds but as soon as the speed increased it became very difficult to control, weaving and spinning out.
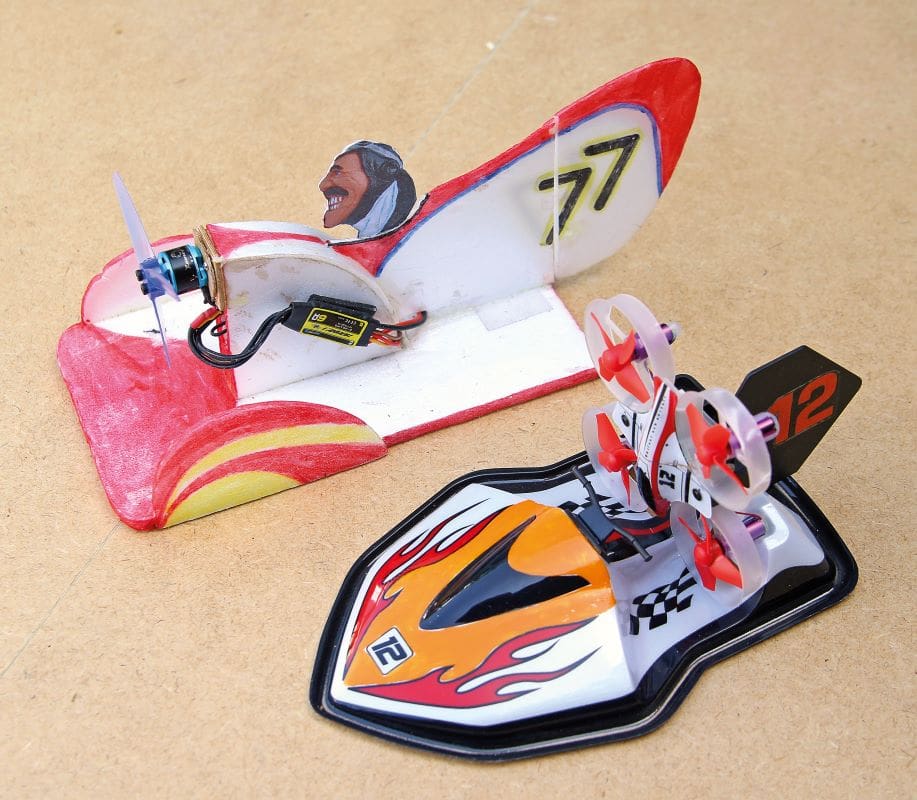
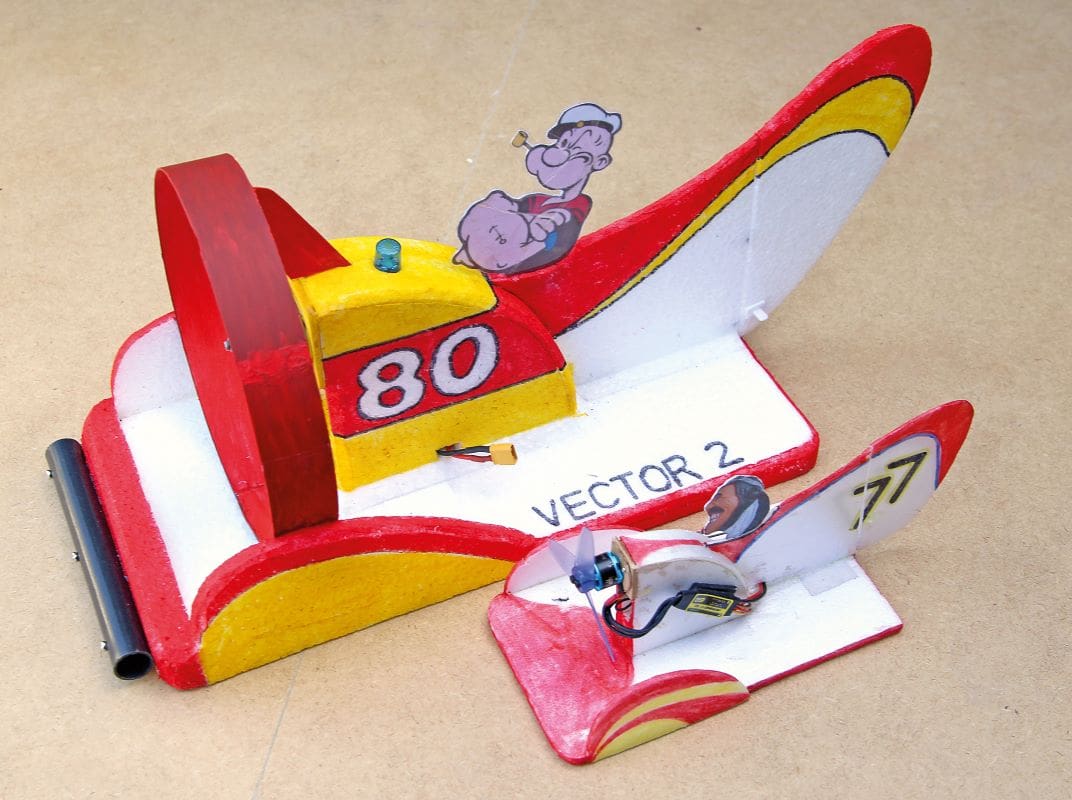
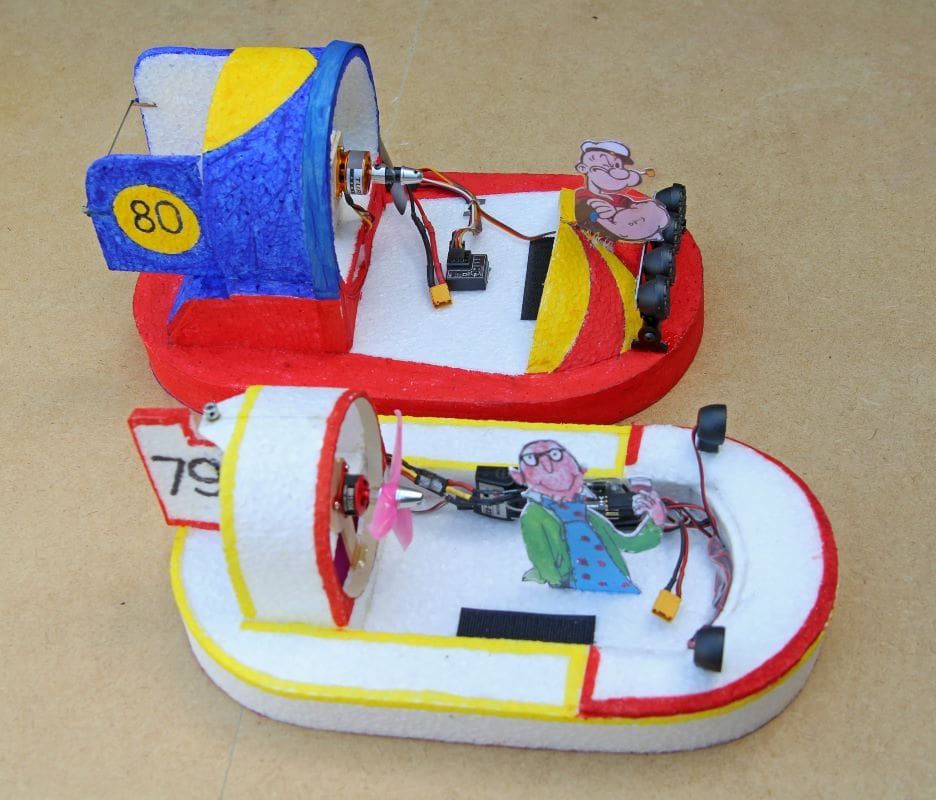
As the Vectorcraft is too small to fit a gyro, I thought that a larger version with a gyro could be the answer. So, I enlarged the design to give a length of 340mm – the same as an Airbug – and built it as a bigger version of the original. Sadly, the excellent Turnigy C2222 I have always used in my Airbugs is no longer available, however the enlarged Vectorcraft design was capable of taking a 5″ or larger diameter prop, so the motor choice was more varied.
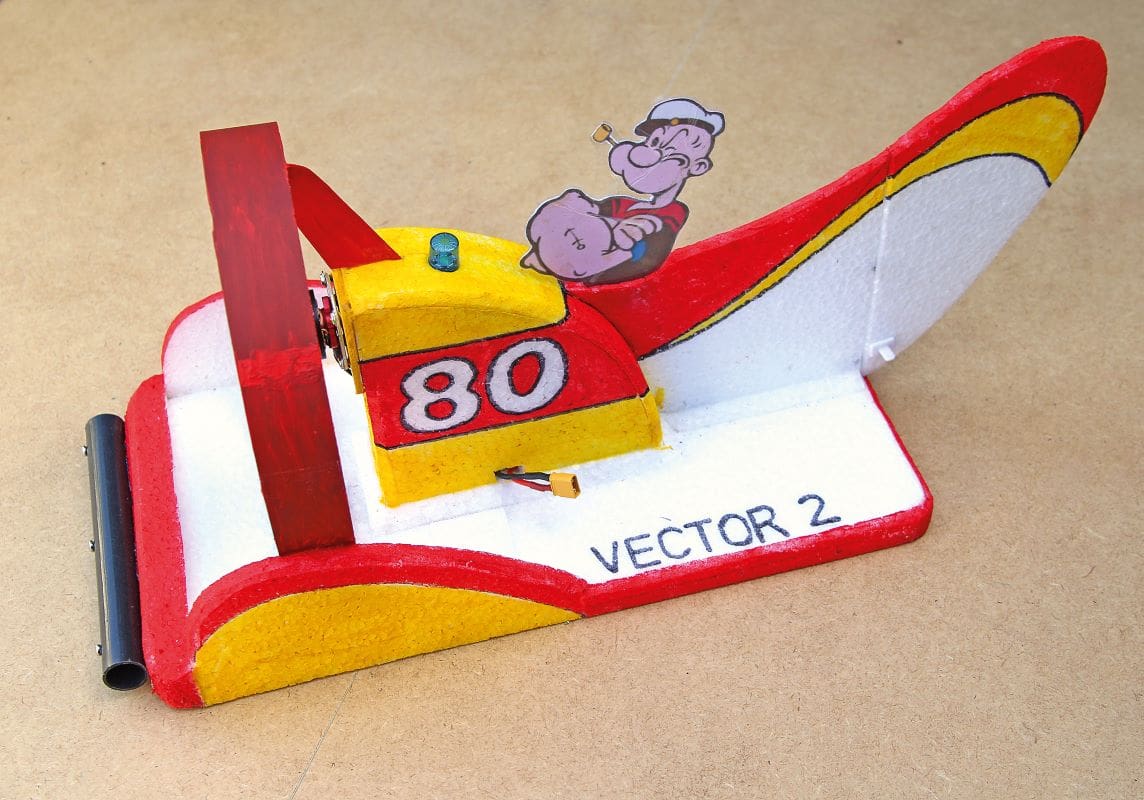
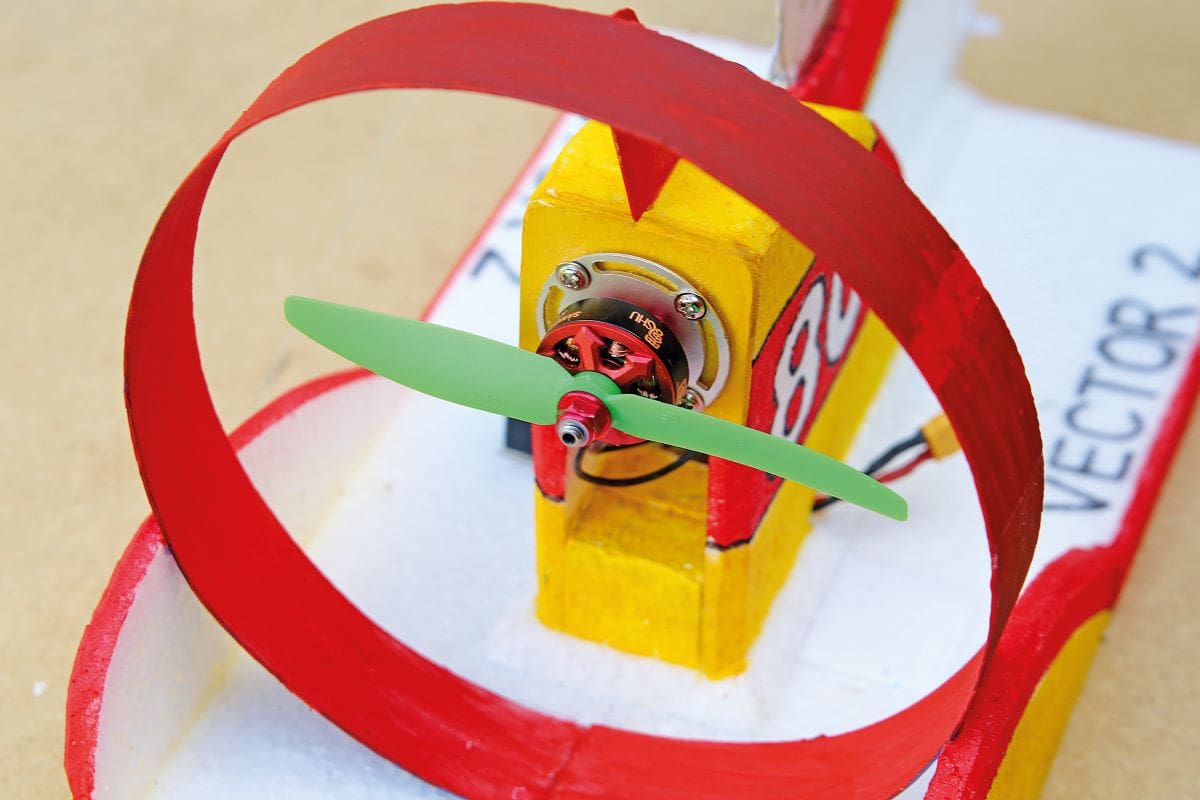
A DYS Samguk Series 2800kV motor was fitted as this offered a good performance with a 5″ or 6″ prop on a 3S LiPo pack. The motor arrived with an issue as it is designed to be fixed to a bulkhead from behind. I had, of course, already built the model with the motor pod and motor firewall bulkhead in place, with no access from behind. I was about to make a backplate when a search of my old motor mounts produced a metal one with the correct hole spacing. With the motor screwed to the metal mount this was then fitted to the firewall. With its higher output I fitted a 20A ESC and tests with a 5 x 4 prop showed that power would not be an issue!
The Rx and ESC fit into the motor pod with the gyro and rudder servo outside. An old hoop from a Sumo (that brings back some memories) was cut to use as a prop guard. It does make one more aware of the prop and a Chiticat wire type guard will be fitted once the model has been test flown. Also, should the model end up inverted (and they do!) the prop will be protected.
Initial tests suggest that this one is going to be very fast and I’m hoping the gyro-controlled rudder will keep her in a straight line at speed. I’m also hoping that the model has enough mass to stay on the ground and it will not tend to flip when cornering tightly.
RETURN OF THE AIRBUG
So, with two new hovercraft I was feeling pleased with my efforts when a club member contacted me and said, ‘I hear you are looking for an Airbug plan – see attached.’
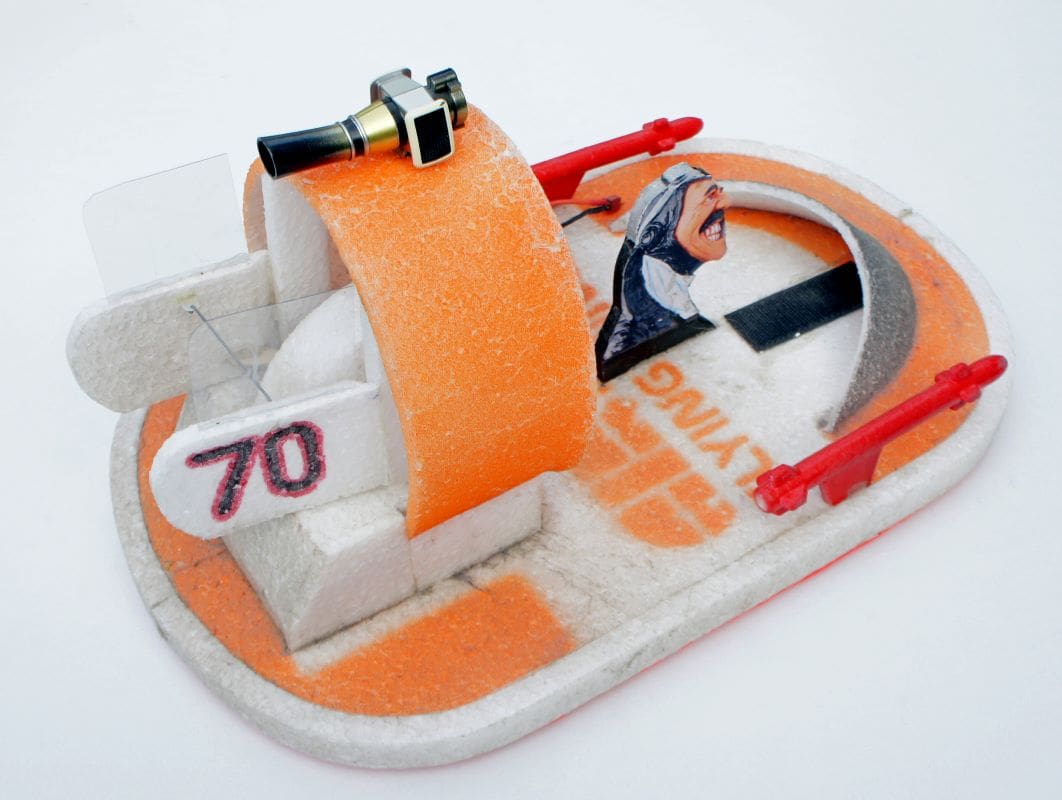
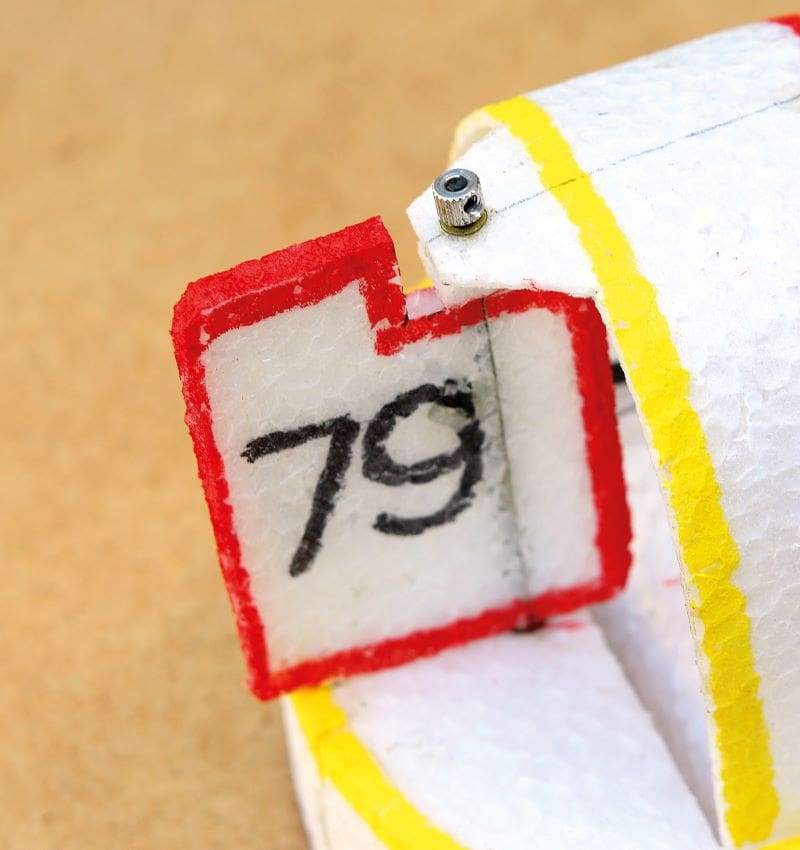
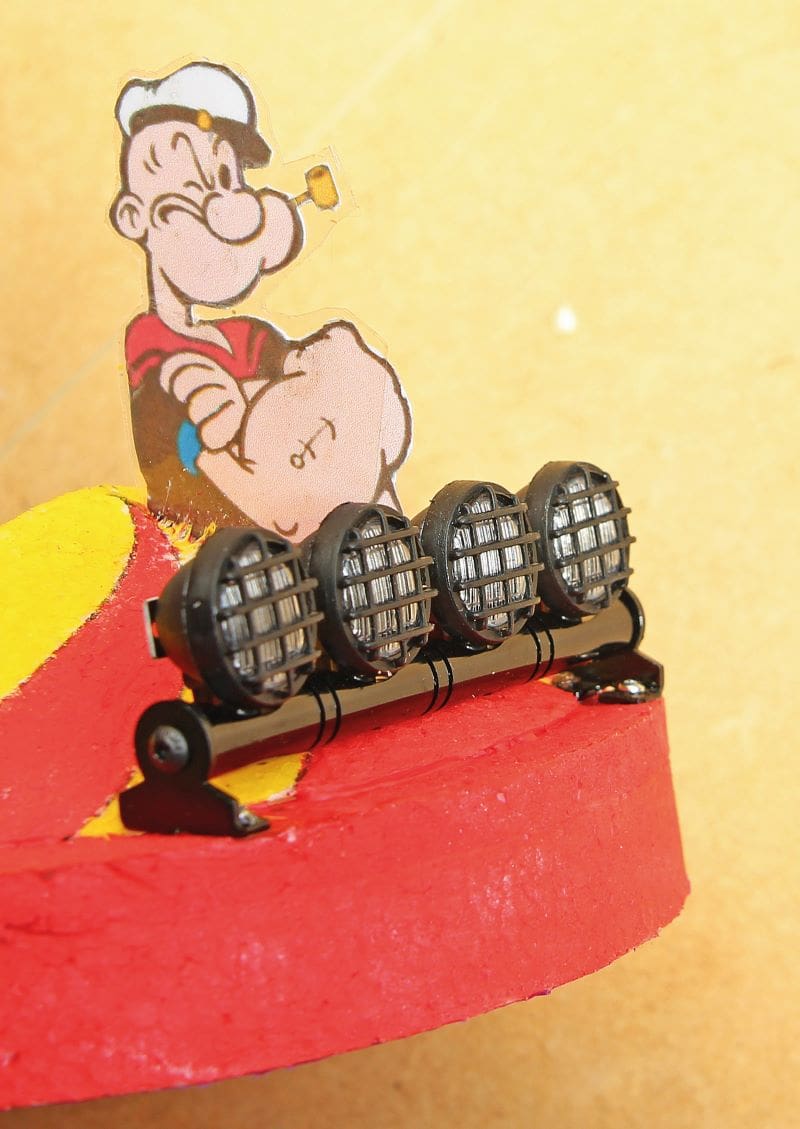
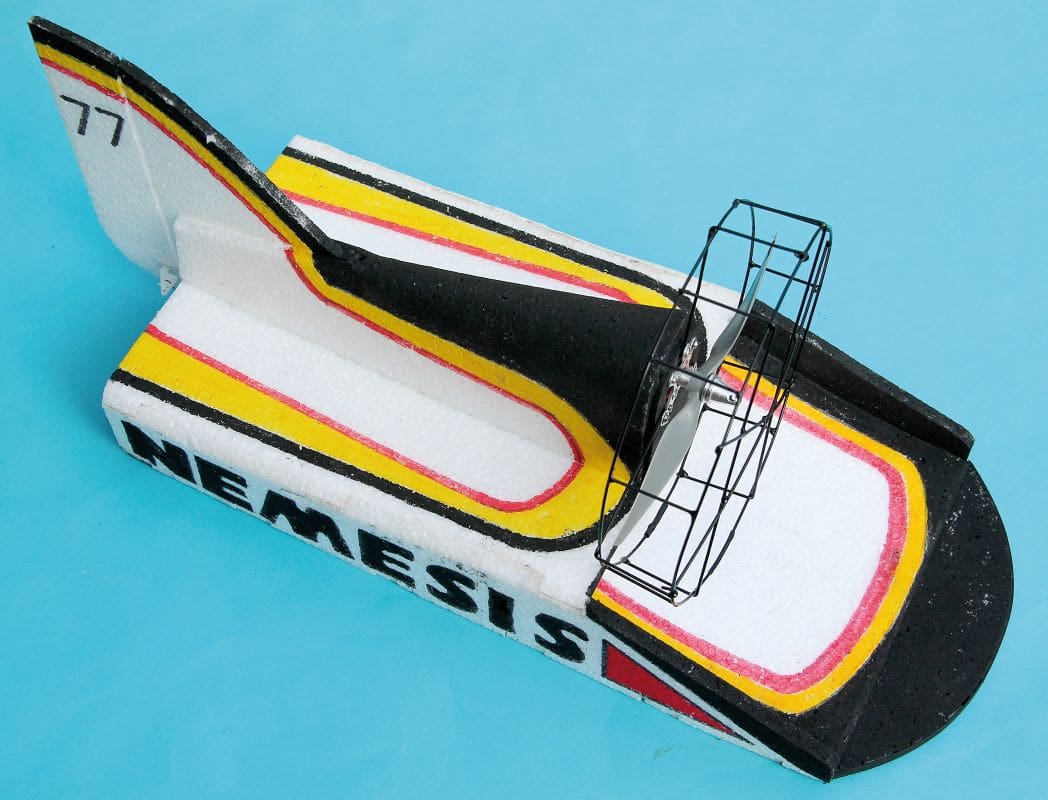
And there it was, so no guesses what came next! This model sticks to the well tried and tested design and my last remaining Turnigy C2222 motor has been installed. One thing I have done is to use a ply rim on the front of the shroud and I have reinforced this rather vulnerable area with a bent ply frame. This will help to maintain the form of the shroud and protect it against crash and flip damage.
BEST BE READY
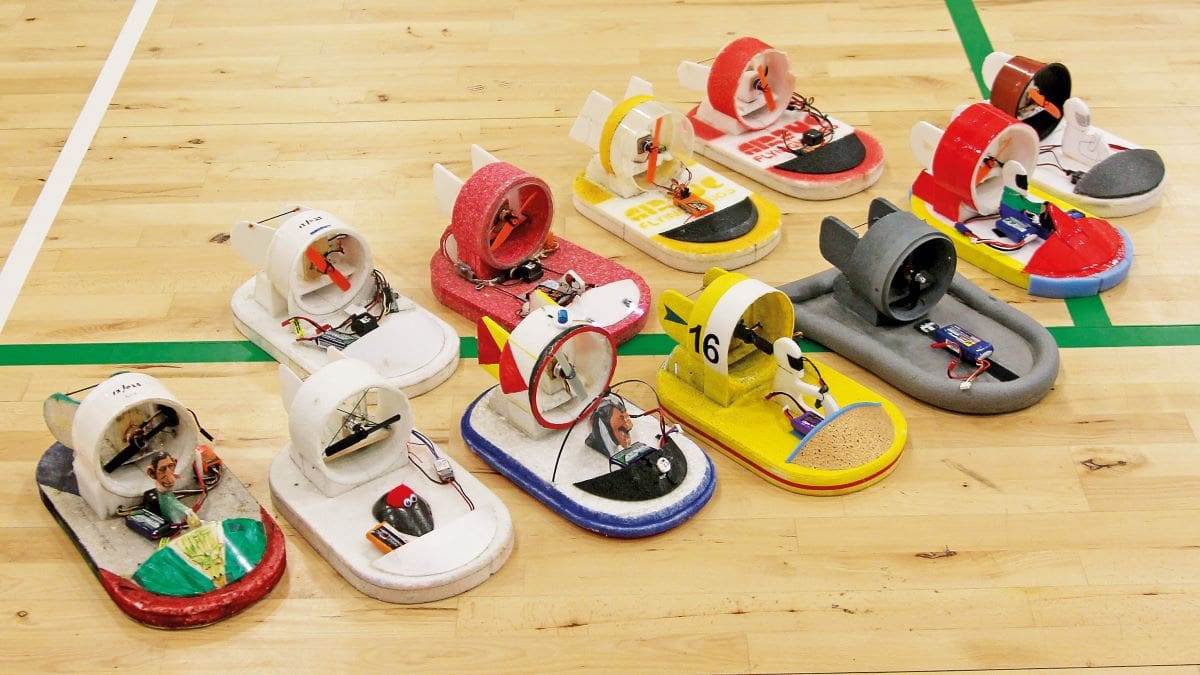
It sounds like we are obsessed with speed and mayhem, and perhaps this is true! In theory we could opt for a laid-out circuit or slalom course where we could either race in a more refined way or do time trials. But since our main interest is in flying model aircraft the hovercraft take their turn during a busy two-hour session. This usually means two Airbug and two Chiticat slots during the evening. With only an eight-minute slot available it’s a question of ‘last on the floor is a cissy’ and ‘the devil take the hindmost’ (apparently an expression dating from 1611 and very applicable to our hovercraft sessions!)
This does encourage you to be sure your model is ready to go as minutes wasted on fixing something is a lost opportunity to misbehave. With as many as twelve Airbugs or more zipping around – and they can really zip – it’s a bit of a ‘cut and thrust’ event. But there is no suggestion that we should turn these sessions into something more sophisticated; everyone just has fun! The only rule to avoid destruction is that we all go clockwise, but of course there is always one!
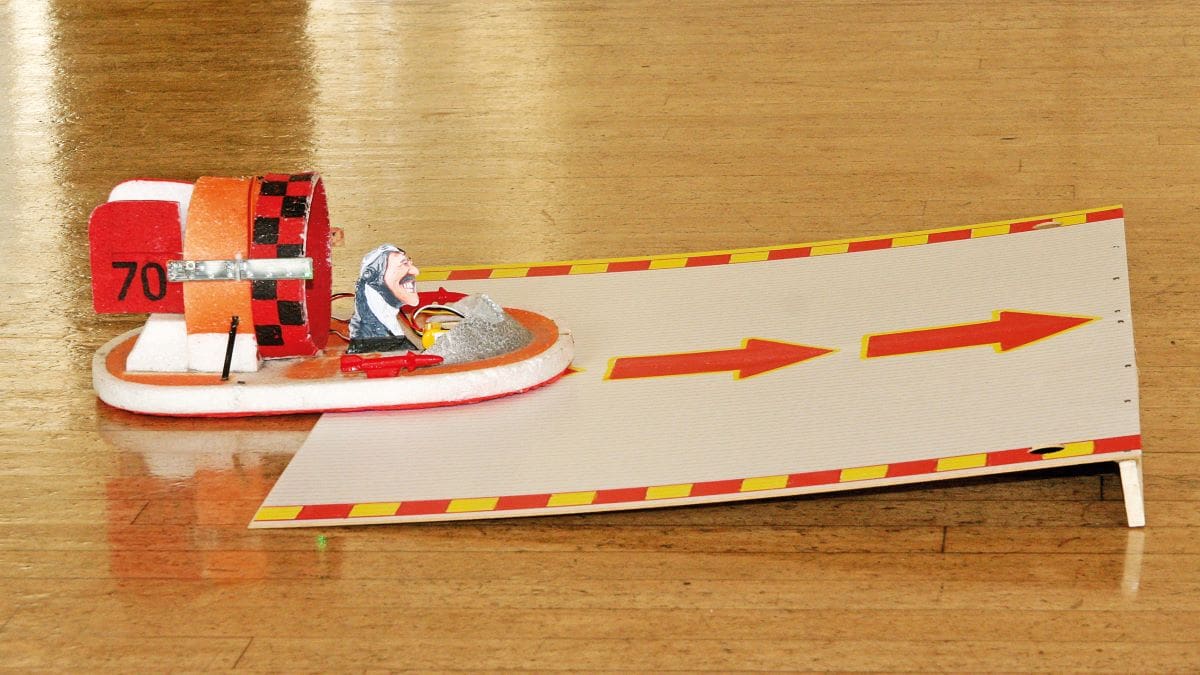
ON THE RAMP
Sadly, I took my portable Airbug ramp apart or we might be giving it another go. The Mk II ramp was double sided and wider but was still the cause of many mishaps.
There were two criteria to survive: 1) approach the ramp accurately (not particularly easy) and 2) get the right speed; too slow and leaving the ramp was untidy, too fast and the Airbug usually did a spectacular roll, landing inverted! When you got it just right it was very satisfying experience.
GOING THE OTHER WAY
The Chiticats also just circulate at ridiculous speeds, but anticlockwise this time as we found torque was an issue. These models are truly fast, and an early requirement was for a prop guard to avoid ankle injuries. They stick like glue to the floor, which is why they can be driven at such fast speeds. For some reason mid-airs are quite common, even when there are only two on the floor!
As you will have gathered, it is all about having a good time indoors and taking advantage of the space. So, why not use the floor? After all, you have paid for it!
LATEST UPDATE
With the resumption of our indoor sessions in September 2021, I was able to test my new hovercraft. The Kiddy Craft Mk III was not quite as fast as an Airbug but is extremely easy to control and therefore very relaxing to pilot.
The Airbug replacement performs well, but more care on the corners is required as it can roll or run out of space, depending on the speed. Some ‘drift’ techniques have to be learnt to get the best out of any fast model.
And the big Vector? In a straight line this is truly fast but, unlike the Chiticats, if flown too fast on the corners it will flip and roll quite spectacularly. I will experiment with a heavier LiPo pack but may have to just throttle back a bit when cornering!
So, whether you think hovercraft are for flying close to the ground or just in the air, they really are great fun to operate when more than one are gathered together.
Finally, if you are looking for a larger and very capable hovercraft both for electric and IC, then look up Palaform Ltd. Their hovercraft are more for multi-terrain outdoor use but I’ve had one of their models and I know they perform well.


