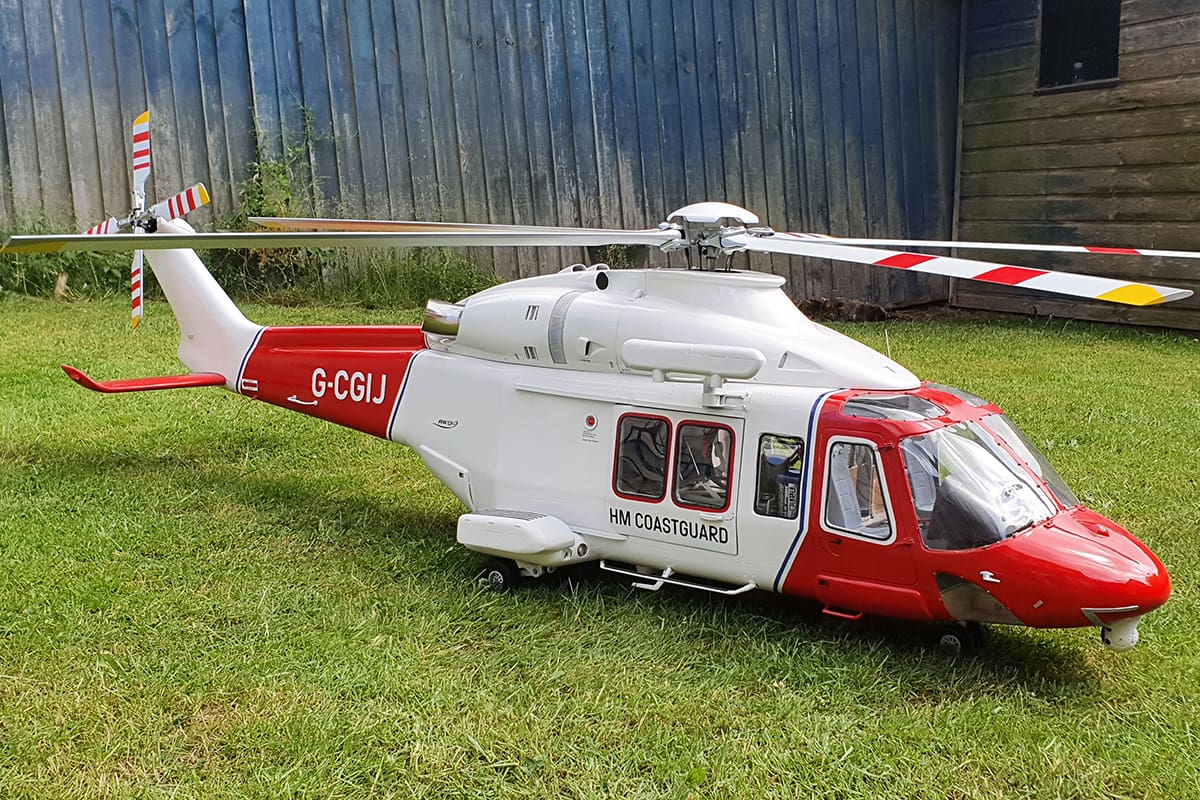
In the second of a two-part feature, Kenny Morton finishes and flies his Search & Rescue helicopter
words >> Kenny Morton
photos >> Kenny Morton, Paul Collins
Enjoy more RCM&E Magazine reading every month.
Click here to subscribe & save.
In the previous thrilling episode, we had got to the point where we had, in the immortal words of Richard Rawlings (Misfit Garage, TV show), ‘Fired it up’. Read on, as we get this beast finished and airborne.
ATTENTION TO DETAIL
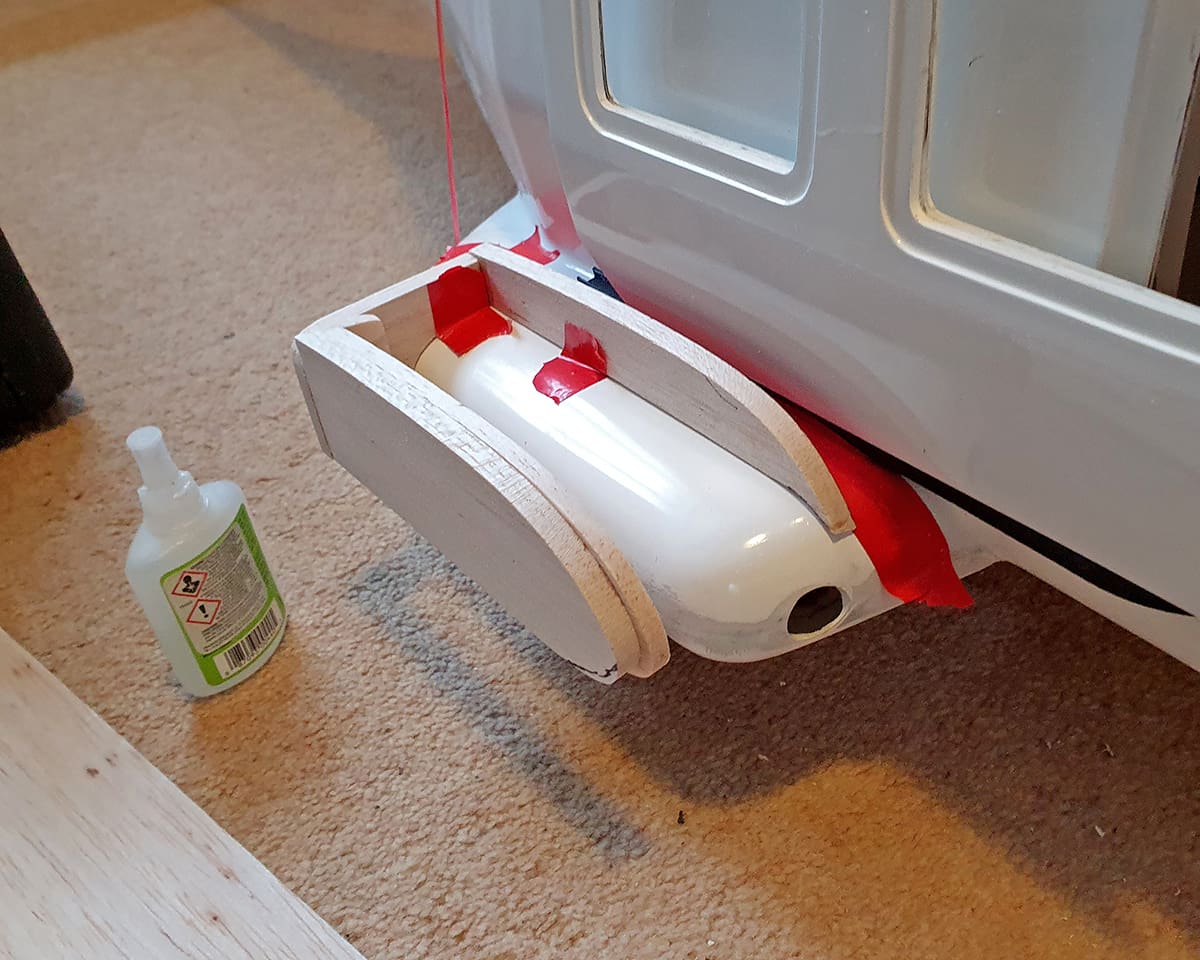
Once the tail was attached, I then had the joyful task of re-installing everything that I took out before. Once that was done, I began work on getting the scale details right. I began by making the ‘strake’ that runs down the side of the tail boom. Curiously absent from other scale AW139s, mine was made from 1/2” sheet balsa, cut and sanded using a cardboard template. Since it sits on its edge, I drilled pins into the tail boom to provide support and epoxied the whole thing using micro balloons as a filler.
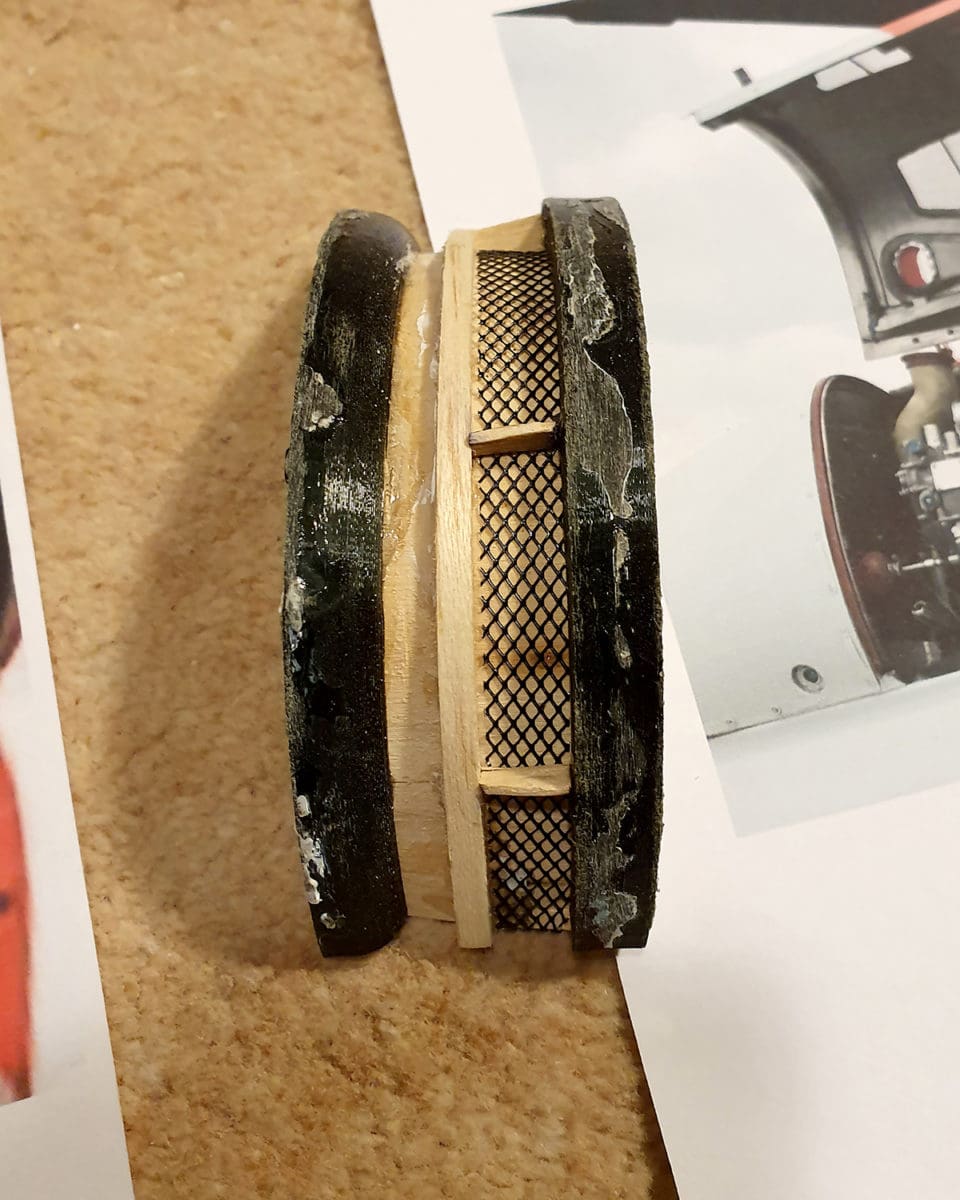
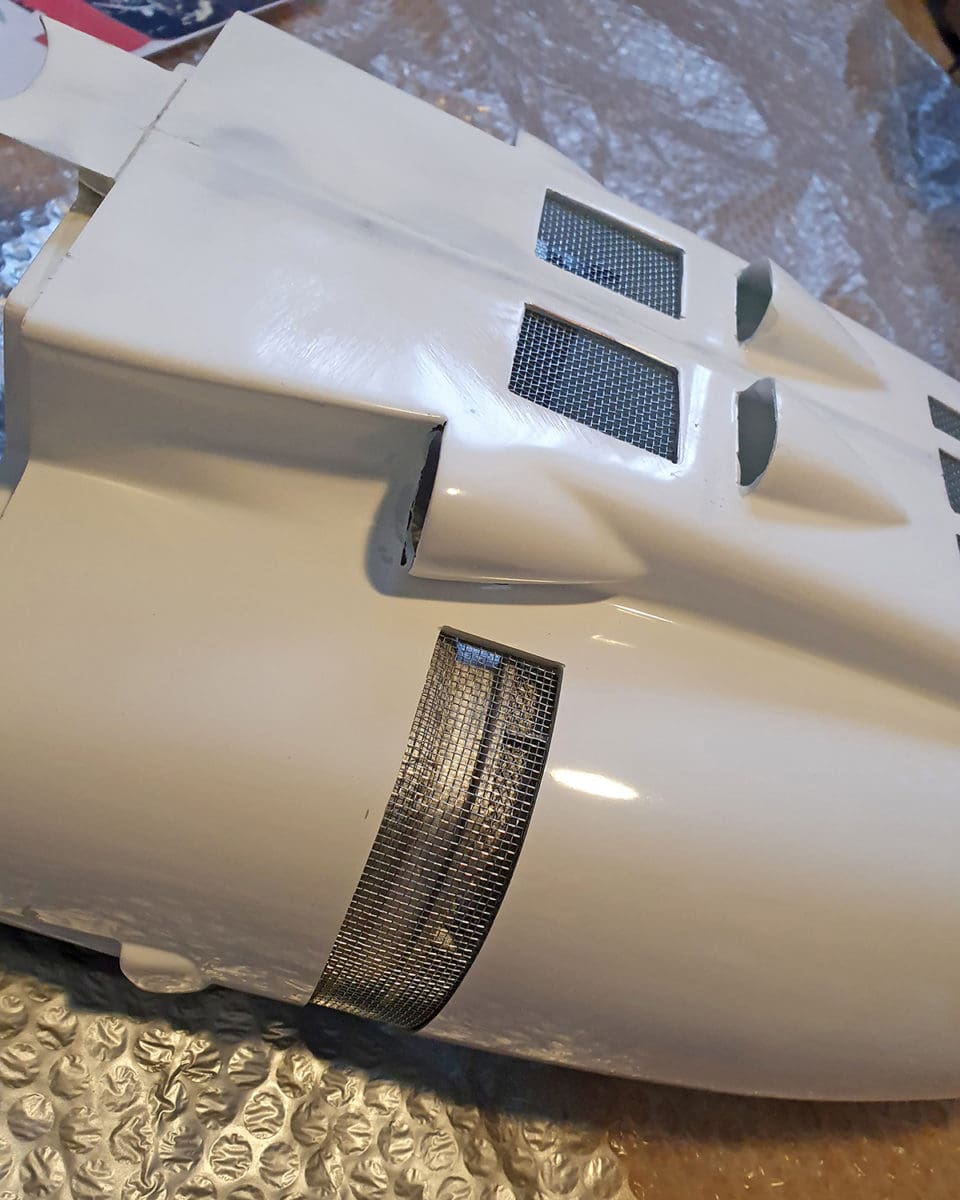
Next, I built the air intakes. On the full-size you can see the turbines on the other side of the mesh. I therefore 3D printed four turbine shaped ‘sticks’, which I then heated and bent to the shape of the doghouse assembly, using balsa sheet to bridge the gap between the ‘sticks’. Once done, I turned the whole thing over and created several triangular fillets, infilled the spaces with body repair mesh on top of the balsa and sprayed the whole thing strategically black and silver.

One challenge was the creation of the life rafts, which the helicopter carries in pods on the sponsons. These were again started in card and once the shape was established, I then created them in balsa.
Other scale details, such as the emergency floats, were made in a similar way, using cardboard to get the shape and size, then either creating them in balsa or by 3D printing. Making all the scale details took around two months and by the time they were complete I could pretty much create anything in CAD.
I wanted to add a fully working slide door to the model. Looking at the full-size helicopter I could see the ‘white van’ style runners, so I designed them in Fusion 360, then I designed stand-off pegs, which I glued to the doors. After a few tries I ended up with a door that would slide open just like the real thing. I modified an old servo for continuous rotation and installed this under the floor of the fuselage. I then fitted a pulley system to the door. The door now opened and closed by remote control, but I quickly realised that it was quite fragile. So I decided to shelve it and come back to it at a later date.
GLASS COCKPIT
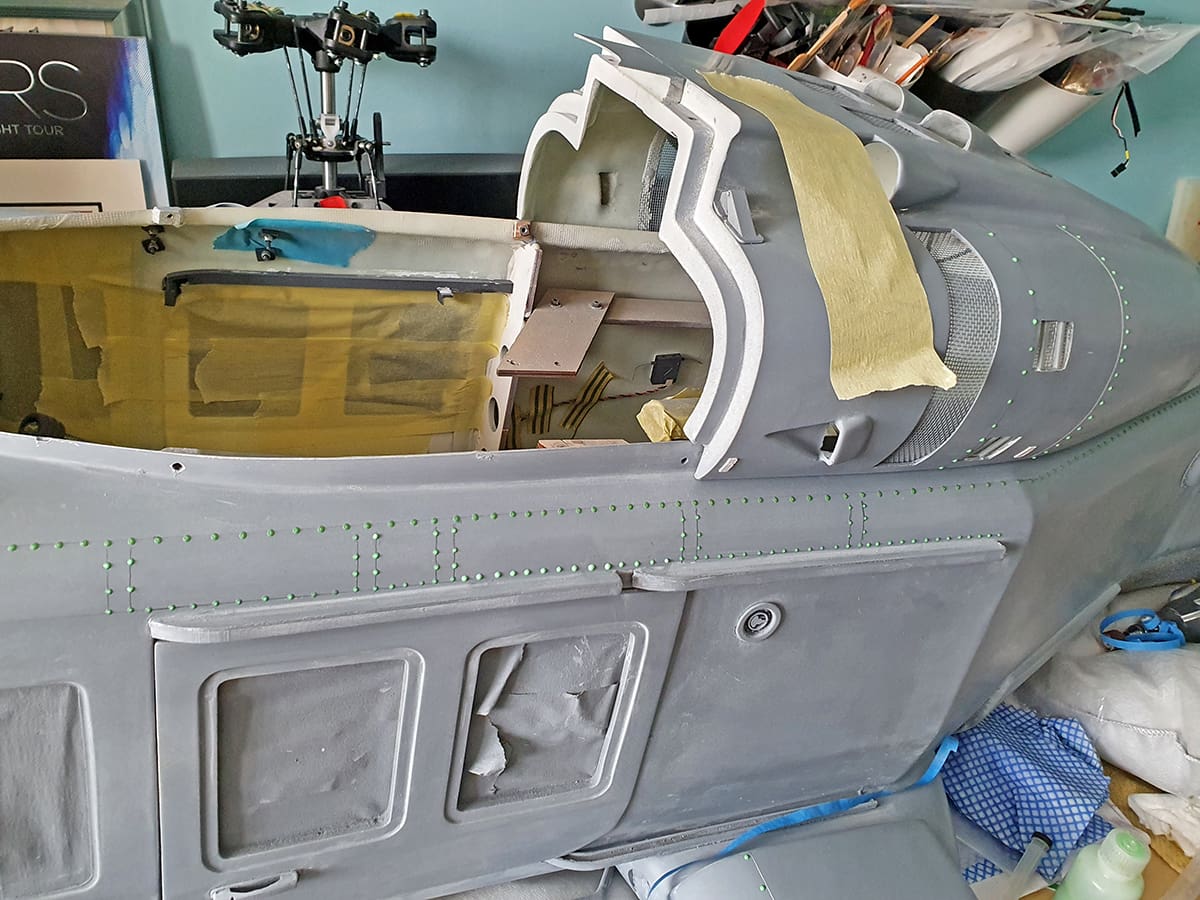
Eventually my detailing work moved to the cockpit, and it was here that I had another brainwave… The full-size AW139 has a ‘glass’ cockpit, which basically means that instead of a myriad of gauges and dials etc. there are four monitor screens. But a fully detailed cockpit would look quite dull with these as blank glass. Then I thought, ‘I wonder if I could make the screens work…?’
I sourced a couple of cheap Arduino computers and 4.3” LCD screens. I initially made the cockpit in cardboard again. Once the shape was set, I made the facia in ply and cut holes to take the LCDs. Finally, I had to cover over the back of the facia to meet up with the windshield. My first go was an unmitigated disaster; I got the crazy idea of putting glass fibre over the cardboard template. The result was resin impregnated mush. So, I went back to basics using balsa sheet. I started in the middle and worked out to the edge. The flexibility of the balsa worked well, and I ended up with something acceptable.
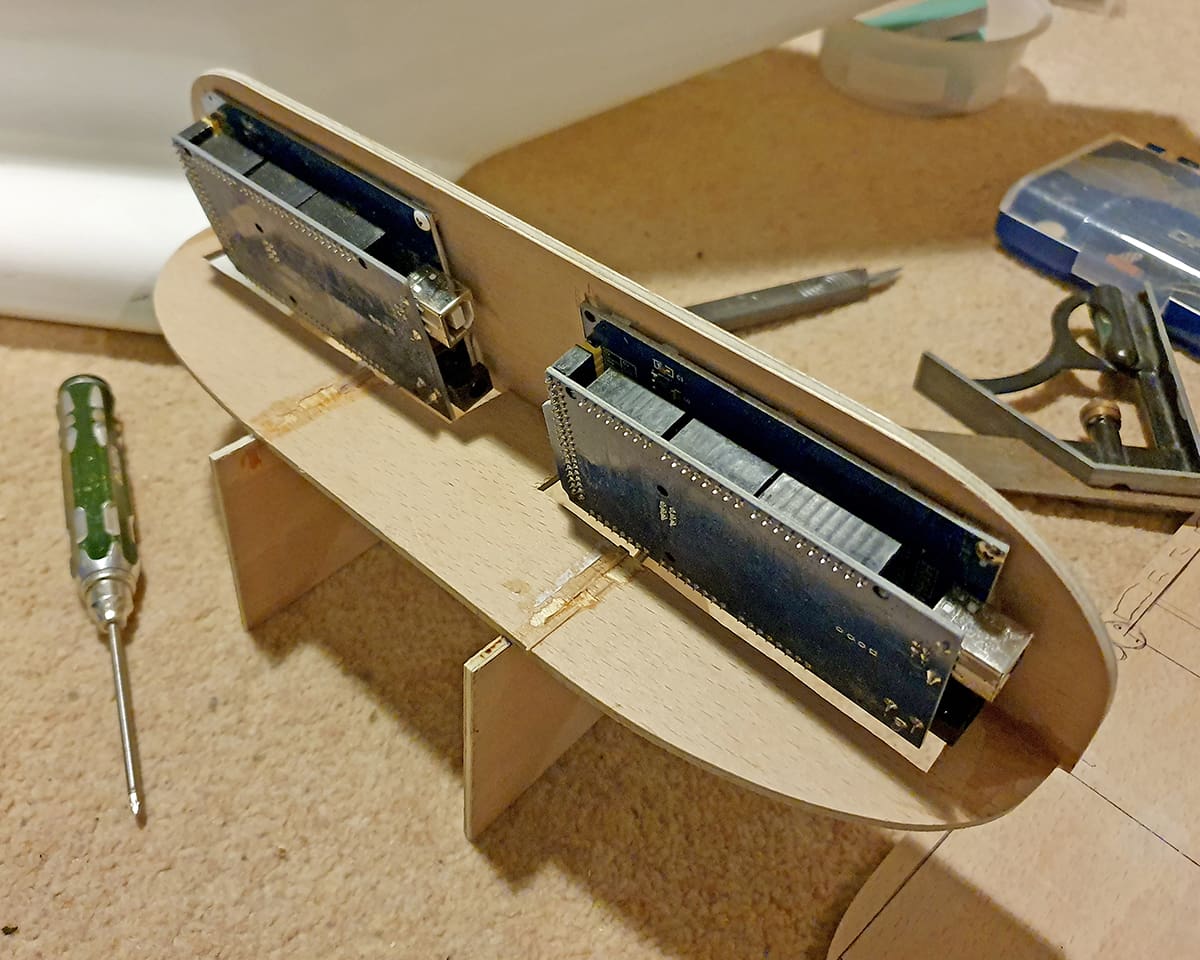
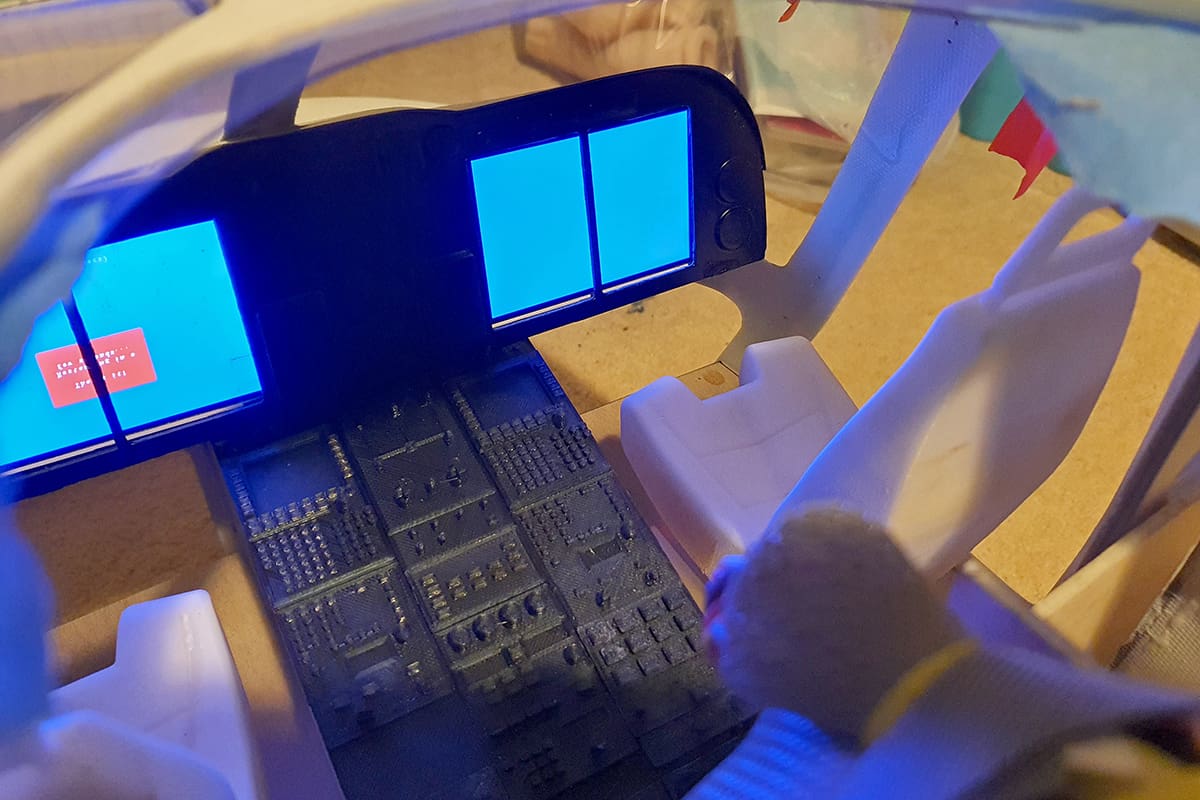
Now came the fun of fitting two small computers inside the space. This took several days but eventually they went in, and the result was spectacular. I still had no clue how I was going to get these screens to do what I wanted so again this was shelved for the moment.
After building the cockpit I turned my attention to getting the machine ready to fly.
GOSH, THIS IS HEAVY!
I reinstalled the mechanics and then I needed to figure out was required to get the Centre of Gravity in the right place. I put 2 x 5000mAh 6S LiPos against the cockpit bulkhead and lifted the model up by the rotor head. She was extremely tail heavy and at this point it was apparent that a lot of ballast weight was needed – like a nose full!
Since there was a retractable landing leg in there my options were, to say the least, limited. I added another 2 x 4500mAh packs next to the existing ones and lifted it again. Now, whilst trying to avoid giving birth to my colon, I noted that the tail was now nearly level. A couple of smaller packs and we were pretty much there, and I was relatively happy. That was until I happened to mention its obesity to Vario UK. Their response filled me with horror, ‘It’s not over 20kg, is it?’
This was a concern because, as I’m sure many of you will know, if a model is heavier than 20kg it becomes classed as a ‘large model’ and all kinds of rules kick in. I got hold of some scales… 14.7kg – phew! Even with 1kg of paint and a bunch of other stuff, she still wasn’t going to break the magic 20kg, so I could breathe again.
The run up to the maiden flight was now well and truly on.
FIRST FLIGHT
Maiden flight day is always a nervous affair but compared to a fixed wing model I am sure it is much less fraught because helicopters can get away with not fully committing to flight. I am certain, however, that my fellow club members have a sixth sense for when carnage is possible, as they all turn up to watch. This was the case for me, as when the big day came there seemed to be an unnatural number of spectators.
There was nothing for it but to stumble out to the flightline with the heavy beast and go for it. I stood back and cracked open the throttle; she spooled up and sat there, but no lift off. She did manage to collapse one of the landing gear legs, however. With that issue sorted, I upped my throttle settings and repeated the exercise.

This time she lifted. My heart was in my mouth as she was extremely twitchy and difficult to control, but she flew. I fought with her in the hover for about a minute before landing. But ‘SHE FLIES!’
After a few flights, I managed to tone things down a bit, but not enough, so I sought help and got in touch with someone who provided the settings that he had used for his Bavarian Demon gyro. After this, she flew more calmly and a I conducted a few more test flights.
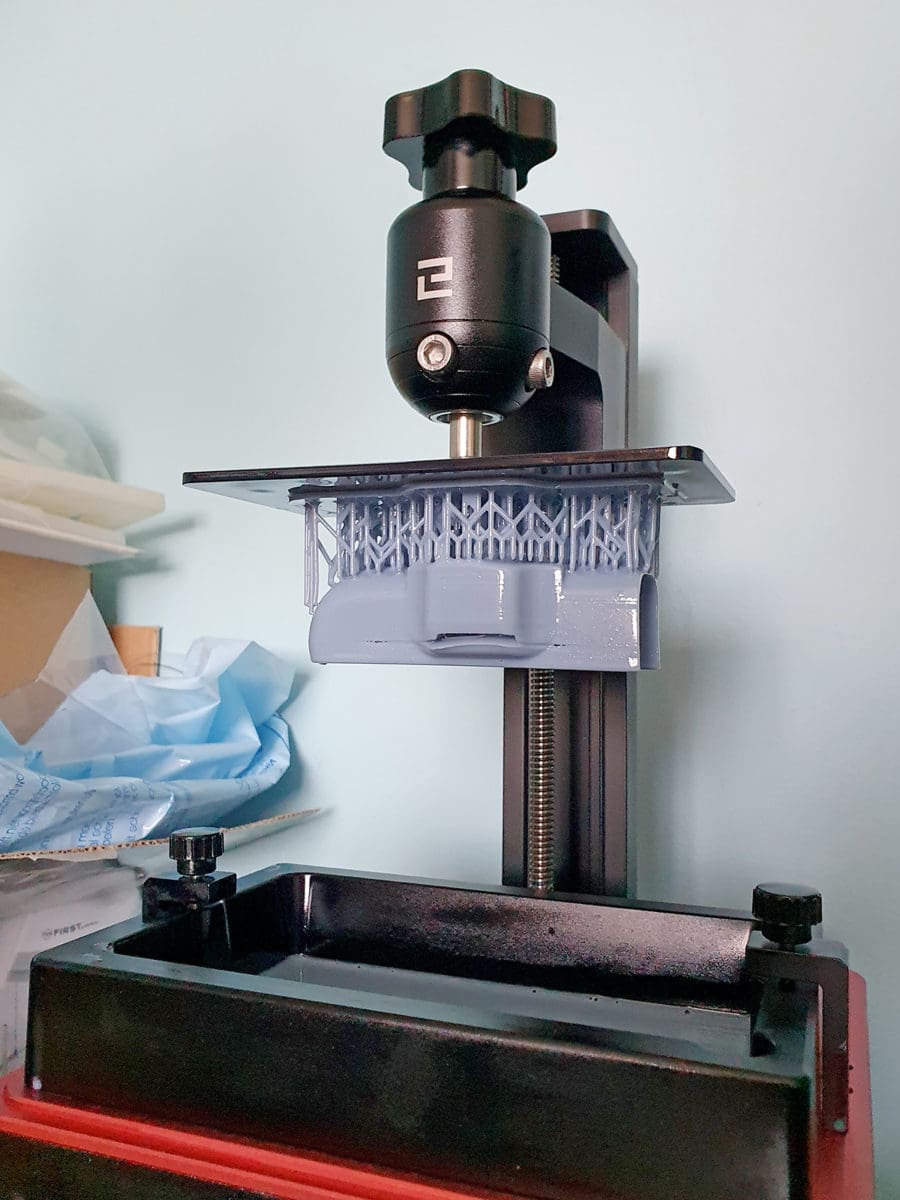
I needed to add the remaining scale details, then I needed to prepare the whole thing for paint. The remaining fine scale details were mostly created by designing them in Fusion 360. Then I acquired an Elegoo Mars Resin 3D printer, which has much higher resolution than my traditional FDM (filament) 3D printer, so the fine details such as door handles looked better but were much more brittle. So, I had to be careful which parts were made with each printer.
In the end all the details were added, and I could begin the long and harrowing job of getting paint on the machine.
PAINT SHOP
Of course, the process begins with… TAKING IT ALL APART AGAIN!
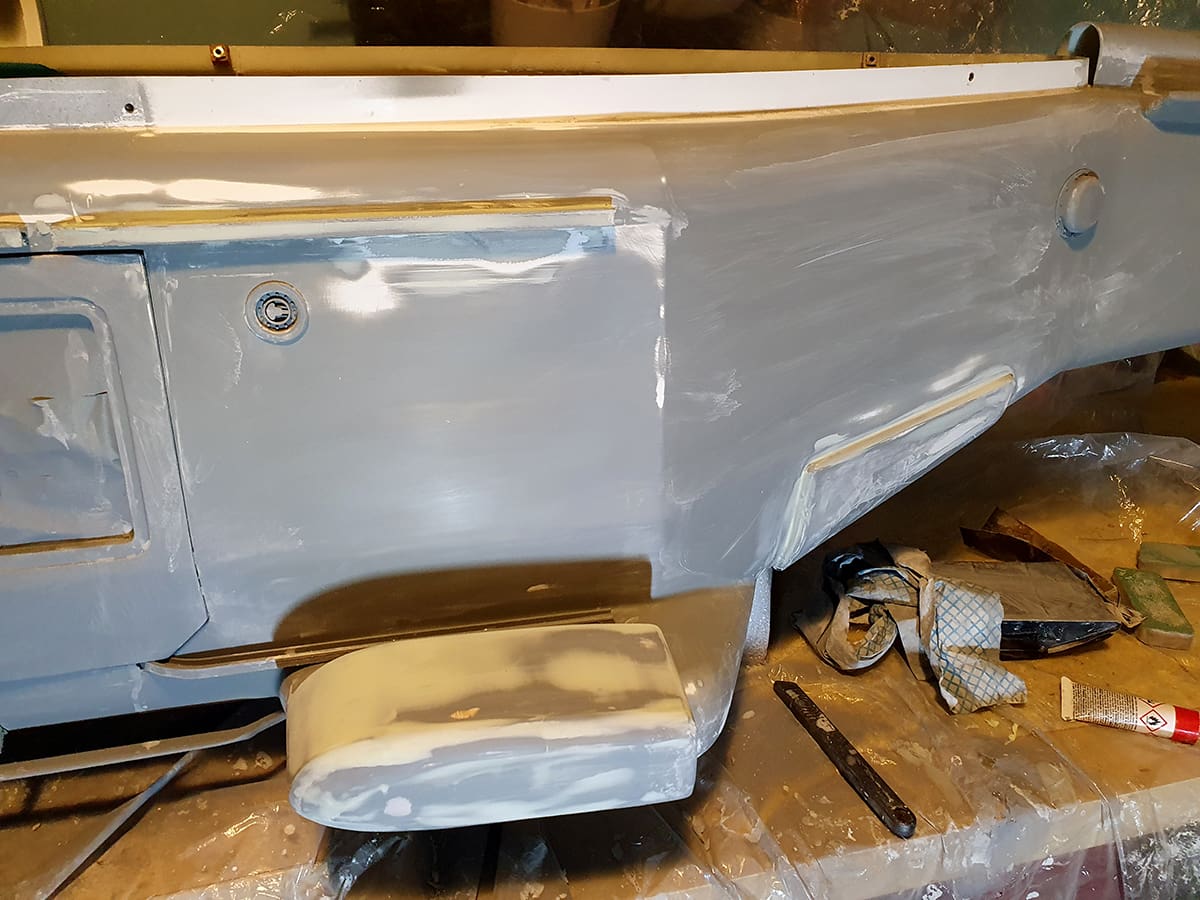
Next, the job I hate – sanding, inspecting, filling, and priming. Repeated over and over, ad nauseum, whilst the number of imperfections slowly reduce. Eventually I got to the stage where it looked done, so I obtained some two-pack primer, sprayed it on and – yes, you guessed it – started the process all over again!
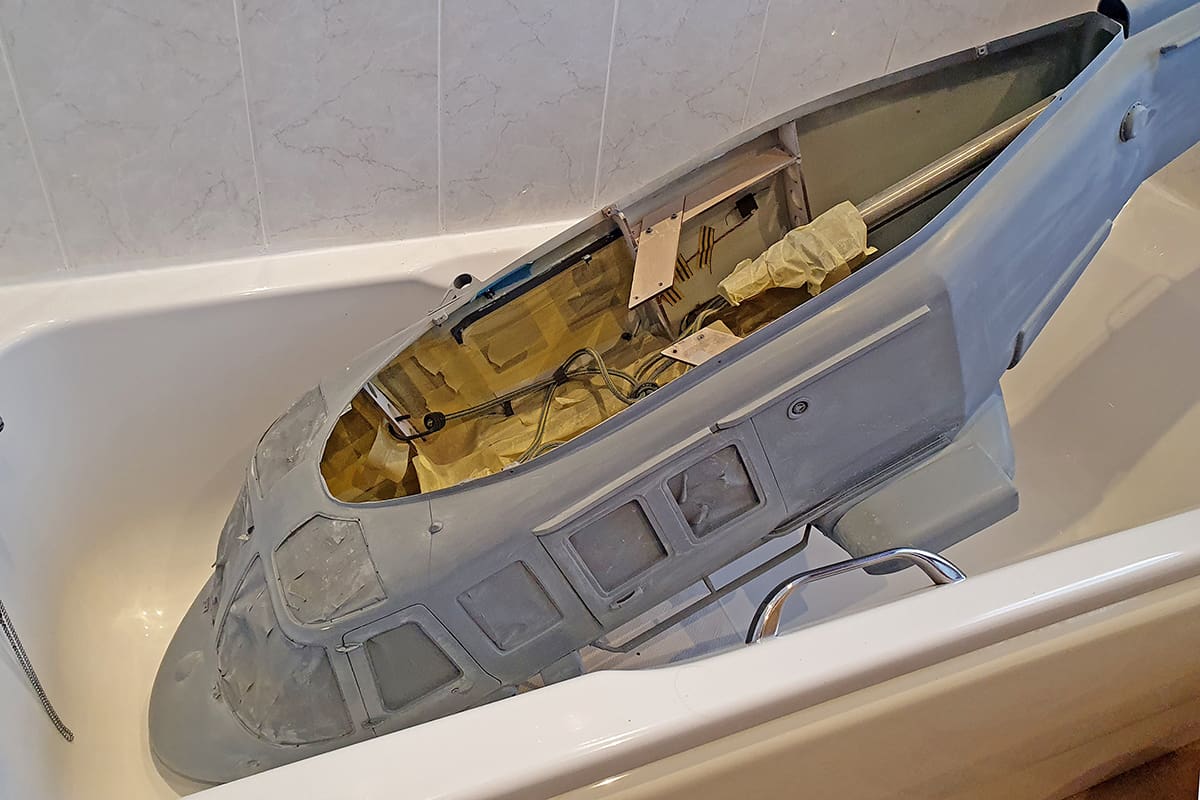
Eventually I got it somewhere close to smooth. To congratulate myself, I gave the model a bath, literally! I put it in the bath to clean off all the remaining dust.
ENDGAME
The rivets on the model are simply dots of PVA glue dabbed on with a syringe. I am not a ‘rivet counter’ but it really does stand out if the rivets are omitted completely or in the wrong places. Riveting is, to me, a cathartic exercise and on a machine of this size it took a while. Thankfully the full-size AW139 is part composite, so there are not millions of the things. Eventually it was ready for its final clothing of red and white paint.
Getting the colour of a model correct is quite difficult. Ask any Airwolf builder what colour it is, and you’ll get a different answer from black to green. The same is true for my AW139, so I emailed the Coastguard. Helpfully, they replied with paint codes. Proud of myself, I trotted down to the local car paint supplier and asked for the paint codes I had been supplied, only to be told, ‘That’s an aviation colour; we can’t do those.’
Defeated, I asked for help, and they provided the phone number of PPG Automotive. I contacted them to ask for a cross match, but no joy. However, they did give me the email address of PPG Aviation. So, I emailed them, explained the project, and asked for colour samples. About two weeks later and I was back at the paint supplier with swatches of the correct paints, which they quickly scanned, and I was promptly provided with the automotive versions of the HM Coastguard paint colours.
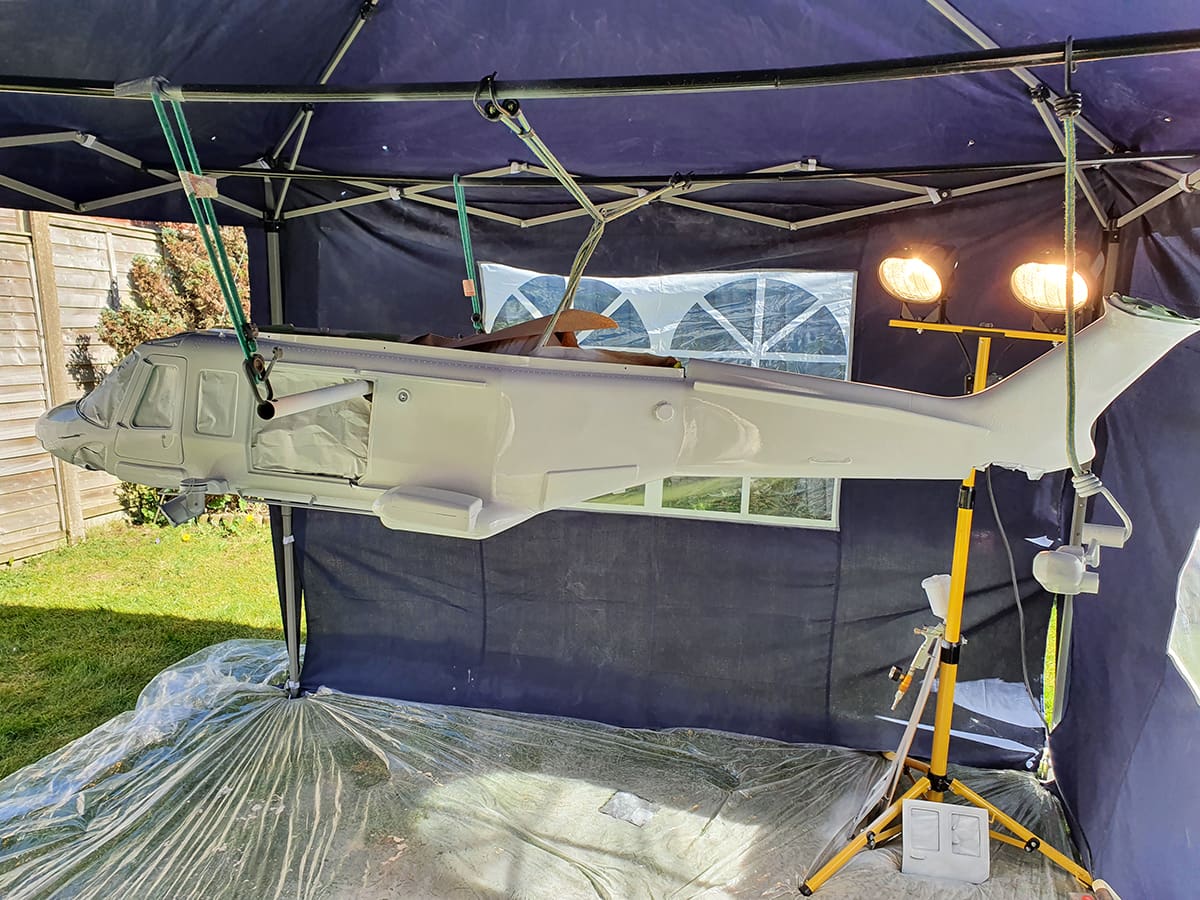
I initially masked the machine for white. Since the model was large, I could not spray it inside, but I did not want to risk spraying it in the open air. So, I opted for the middle ground and sprayed it in a sided gazebo in my back garden. I sprayed the first two coats of white, then using fine sandpaper I flatted everything off and re-masked the model for red. The same process was repeated for the blue stripe and finally I sprayed on a coat of clear over the top.
With the painting behind me, I could re-assemble the whole thing. With everything reinstalled my attention turned to getting the signage right. I used a vinyl cutter for the big lettering and for the smaller stuff I created using PowerPoint and printed onto decal paper.
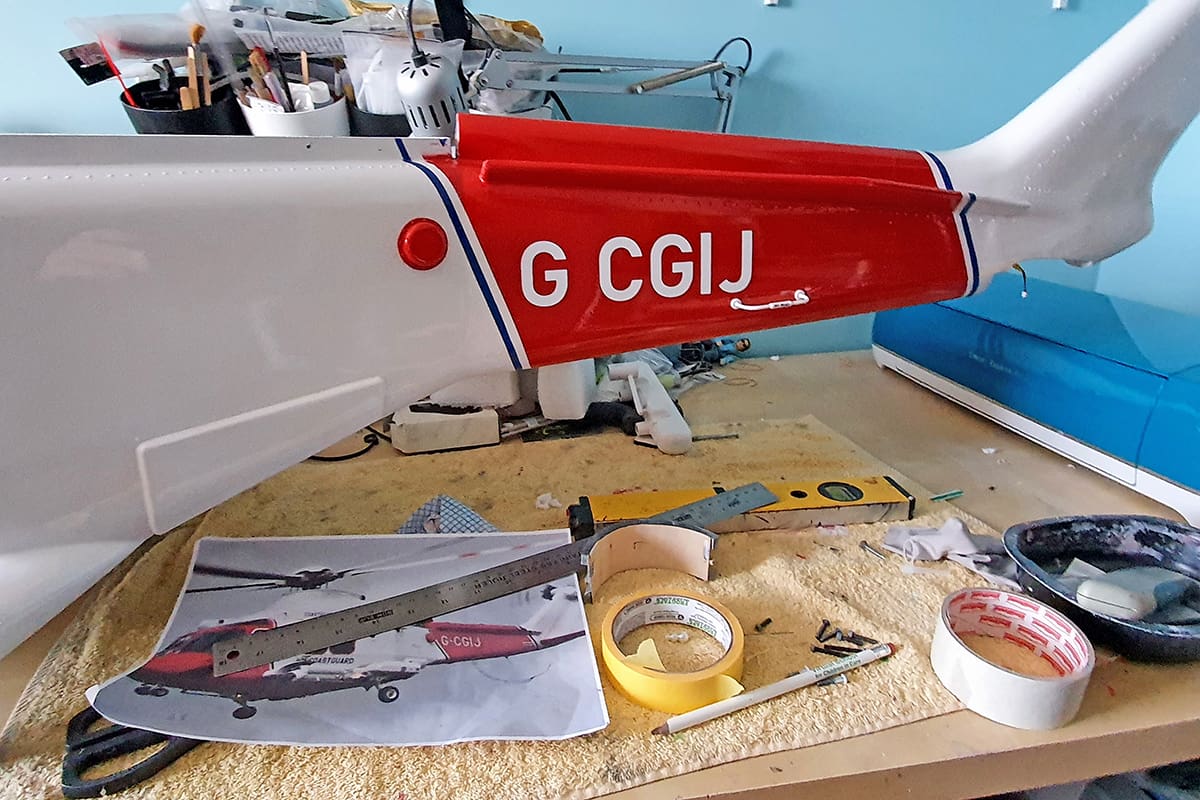
The actual information for the small signage came from my nephew who is a dispatcher at Prestwick airport. There is a Coastguard station at the airport, and they agreed to let him do a walkaround of one of their helicopters with his camera. Using his tures, I was able to re-create the signage accurately at 1/7th scale. The only small concession to detail is that the signage on my model is accurate for an AW189, but don’t tell anybody and they’ll never know!
PILOT & EXHAUSTS
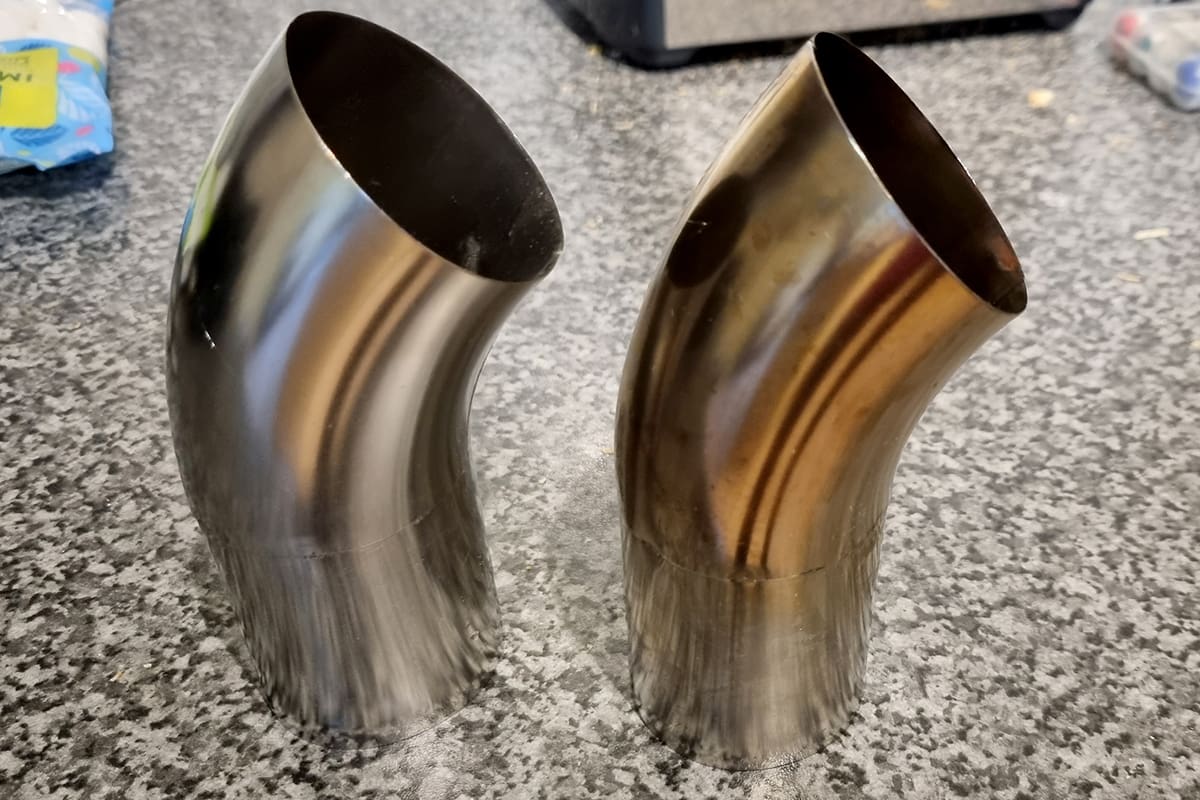
The only things I needed to do now was to create a pilot and sort out the very shiny stainless steel dummy exhausts.
Sorting the exhausts was relatively simple; I put them on the gas stove for about five minutes. They quickly coloured to a lovely coppery brown – very realistic.
Creating a pilot involved me downloading a pilot figure from ‘Thingiverse’ and modifying it to suit. The pilot’s visor is made from an old pair of sunglasses, and he has a massive hole in his derriere so that I could drill out a lot of the infill material to lighten him up!
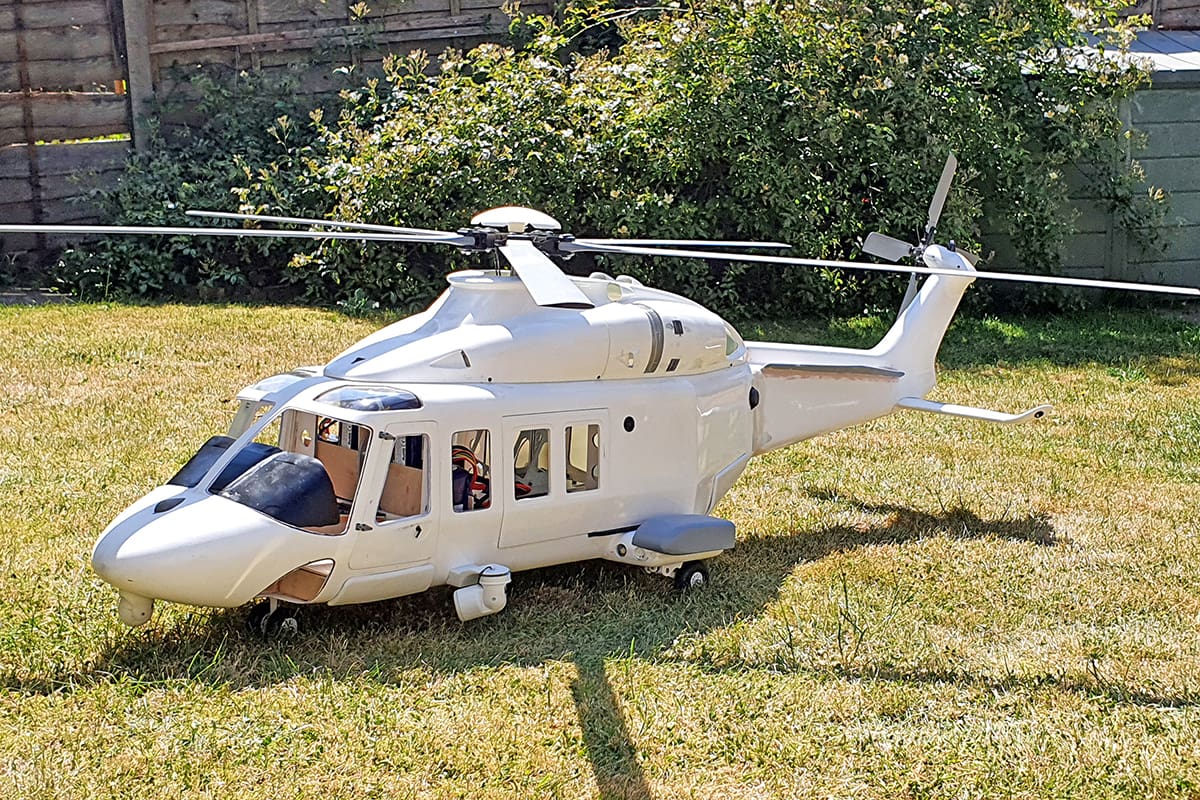
LIFT OFF
Flying this beast is a little scary. The sheer amount of time and effort involved in building it means that if she goes in it’s going to take a LONG time to fix, that’s not withstanding the cost of it all.
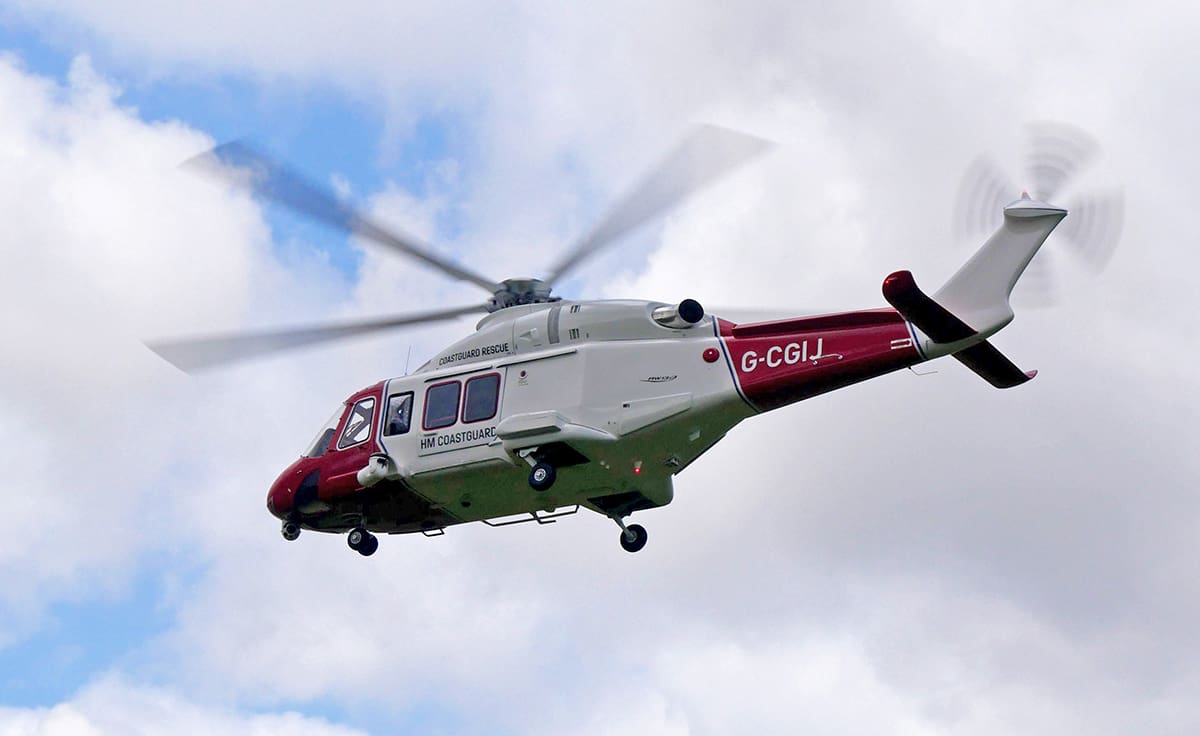
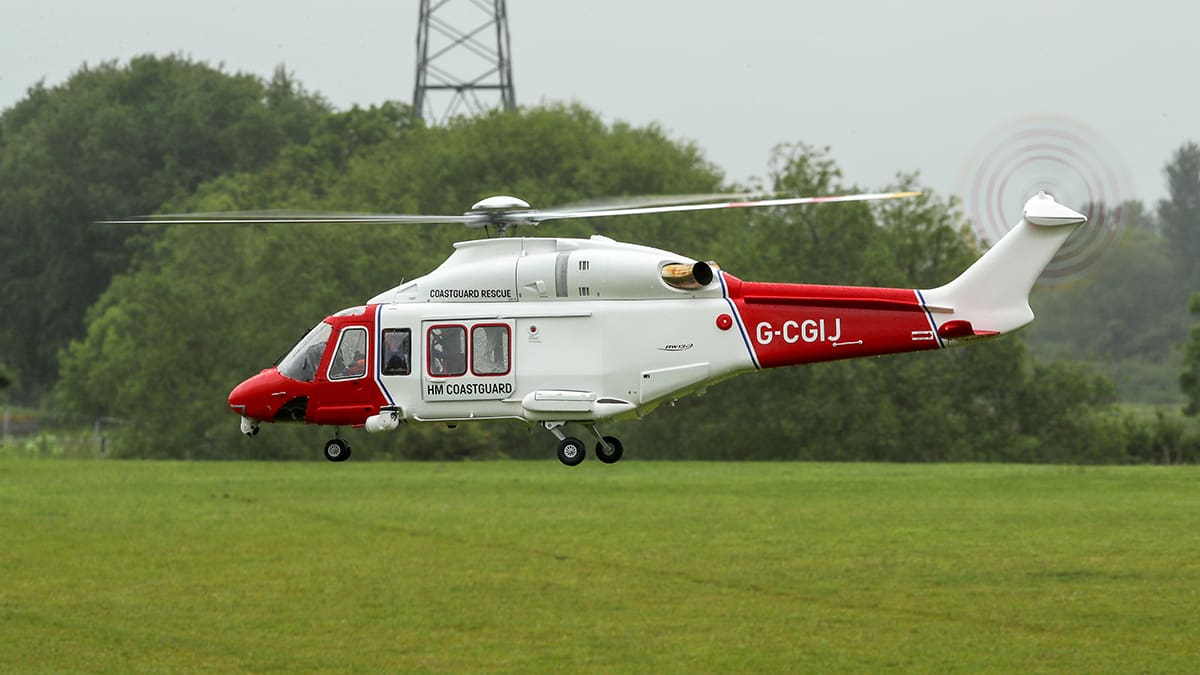
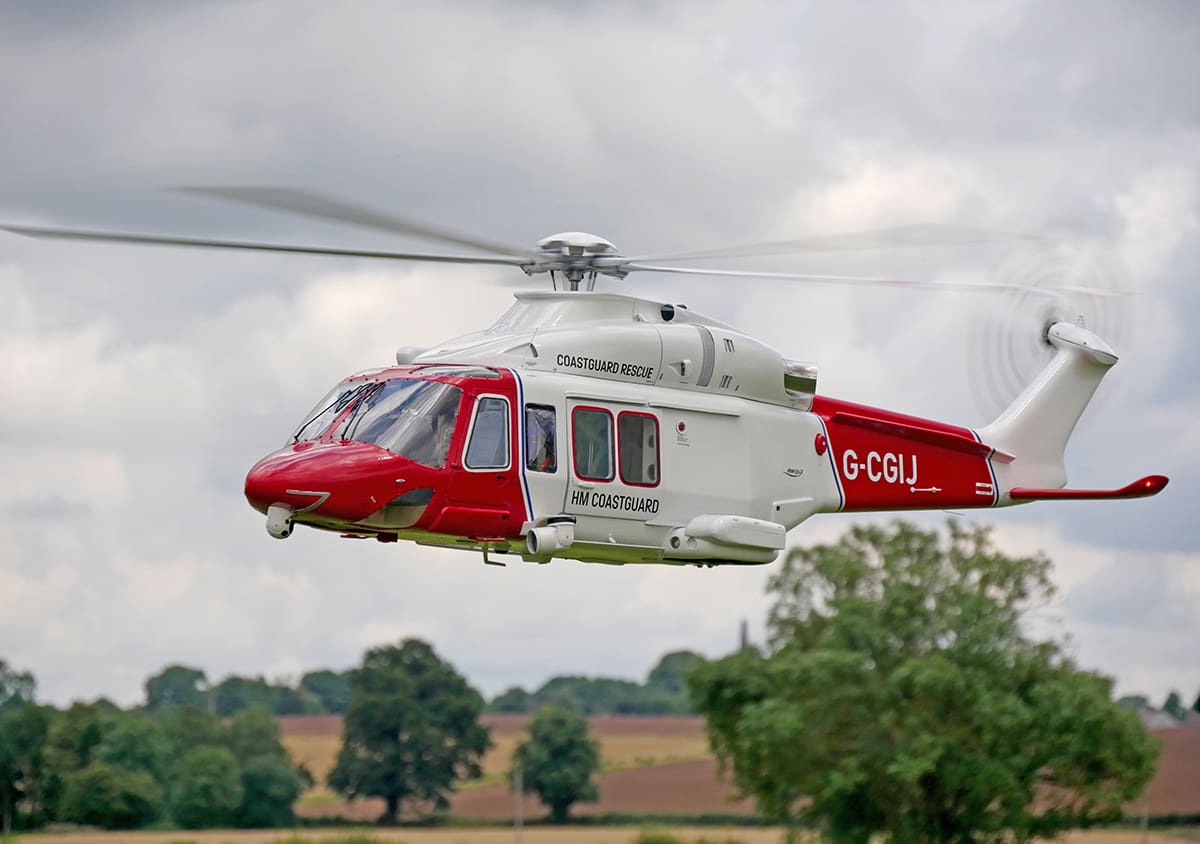
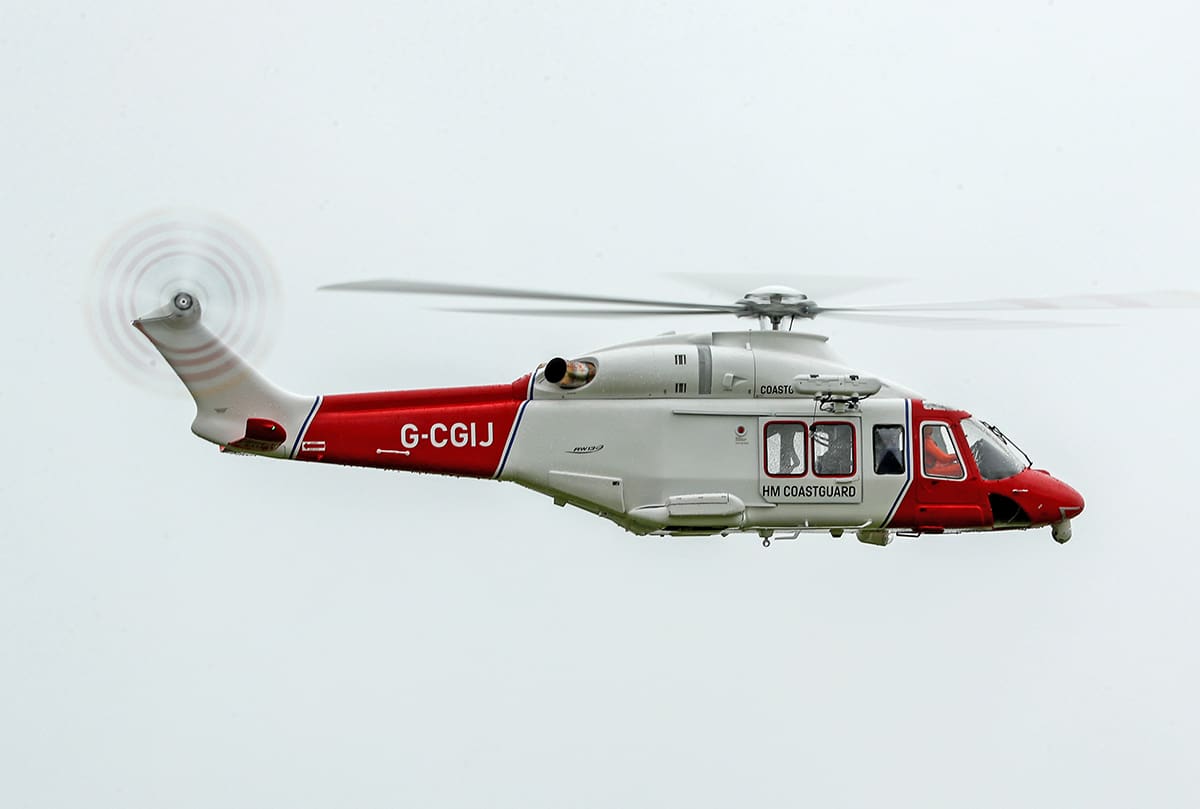
Also, she weighs at least 17kg – and she never lets you forget it! With most model helicopters it pays to be one step ahead of the machine, but with the AW139 two steps ahead is a minimum and I’d prefer to be three. She also exhibits some ‘interesting’ tendencies due to the offset tail rotor, whereby if you apply left rudder the nose wants to drop and right rudder makes the nose want to lift. All of the above being said, she looks absolutely stunning in the air.
There are a few more things that need to be completed – the door for example – but I’ll get to those in due course. Short term I’m going to be fixing my rather sick Airwolf.