Paul Cox reveals a simple way to bring your receiver status light to the fore
Knowing that your transmitter is solidly bound with your model’s receiver can be a concern if the receiver is buried in the bowels of your pride and joy and you’re unable to view the status light to give you comfort and confidence.
I dreamt up a neat solution to this dilemma that I thought worthy of sharing. The idea came to me when I stumbled on a kid’s fibre optic illuminated toy. They only cost a few quid and will give you enough of the fibres to last until the cows come home (which, I understand, is quite a considerable amount of time).
Enjoy more RCM&E Magazine reading every month.
Click here to subscribe & save.
The technique is simple and effective but will require you to drill a small hole in your beloved receiver. Naturally this will put some people off, but if you’re feeling bold and up for it read on…
(This will also void any existing guarantee! – KC)
IN THE TUBE
I used a chopped down disposable plastic pipette to act as an end to the fibre optic bundle, but any suitable sized tube will do. Don’t be tempted to use heat shrink as your fibres will wither and die before your very eyes when heated. I tried – it was not pretty. Instead, super glue the fibre bunch into the tube and for good optical clarity use a fresh scalpel blade to cut the end square.

Next is the slightly risky bit of drilling a suitably sized hole in the case of your receiver, directly above the internal light. Make the hole a tight fit so your tube encased fibre-optic bundle can be pushed into place without the need for any adhesive; this will make for easy removal as and when the time comes.
Next, choose a location on your airframe for the opposite end to be on display, prepped in the same manner as the receiver end. Drill a hole there and, hey-presto, you’ll have an external and clearly visible confirmation of a good bind.
DASHBOARD
I went one step further on my Rich Harris Panther Autogyro and drilled a series of small holes in the dashboard to illuminate the dials and gauges, with one fibre run through each tiny hole and bonded into place. Push them through so that each fibre is proud and trim off flush once the glue is set.
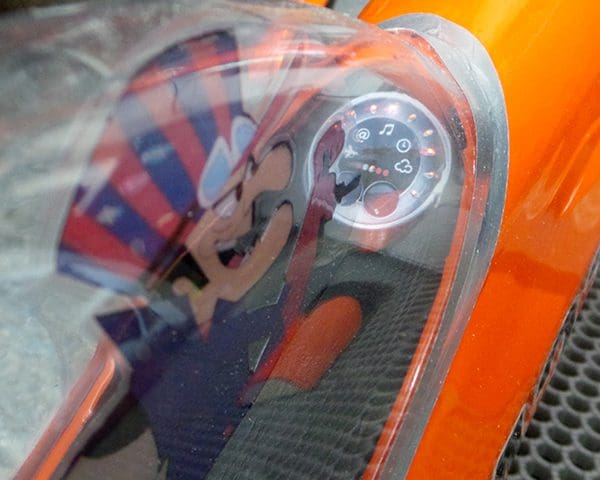
The result is an illuminated dash that doubles up as several visible receiver bind confirmation lights.