
As David Ashby discovers, when it comes to vintage gliders bigger is indeed better…
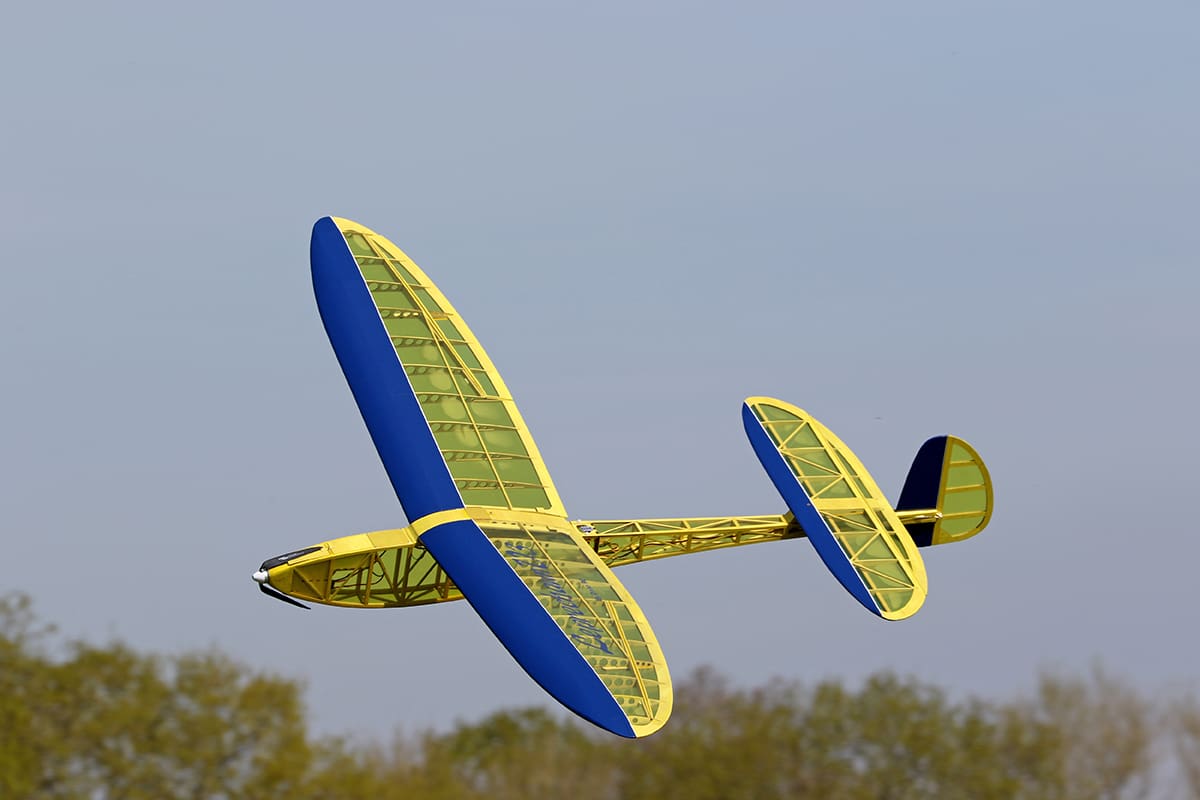
Designed by Dick Twomey as a large 90” span, low aspect ratio free-flight glider, Leprechaun featured in the March 1950 issue of Aeromodeller. Typical for plan features of the time there’s little detail apart from impressive flight recordings. Twomey’s original flew for 20 minutes O.O.S. (out of sight) on its maiden outing from a tow line, the magazine noting that a 2.5hr, 22-mile flight was also later recorded.
The plan is out there along with Leprechaun kits in various sizes from several makers. This one is from Dane-RC, the manufacturing business run by proprietor and lifelong modeller Michael Jacobsen. He produces several interesting models – the Wisel Wing slope glider is one you may have come across – but it was the Leprechaun, now in its third generation, that helped establish his business a few years ago.
Enjoy more RCM&E Magazine reading every month.
Click here to subscribe & save.
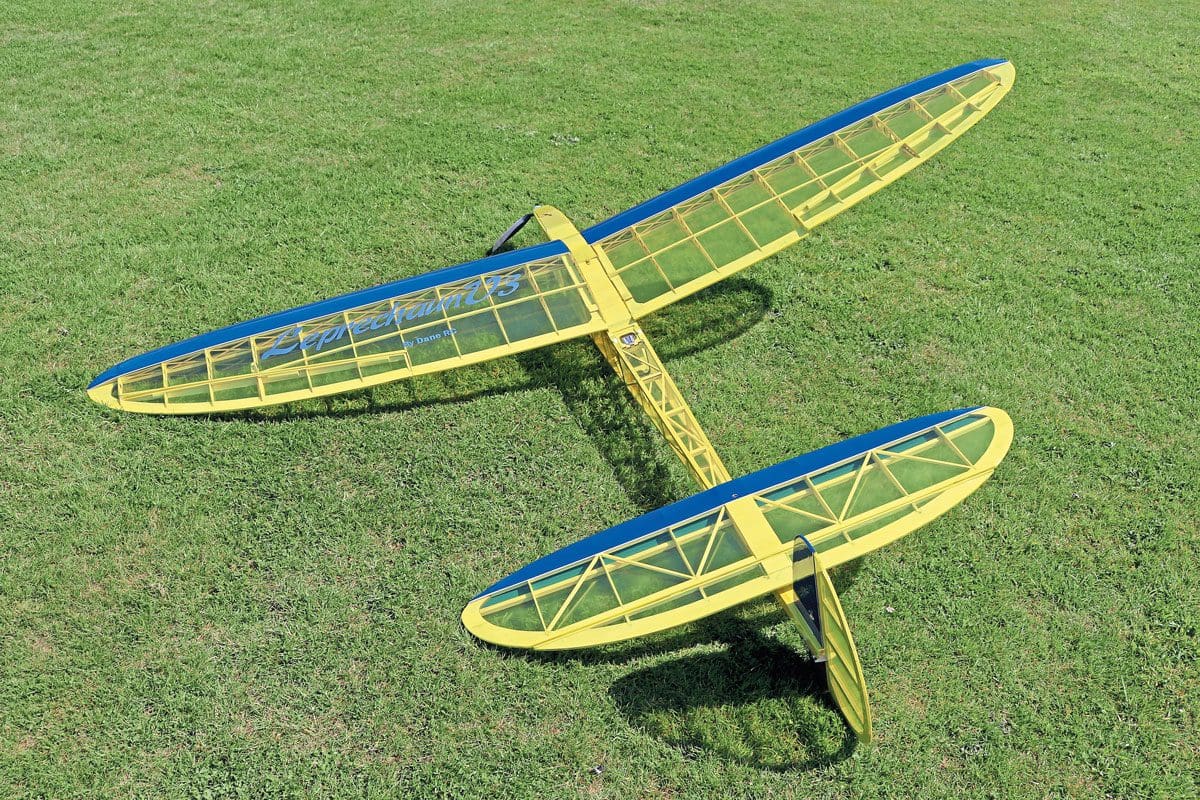
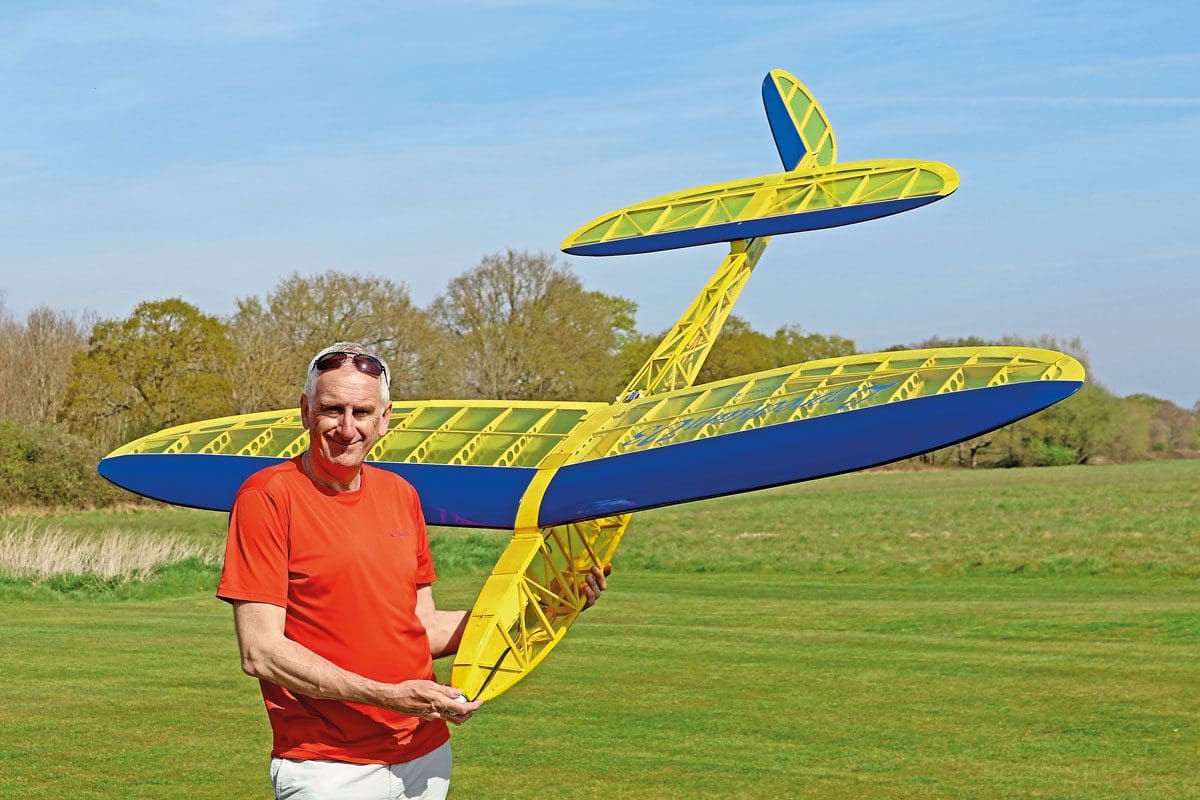
I found a copy of the March ’50 magazine, from which it’s clear there are some outline changes from the original. Dane-RC produce it with several options, and I’ve built the V3 version, which is supplied as a complete kit or a light kit to which you need add your own strip and sheet balsa. Spanning 2665mm with a chord of 470mm at the wing root and a fuselage over 2m long, this is a large model. But an XL kit spanning 4120mm is also available, so long as your building and transportation arrangements aren’t compromised. Finally, an expansion kit is available separately if you’d prefer the standard model for starters, then grow it later.
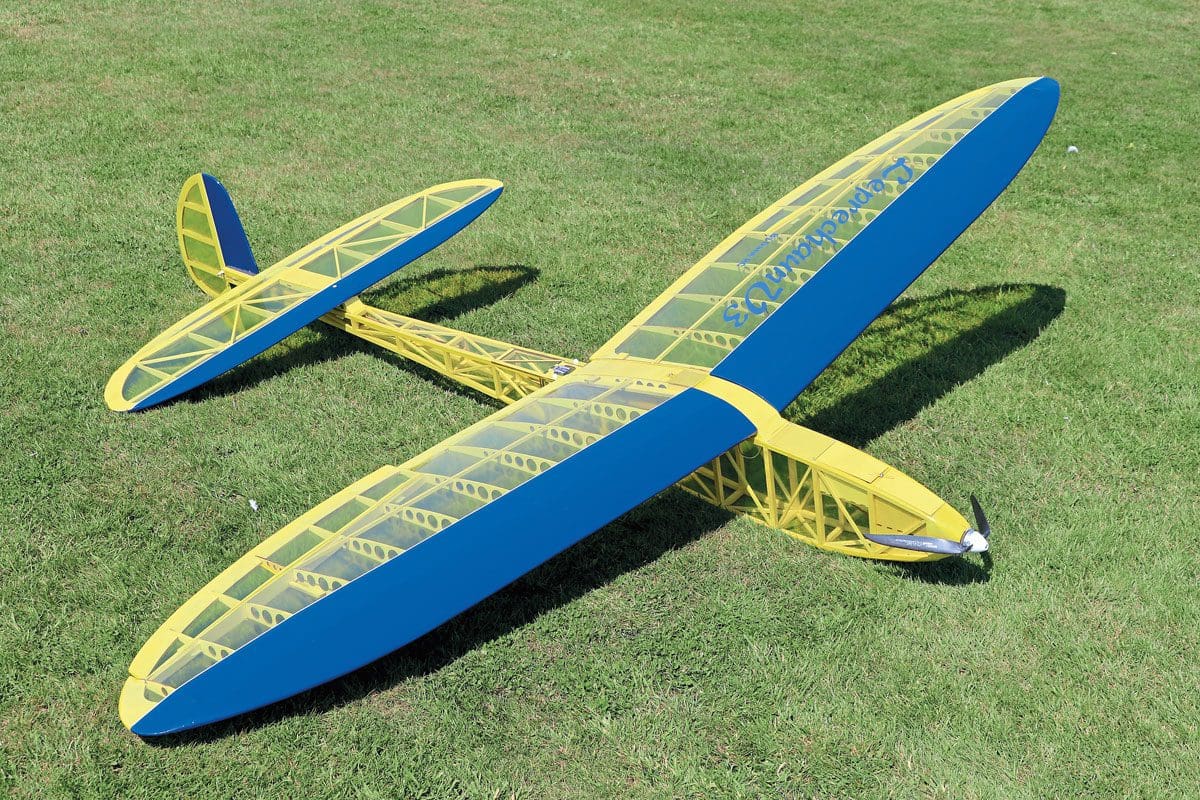
There’s more to consider after you’ve selected the size. For many builders the most important will be the split fuselage option that’ll appeal to those with limited building space. More on that later.
Head down
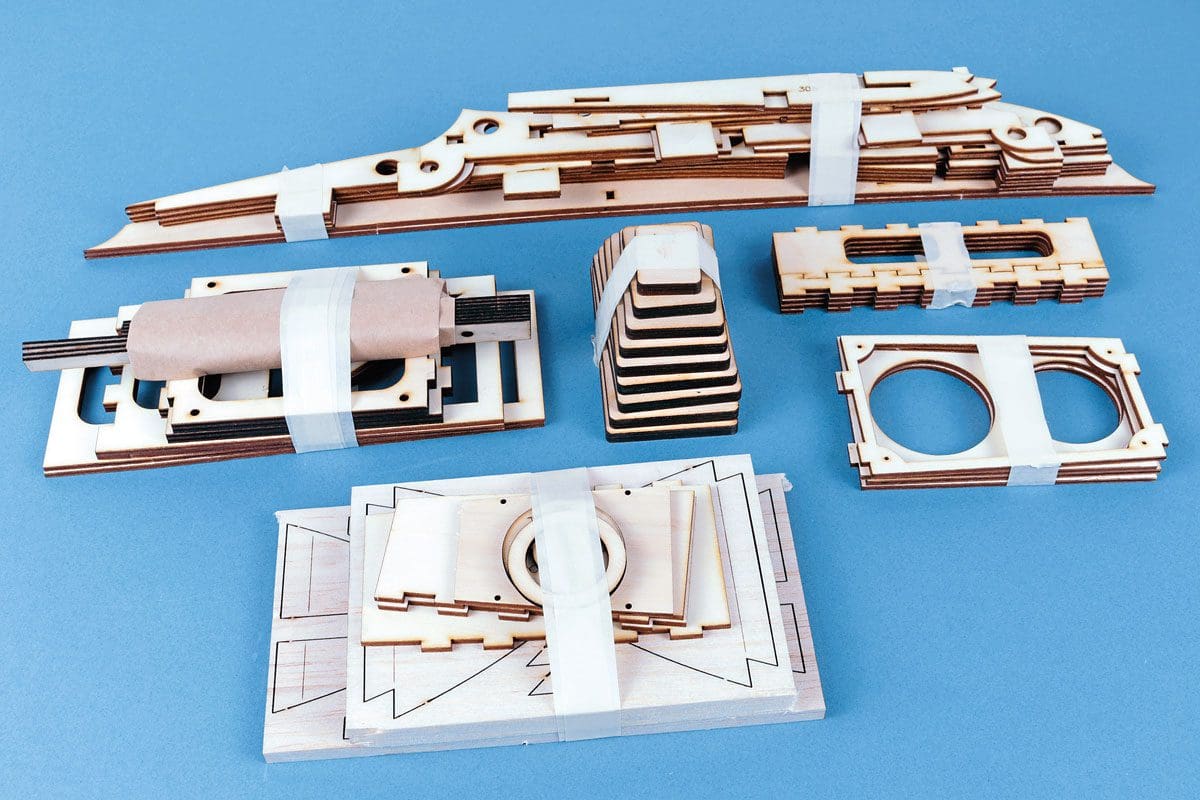
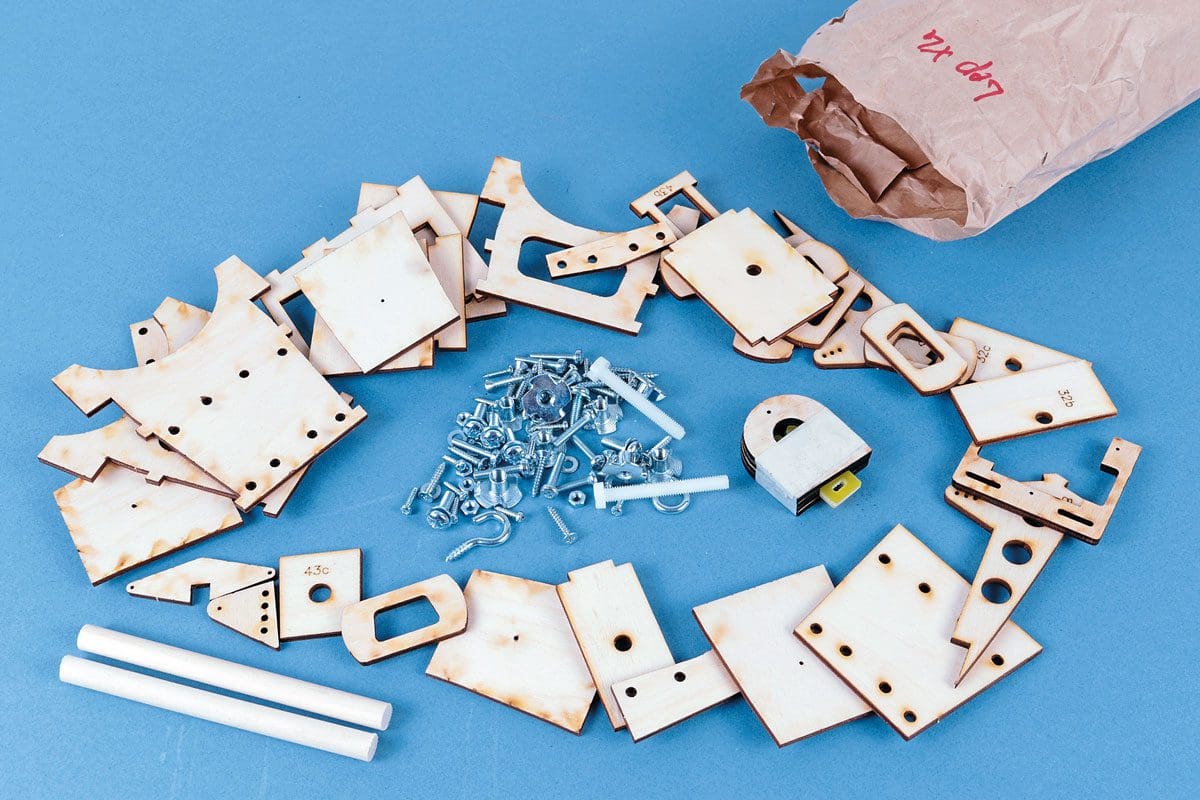
It all starts with a heavy box of wood. Credit to Dane-RC for removing all traces of plastic from the packaging; the box is bound with paper tape and a paper bag contains the hardware. The shaped parts (ribs, formers etc.) are nicely laser-cut from balsa and ply, while balsa strip and sheet do the rest.
Instructions take the form of a series of photo steps that you’ll find at the Dane-RC website. Studying the plan and photos provides reasonably clear guidance, although it’s important to state that the kit isn’t for beginners to trad’ kit construction. Don’t be misled by the straightforward structure; there will be times along the way where previous experience must be drawn on.
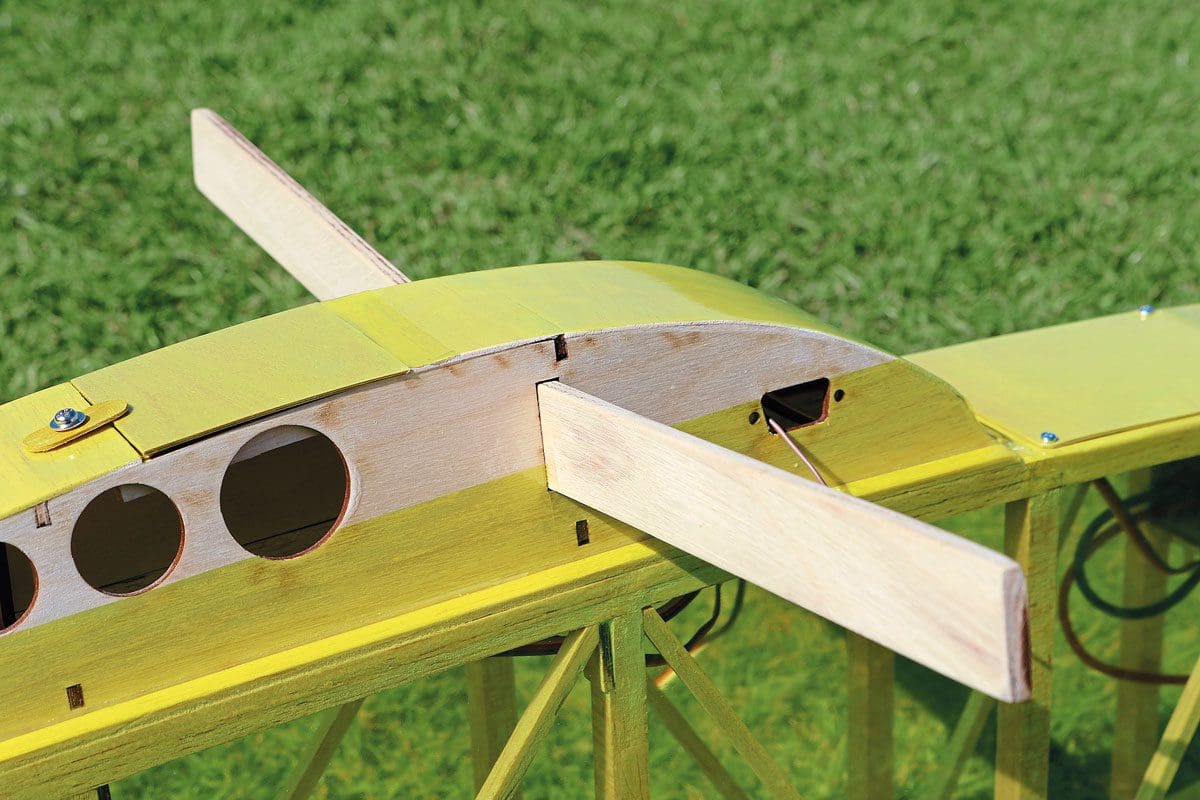
Incidentally, I won’t bore you with a blow-by-blow account of construction, save for some bullet points (in italics) along the way. I uncorked the aliphatic and started with the fin and stab’ as a way of acquainting myself with some small sections. Although they’re the most manageable bits, the stab’ spans a whopping 46” and, size wise, provides a hint at what’s to come.
Parts no.35 will need trimming and shaping to fit between the elevator l/e and t/e (a few more photos here would be useful).
No hints are left as to how the elevator horn (44) is to be attached. That’s not a problem as various methods will suggest themselves. Similarly, control surface hinges aren’t marked on the plan, and none are supplied. Again, no biggie. It’s worth noting that hinge reinforcements aren’t marked on the wing and tail plans but can be found on the cut section drawings.
Wings
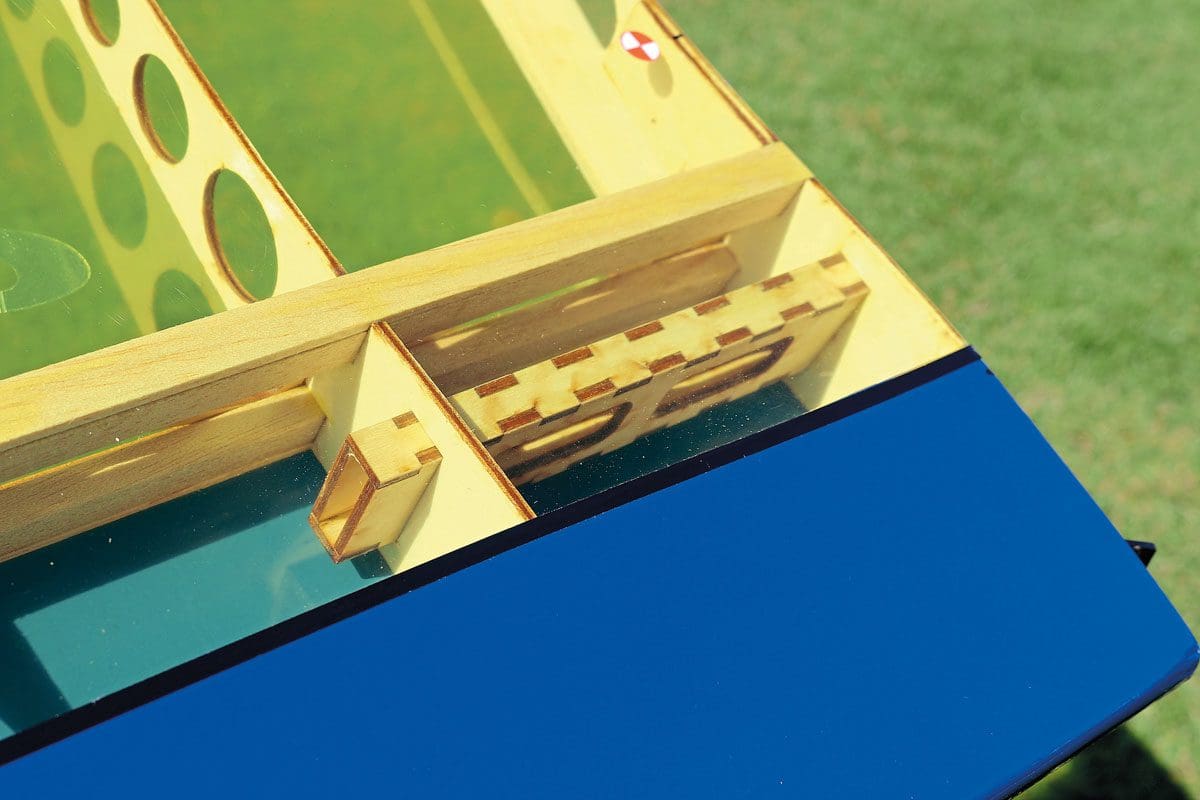
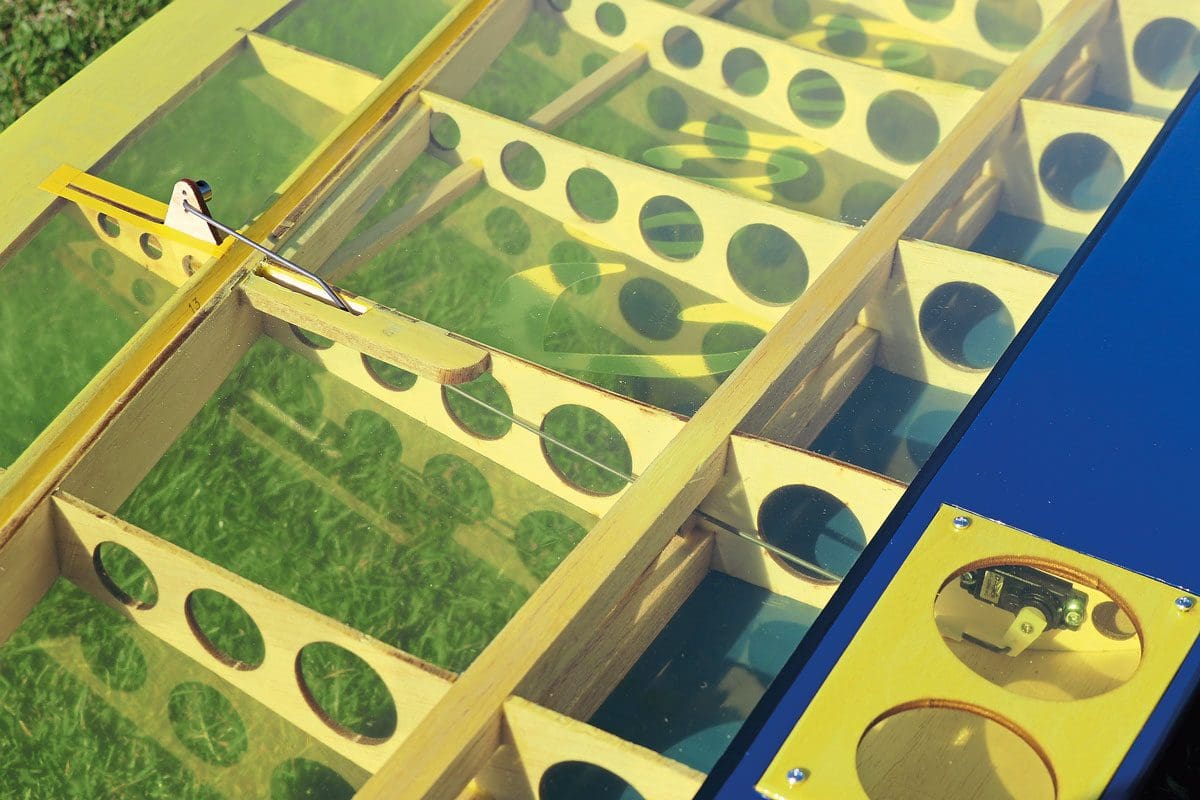
Two words – ‘they’re big’. Ok, perhaps not length wise (I’ve built each panel on a bench measuring 140 x 60cm) but a max chord of 18.5” means workbench space will disappear. The two-piece standard wing is crazily under-cambered, so rib tabs keep it level during construction. The main spar, ribs, leading and trailing edges are all laser-cut, interlocking and fit well. Theoretically I guess you don’t need the plan, but I didn’t trust myself to do that and built over it just to be on the safe side.
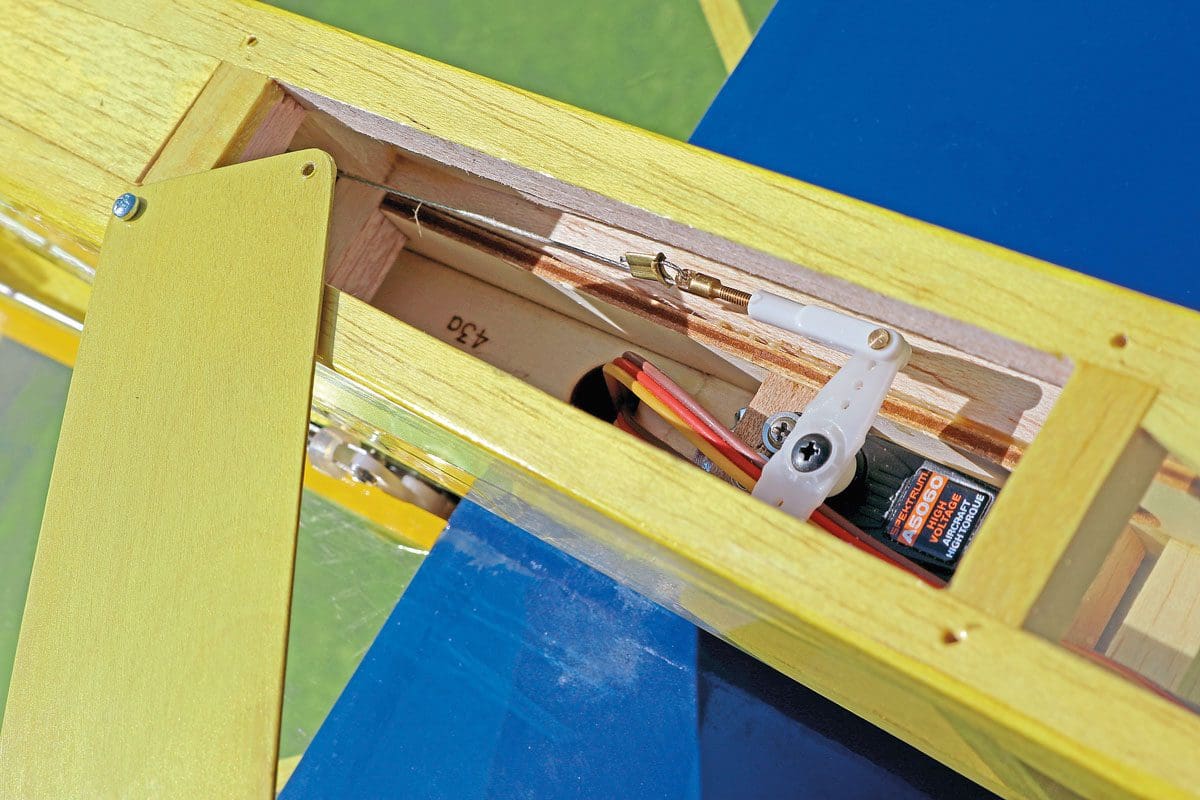
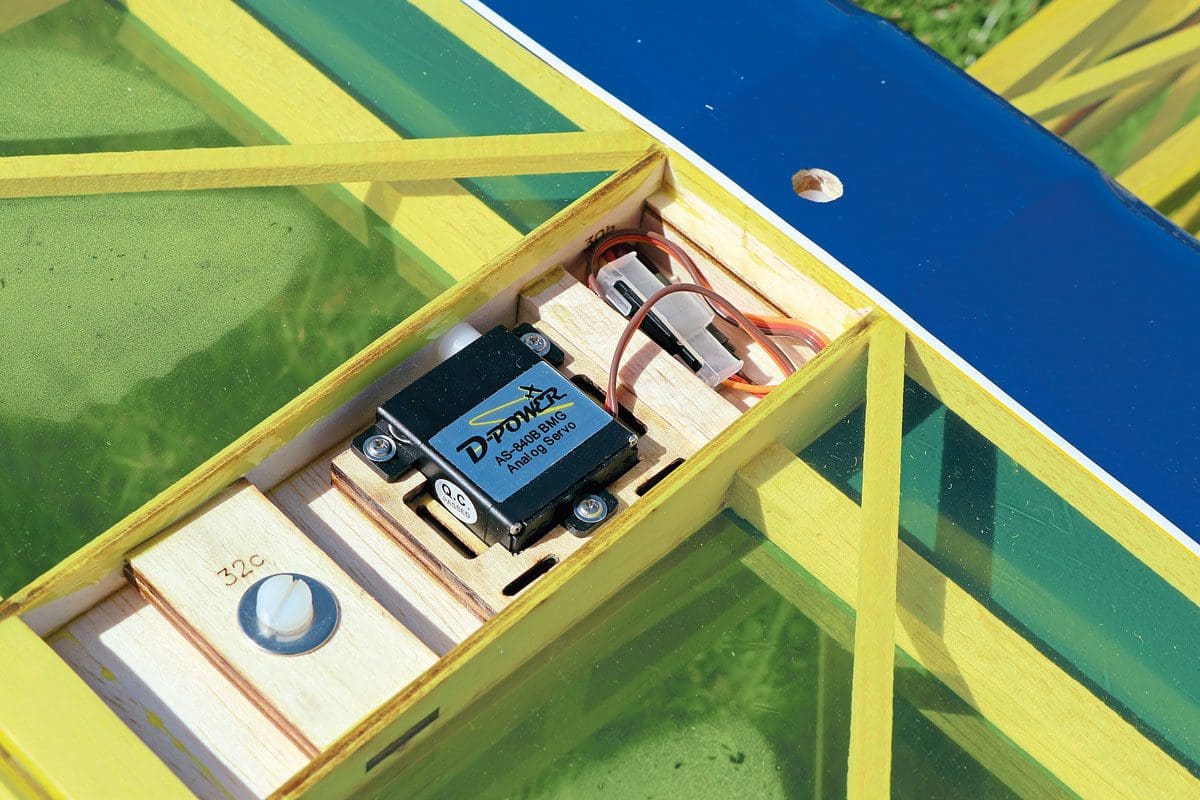
Mini metal gear servos live in each wing D-box with ailerons driven by an internal pushrod that runs full chord to emerge near the control horn. The idea is to keep everything neat and tidy within the wing but, like me, you may have trouble creating sufficient control surface movement owing to pushrod flex. I countered this by supporting the pushrod within the wing, but only with partial success. The 20mm up on aileron was at the bottom end of the 40mm suggested, although this proved sufficient in the air, especially with a little rudder input helping out.


Fuselage
At first I was a little confused as to how to tackle the fuselage, but obsessive referral to the photos, the plan and a build blog by Paul Hampshire on the Slope Soaring Sussex website () got me over the line.
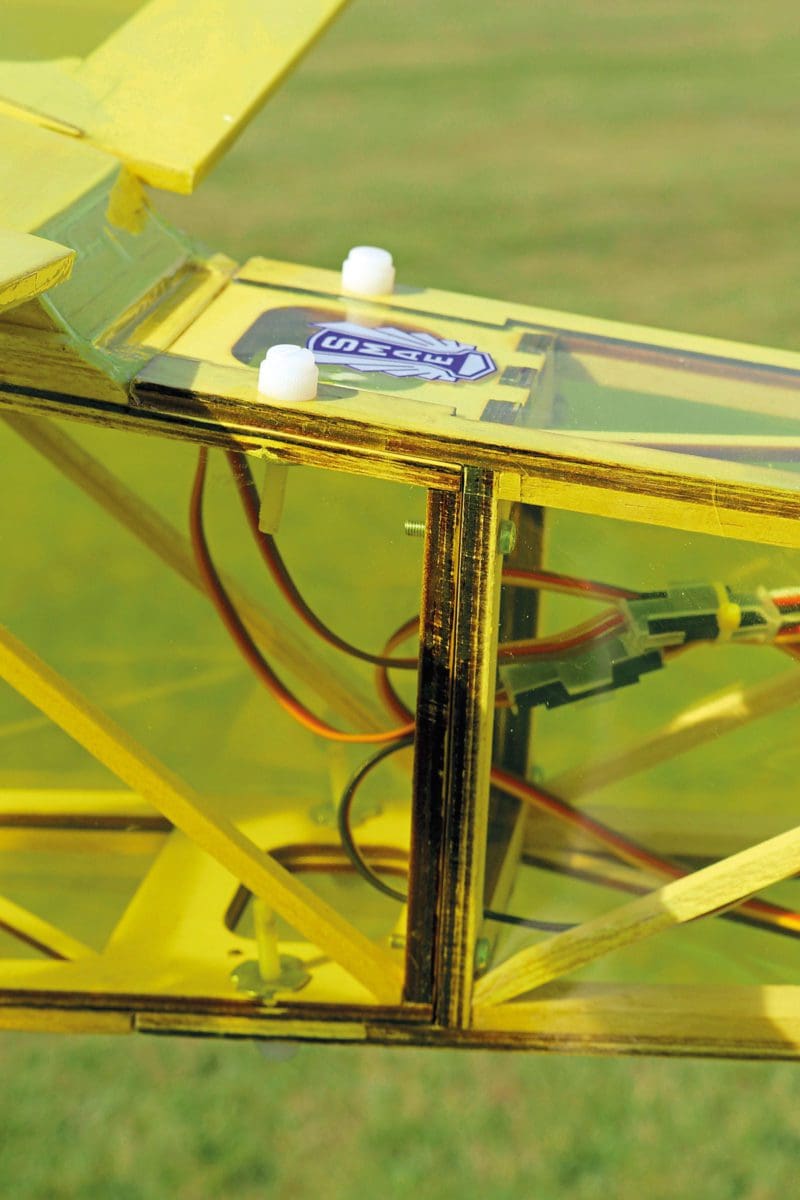
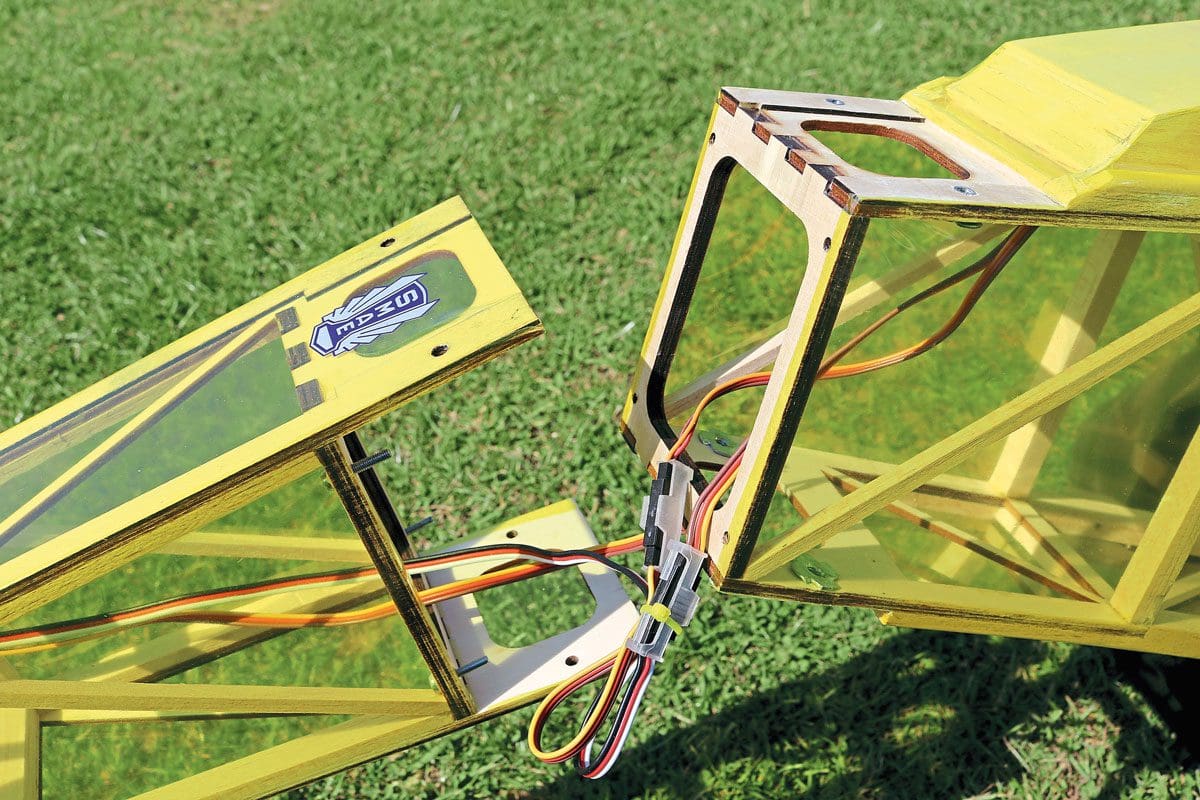
Although I was confident the fuselage would fit in my car in one-piece, it made sense to adopt the split fuselage for which parts are included in the kit. If, like me, your workbench is on the smaller side then you’ll have no choice but to do the same.
I started with the front section constructing the joiner frames, then fuselage sides, all over the plan.
It’s important to appreciate that the ply nose formers sit flush with the inside edge of the longerons. The plan view refers.
The longerons themselves are made from laminated 10 x 5mm balsa strips. Applied one after the other, it’s a good way of managing the fuselage curves all the way round.
Reinforcing the sentiment that this isn’t one for first-time builders, little guidance is given regarding radio and battery access hatches, the closed-loop rudder and several other little areas that demand some degree of thought and planning along the way. That’s not really a niggle – some folks like to do their own thing – but it’s something to be aware of before you start.
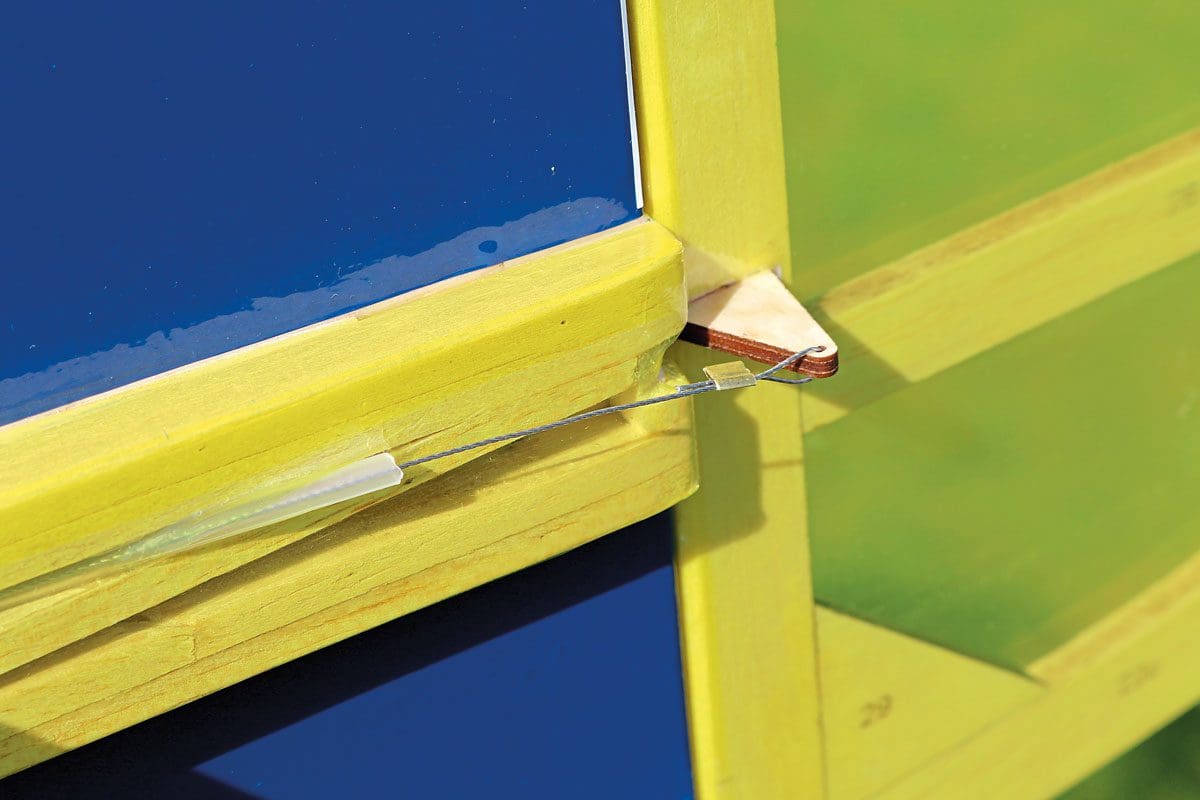
Incidentally, those planning on building the fuselage in one piece can leave a servo in the nose and run long pull-pull cables back to the rudder. The alternative, as I’ve done, is to pop a smaller servo in the stabiliser mount, where a suitable area has been created, then install a far shorter closed loop. Some builders have placed the servo in the side of the fuselage, just in front of the rudder, and fitted a pushrod.
Fit & Finish
Some models you can build, then immediately start to cover without a second thought knowing that hinges, connections, wires, and other bits will slot into place easily enough at the end, much like an ARTF model. This isn’t one of those.
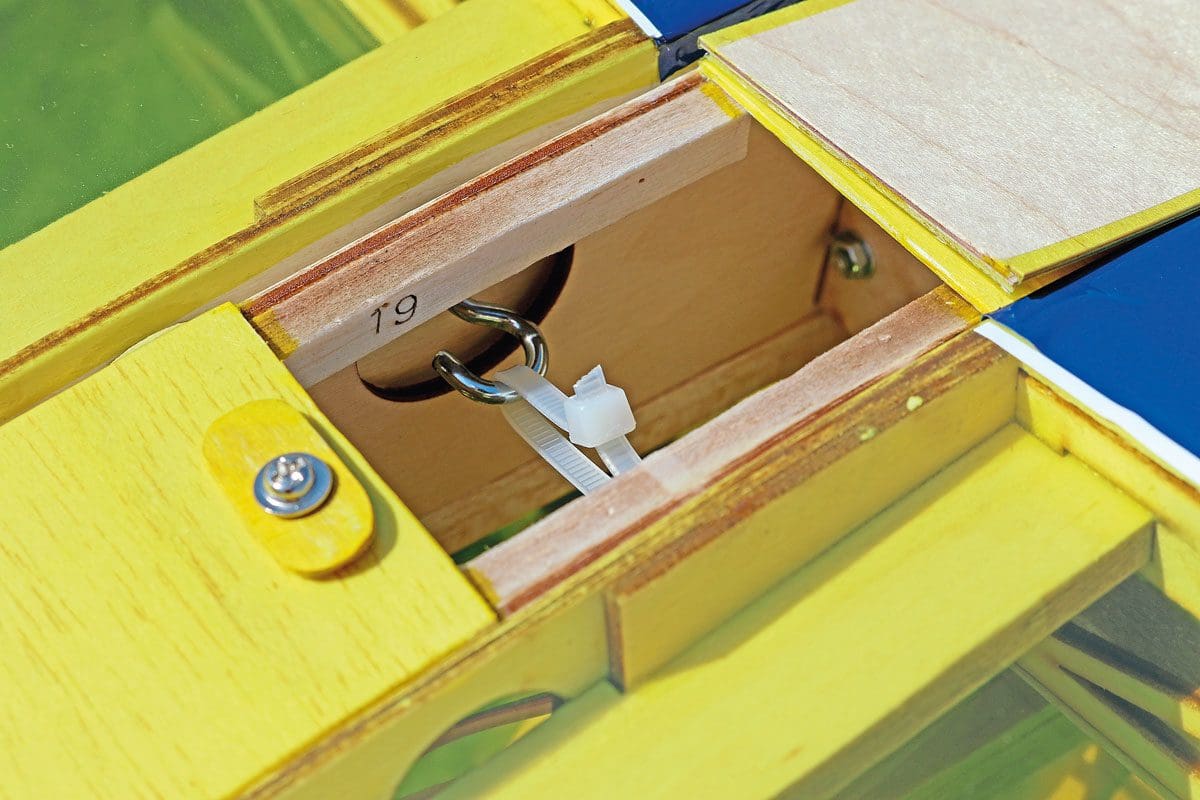
Again, that’s not a niggle, just a reflection of the type of project this is. For instance, long cables are required to run down the fuselage linking servos to the receiver. They’re best added before covering is applied as you really don’t want cables flopping about in that wide fuselage. A series of cable ties did the job for me.
As a very welcome addition Dane-RC kindly added some covering material with the review sample, some 9m of transparent yellow and 5m of solid blue. I’m terribly wasteful when it comes to covering so was relieved that there was sufficient. Thrifty finishers will have some to spare.
Hatches came next; screw-down covers are used over areas where access will be occasional, with pop-open covers secured with tape and a swing latch to hide the battery and wing connectors.
It came as no surprise that tail heaviness was evident when the time came to test the C of G. A 2200mAh 3S battery made next to no difference but two 3S 3300mAh packs helped and slipped into place. Connecting them in parallel (to provide 3S 6600mAh) made sense. But that wasn’t enough and 150g of stick-on weights found a home in the nose.
Incidentally, the Hacker motor/gearbox combo is small and designed to fit into tight spaces, especially glider noses. The gearbox is a reduction unit, enabling the use of propellers far larger than the motor size and kV would normally permit, as in this case where a 2500kV outrunner spins 16” x 8” folding blades.
First flight
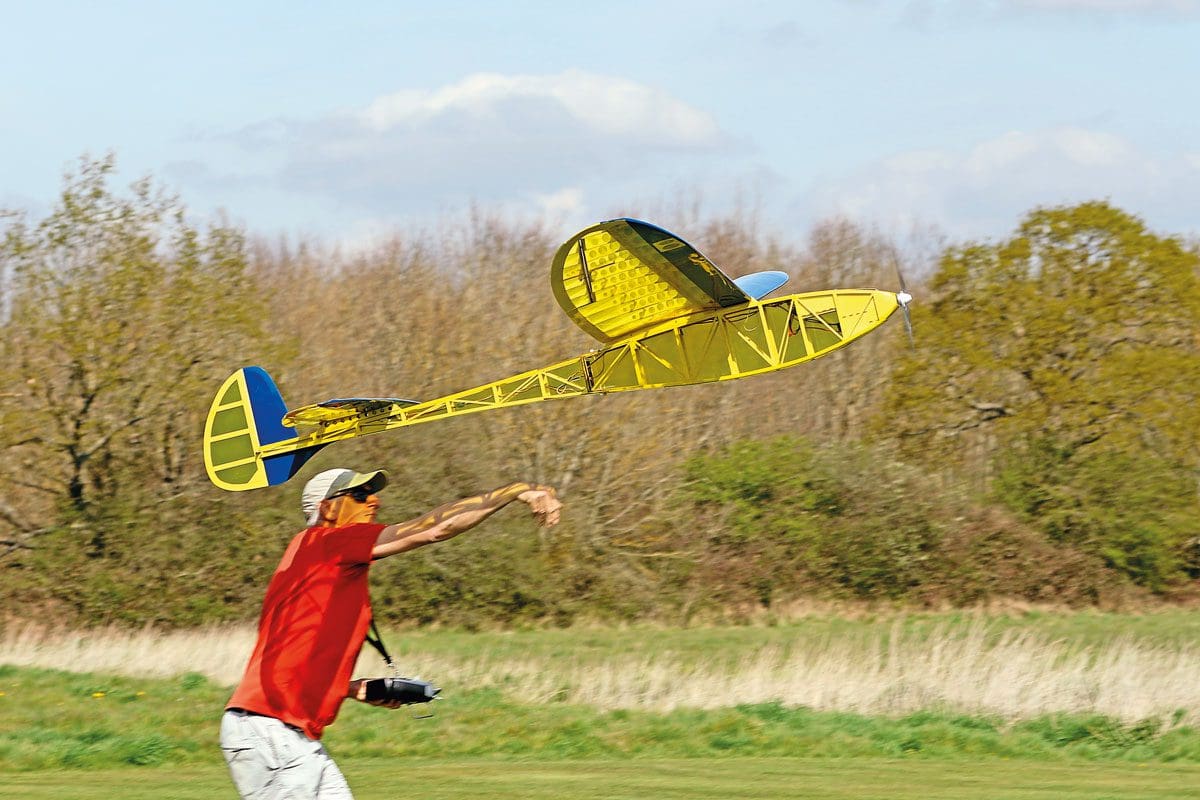
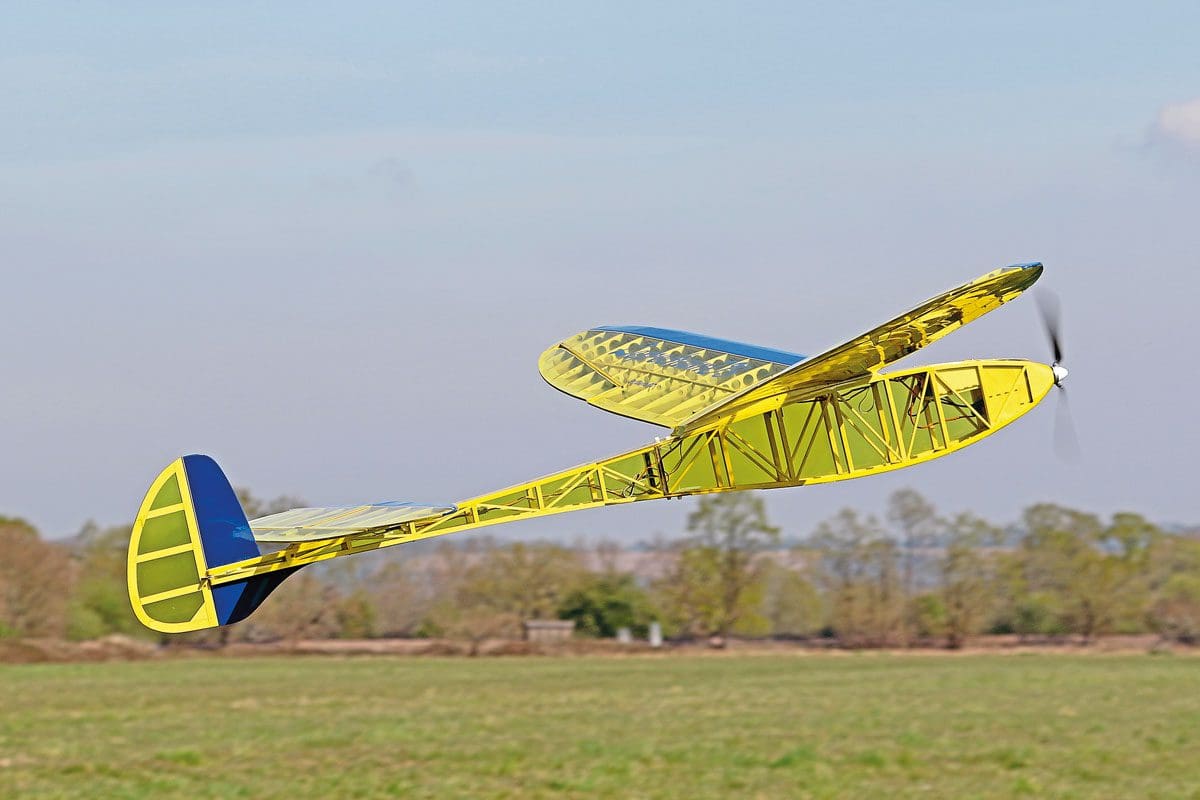
From start to first flight took three months. Good Friday dawned clear and calm, presenting perfect conditions for the maiden. Despite its size hand launching is easy, thanks to the narrow fuselage and modest weight, and it climbs away without fuss. From the start it was clearly tail heavy but nothing that a good dollop of trim (and, latterly, some additional nose weight) didn’t cure.
The noise from the gearbox combined with a cavernous and acoustic fuselage is quite unique. Factor in the model’s modest rate of passage and, at times, Leprechaun resembles an airship slowly ambling along. Climb out needs just half throttle, no more. Even then some down elevator moderates my model’s tendency to climb at an uncomfortably steep attitude.
I’d worried that my aileron deflections might be ineffective, so I created an aileron/rudder mix at the transmitter just in case. I tend to fly with the mix enabled but, having said that, the large rudder is very effective and the model flies easily enough using just rudder and elevator.
Something so slow moving and floaty could catch out the unwary because Leprechaun isn’t unstallable and will drop a wing, but keep it moving, even at a walking pace, and you’ve a predictable and well-mannered machine.
Outing two
The breeze got up a little for outing number two. With occasional 10mph blows it wasn’t what you’d call windy, but turbulence below the tree line called for a careful launch as Leprechaun offers plenty of surface area for opportunistic gusts to grab hold of. Once up and above the trees it flew surprisingly smoothly, with penetration helped by a little down elevator trim. It wasn’t a day for strong thermals, but the model showed little inclination to come down.
It shouldn’t need saying but you can forget aerobatics. Rolls are out of the question and while loops (of a sort) are possible, Leprechaun can’t really build up enough speed to prevent flopping over the top in an ugly manner.
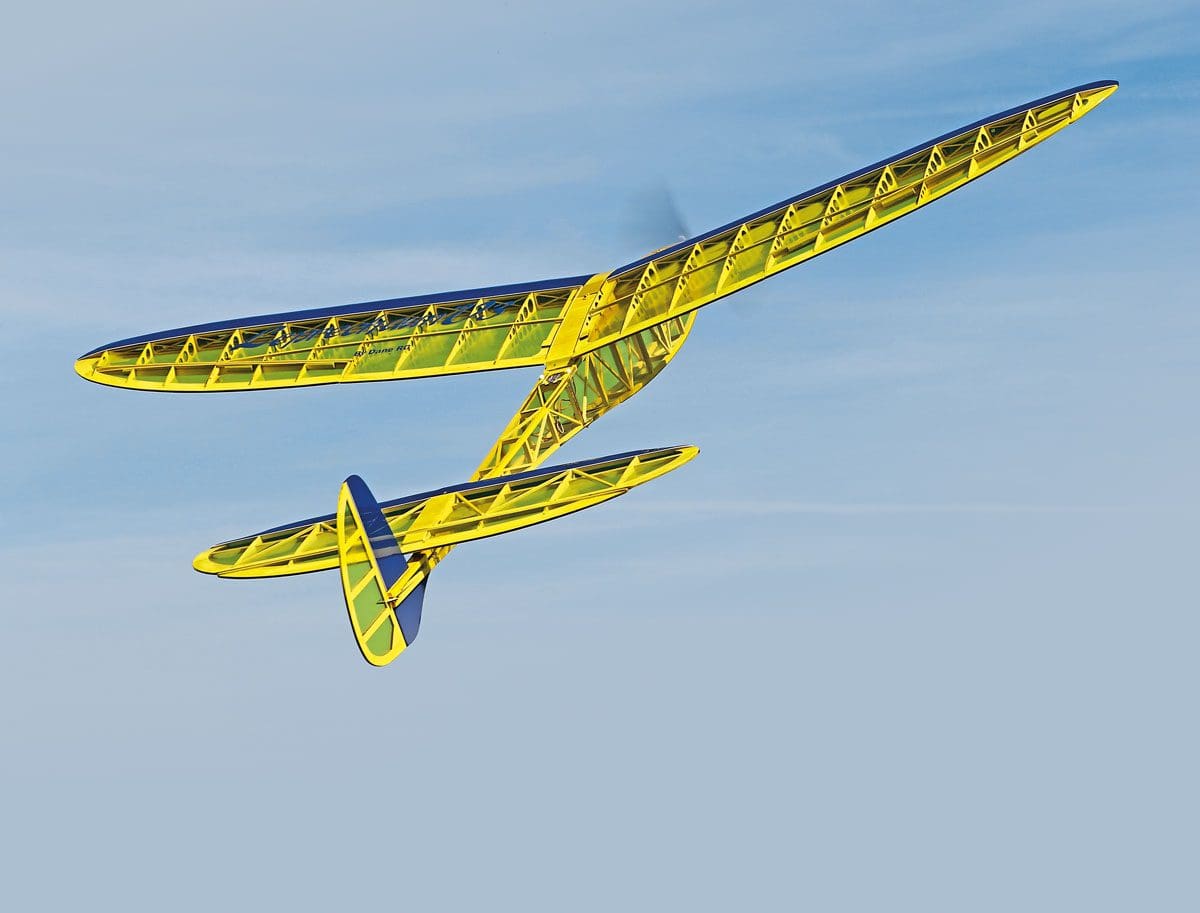
Touch ’n’ goes can be done, especially on wet grass, but such stuff isn’t what this model is about. Leprechaun is a model for calmer conditions, summer evenings or thermally days at the slope and, wherever it flies, it’ll be absolutely head-turningly gorgeous.
Big ‘un
I can say with certainty that, in terms of size and flying traits, this is unlike anything I’ve built or flown. I mean that in a good way, of course. This has been an absorbing and very rewarding project. If you’ve built a few trad’ kits before then a Leprechaun should present no problems and leave you with a machine to be proud of.
Incidentally, Michael at Dane-RC is very helpful and is always happy to answer questions as your Leprechaun grows. I’ve sent him a few over the last few months and received quick replies, even within 30 minutes one evening.
Datafile
- Name: Leprechaun V3
- Model type: Vintage sailplane
- Manufactured by: Dane-RC
- Available: Direct from manufacturer
- RRP: From €259
- Wingspan: 2665mm (104”)
- Fuselage length: 2165mm (85”)
- Wing area: 1.14 sq.m (1767 sq.in.)
- Wing loading: 8.5oz/sq.ft.
- All-up weight: 2900g (6.39lbs)
- Power system: Hacker A-20 6XL 2500kV outrunner with 4:1 reduction gearbox, 60A ESC, 16 x 8 folding prop, 3S LiPo
- Functions (servos): Ailerons (2), elevator (1), rudder (1), throttle (via ESC)
- C of G: 190mm back from wing LE root
- Control throws: Ailerons – 40mm up/20mm down. Elevator – 40mm up/20mm down. Rudder – flyer discretion
words » David Ashby photos » David Ashby, Jane Ashby


