
Knife-edge flight is that condition where the model is flying on its side, using one side of the fuselage as a wing; elevator becomes rudder and rudder becomes elevator… confused? Fear not, all will soon become clear. To begin with, however, let’s take a look at the side effects of rudder input as this can upset the pattern of any manoeuvre requiring yaw control. Knife-edge flight is likely to highlight adverse flight characteristics so here’s a brief synopsis of the characteristics and possible causes.
● If the model rolls in the direction of applied rudder (i.e. apply left rudder and the model banks to the left) then the wing will have too much dihedral.
● If the model rolls in the opposite direction to the applied rudder, then there’s insufficient dihedral.
● If the model pitches down then the tailplane could be too high or may have insufficient area, the C of G may be too far back, and / or there could be too much positive incidence on the wing. If the model pitches up, the opposite applies.
Enjoy more RCM&E Magazine reading every month.
Click here to subscribe & save.
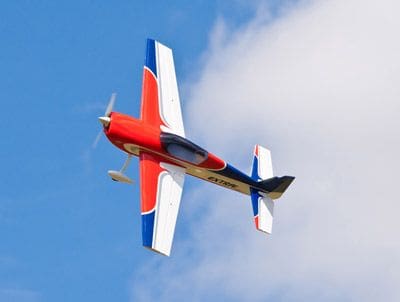
Knife-edge flight is made easier if your aircraft has a low or non-existent side effect reaction to rudder input. The best knife-edgers usually follow a fairly ‘zero zero’ aerobatic design, i.e. thrust line, wing and tail position are close on the horizontal plane – the Extra 300 is a classic example. Such models usually have a good amount of fuselage side area too, since that will act as a wing when in knife-edge. However, even the most difficult or unlikely models can perform knife-edge.
Take my trusty old Cougar 2000 for example. Hardly designed for accurate aerobatics it has a shoulder wing, very little rudder below the thrust line and a fuselage side area that’s just enough to conceal servos! Yet this model will actually knife-edge. Okay, you have to be on the ball with aileron counter control, and mix in a bit of elevator along with that oh-so powerful rudder, but keep the speed up and she does it! Slow down though and it’s game over; that’s where the real difference lies.
If you have to put in lots of correction then flying slow knife-edge, it becomes a far too unstable affair and your model will want to flick out. If, on the other hand, your chosen aircraft has reasonably pure response to rudder then you’re in good shape. If it’s also light with a good fuselage side area then you’re definitely on to a winner and slow knife-edge with a high angle of attack (known as ‘high alpha’) become child’s play. The Capiche 50 is a classic high alpha-capable example. If you can perform slow and steady knife-edge then you’ll be able to tackle some trully impressive manoeuvres.
THE PROLOGUE
If you’ve been practicing the manoeuvres covered in recent issues then you’ll already have a good idea as to how pure the yaw response of your model is, and hopefully you’ve been able to improve any side effects, at the very least through tinkering with program mixes on your Tx. If not, then before attempting knife-edge you should test the models reaction to rudder input. At medium speed, straight and level, carefully introduce rudder with no other controls and observe. The target is for the model to yaw without changing altitude or rolling, and it may begin to start scribing a flat circuit – like a control-line circuit. If it shows any other reaction then refer to the above recap on side effects and do what you can to reduce them.
Solve the side effect corrections systematically. If the model is as good as it can be mechanically then use the program mixes on your computer Tx (assuming you have a computer Tx!) Start with the worst reaction first – say for example the model pitches down badly and rolls to a lesser extent. Set up a mix that ‘slaves’ the elevator control to the rudder channel as ‘master’. Do this on the ground to start with to make sure that the direction of mixing is correct; in this case a bit of up elevator when rudder is applied. Start with a low figure flight test and work up until there’s no longer a bad pitch tendency. This is quick to do if you can get a mate to stand next to you whilst you fly with the program open on the Tx – he / she can hit the plus or minus keys after each attempt. You’ll need to do this for both rudder input directions. Then set another mix to programme the second most obvious reaction, in this case aileron, which is set as a ‘slave’ to the ‘master’ rudder again, to limit roll reaction.
Using a computer Tx in this way doesn’t make a bad model perfect, but it improves things. If the side effects are really bad then you’ll never feel in full control even with mixing, as large corrections thus mixed will vary in their effectiveness amidst different wind conditions and flying speeds. If you’re heading toward 40% mixing or more then you’re in this territory I’m afraid – up to 10% and you have a pretty well balanced model.
Okay then, you’ve made the best of your model… let’s get on with the manoeuvre itself.
GET IT ON
If you’ve largely mastered the rolling manoeuvres covered recently then you’re virtually home and dry – all that’s needed here is the steps taken during zone 1 of the roll. If you can begin to introduce rudder input as soon as you start to roll the model on to its side then you’re ahead of the game. Often the approach is to bang the model on to its side with a dose of aileron and then hit the rudder; this not only looks untidy but can also go pear-shaped. If you’re relatively new to this manoeuvre and to rolls, then start in a climb at about 20° to give a safety margin – when you can safely enter knife-edge and maintain it whilst keeping the same ascent heading then lower that angle until you get to zero.
Remember, the direction of rudder is opposite to aileron when entering the roll from upright. Note also that it’s easier to start practicing this manoeuvre by rolling in the direction that puts the top of the model facing you, at about 75% power. In theory, and once rehearsed, this should mean that by the time the knife-edge position is reached you already have the required controls in action – this is a smoother and less risky approach to the manoeuvre. The quarter roll doesn’t need to be particularly slow but by introducing the required controls part way through you’ll know early on if things are going right or wrong.
When you’re satisfactorily balancing aileron and elevator correction it won’t be long before you’re doing long knife-edge passes along the length of your field. Depending on your model’s characteristics some extra rudder throw might be needed and maybe more power; basically if she drops in knife-edge then you need more rudder, more power, or both!
Ok, let’s up the ante and do it the other way. Roll in the opposite direction and fly knife-edge on the other fuselage side. To make life a little easier, begin by doing this from the other end of the field so that the top of the fuselage still faces you. When that’s perfected, try rolling away from you and do the manoeuvre with the bottom of the plane facing you – not so easy.
Nailed that? Right, try and fly a circuit whilst maintaining knife-edge throughout, using elevator as the directional control. Take it easy, then as the model passes in front of you do a half roll to opposing knife-edge and fly another circuit.
Achieve all the above and you should feel proud of yourself!
Use of knife-edge flight adds a lot more to your potential repertoire than the plain manoeuvre alone so do take the time to perfect it. With the right model you can use bucket loads of rudder, balance altitude with throttle and fly past in high alpha knife-edge at almost walking pace – but you do need the right model for high alpha manoeuvres of any kind so take care if you’re going to tackle this one.


