Dave Goodenough shows how a few simple tricks can add the spark of life to any model aeroplane
A quibbling question: whilst playing with one of my ‘boy’s toys’ at the side of the runway an inquisitive chap sidled up to me and asked a question that frankly raised my hackles more than a little. ‘Why do you bother with putting something in the cockpit? It’s a waste of money and effort, isn’t it?’
That’s tantamount to asking a top-flight scale modeller why he bothers to build a magnificent replica of his chosen aircraft when he can get away with an ARTF plastic pastiche. The ‘look’ is what is needed, as simple or difficult as you choose to do it.
Enjoy more RCM&E Magazine reading every month.
Click here to subscribe & save.
GOING THE EXTRA MILE
Or even just an inch…
‘Dressing’ a model, scale or otherwise, gives a nice but bland aircraft that extra bit of life, the nod towards realism, however simply done. The addition of a cheap painted plastic pilot, whether bust or torso, on an otherwise soulless model makes it look more realistic. Even shaped patches of vinyl to simulate a cockpit or glazing can lift the look of the simplest sports model.
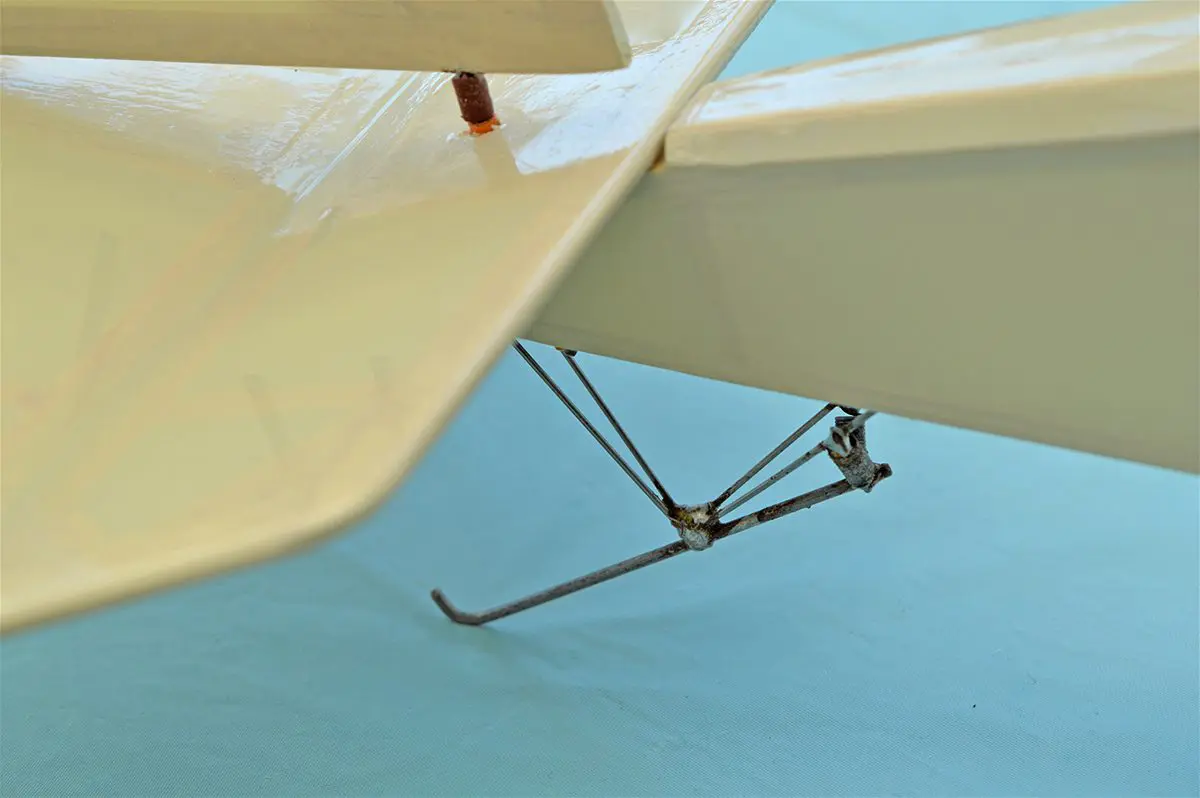
A while back I built an old scale design, the English Electric ‘Wren’. Nowadays the only example left in the world resides at The Shuttleworth Collection, the rarity repository that nestles in a dip of the Bedfordshire countryside at Old Warden, near Biggleswade. As I tap this epistle the Wren is a mere 99 years old, yet still graces the grass at Old Warden and hops up from it a few times every year. This unassuming motor glider was a competition winner back in 1923. Next year is the centenary of the first ever light aircraft competition in Britain, and the Wren was the winner. So why the blather about an old plane, I hear you ask; dressing, realism and ‘the look’ is what it’s about.
Later I’ll tell the tale of a first effort undertaken by mate, Danny, but that’ll have to wait for now.
PILOT POWER
The simplest improvement you can make to a model is to stick an occupant in the office – anything rather than nothing (I have a 1/8 scale ‘Harry Potter’ figure desperate for a model to sit in.) However, with a bewildering array of pilot busts and figures available, why not take things a step further? If your model is, for instance, a low-wing jobbie of, say, 1.6m then imagine it as a real plane; maybe 10 metres wingspan is a good average. 10 divided by 1.6 will give you roughly 6, so you need a 1/6 scale pilot.
What period is your model supposed to be? Modern sports models would maybe take the late 20th century as a guide; perfect, you’re getting closer. How would he be dressed? Certainly not as a ‘jet jockey’, so that’ll be civilian clothes; you now have a done job. The average person is around 550mm across the shoulders (22’’), divide by 6 to get 92mm (3.6’’). Just check that such a pilot size will fit the space. It’s taken little effort, yet the result pays dividends, and the model now looks better.
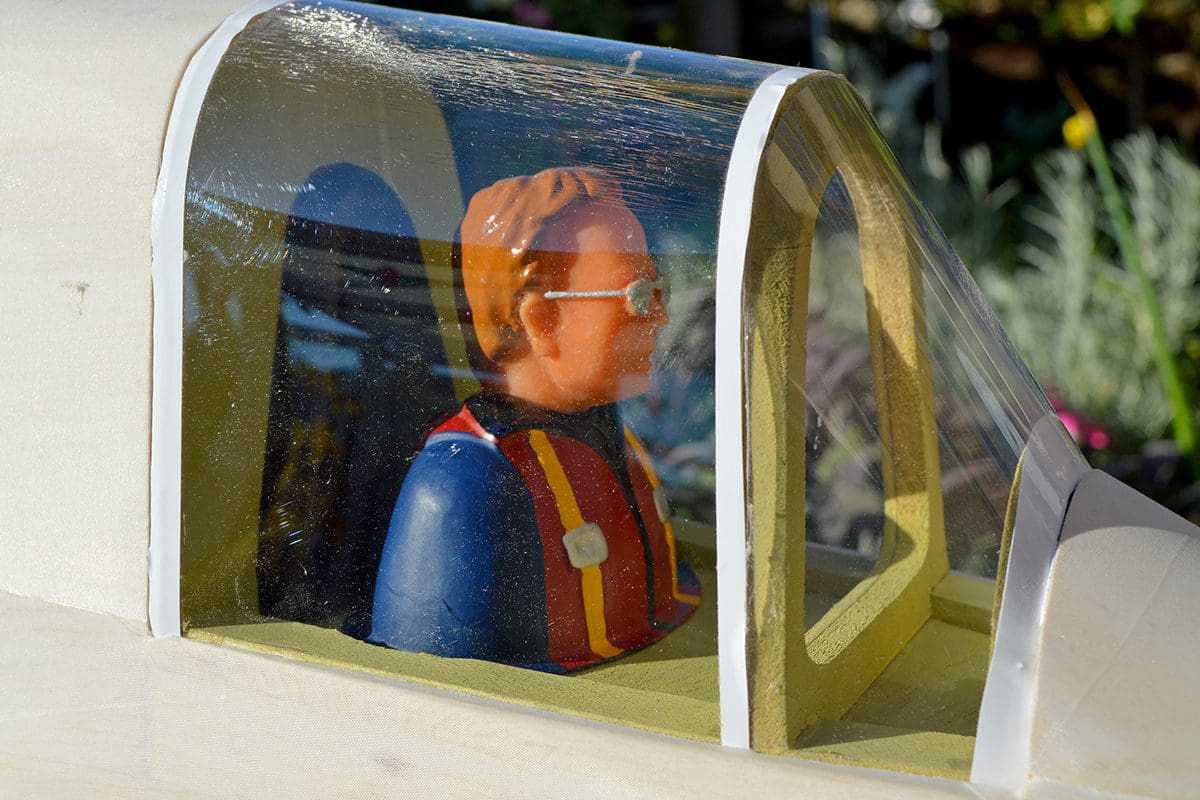
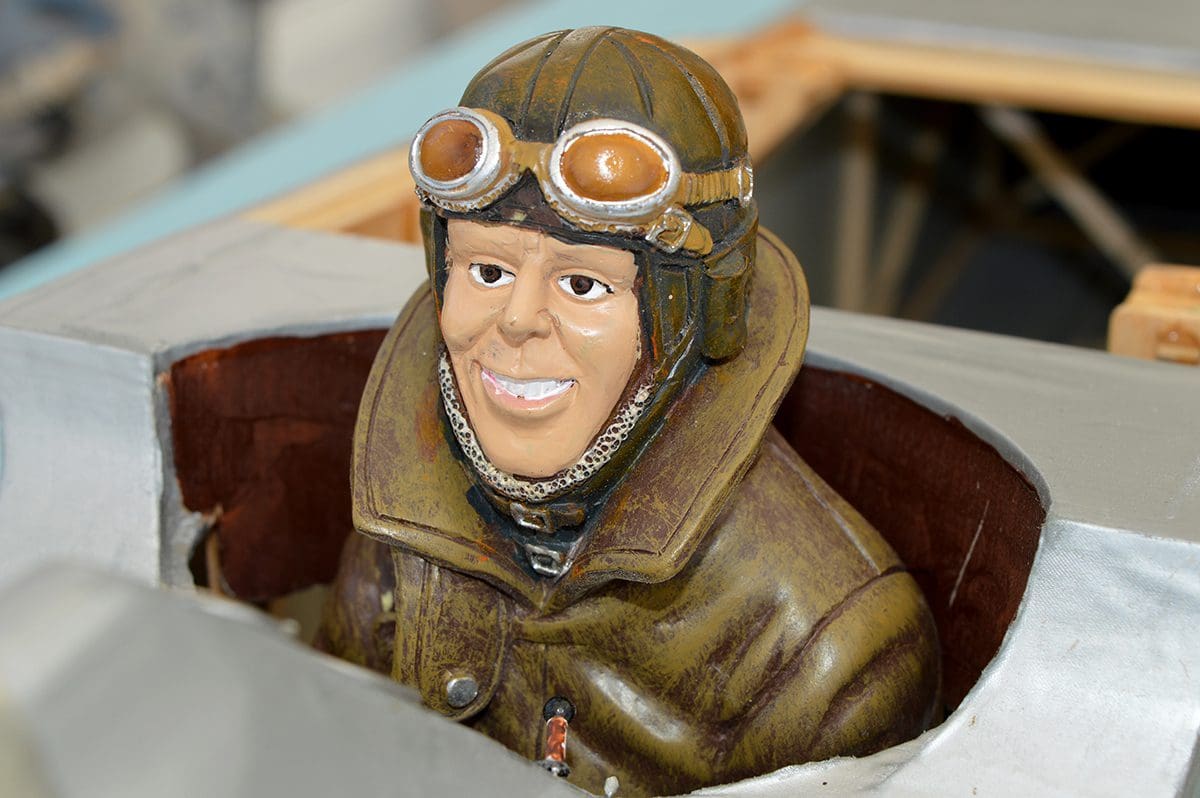
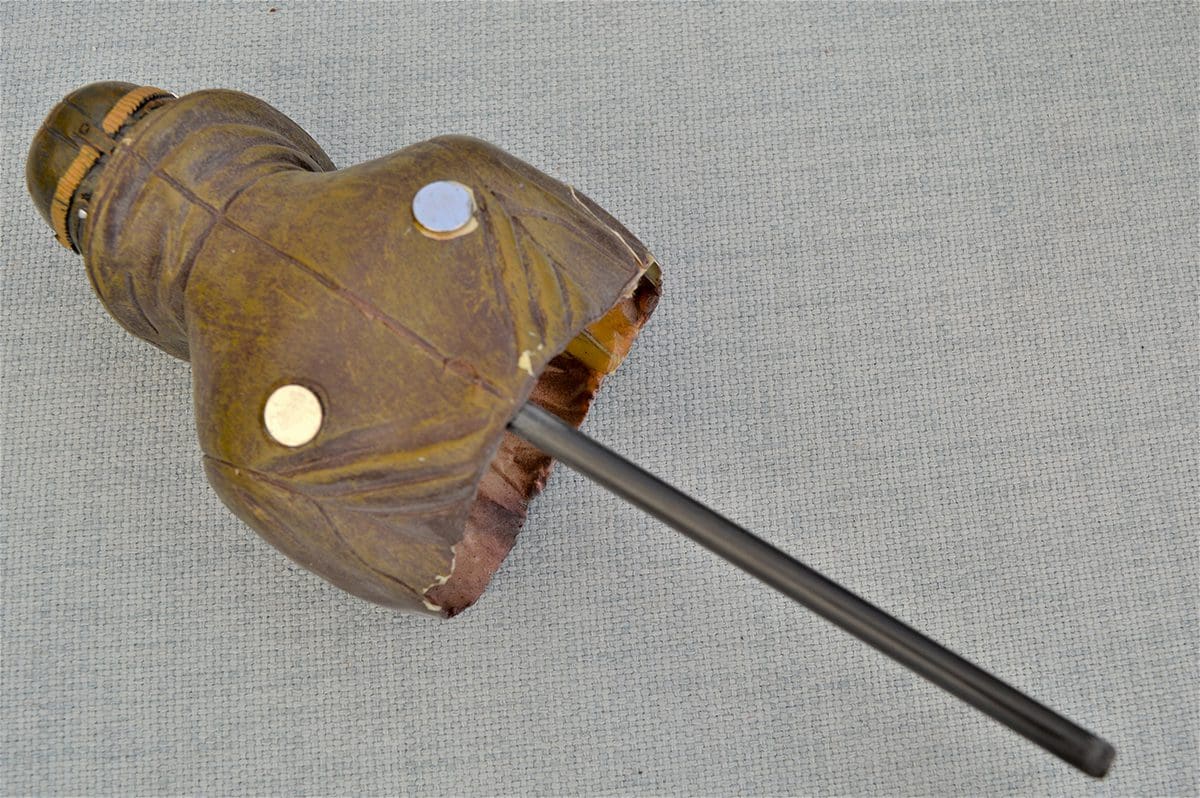
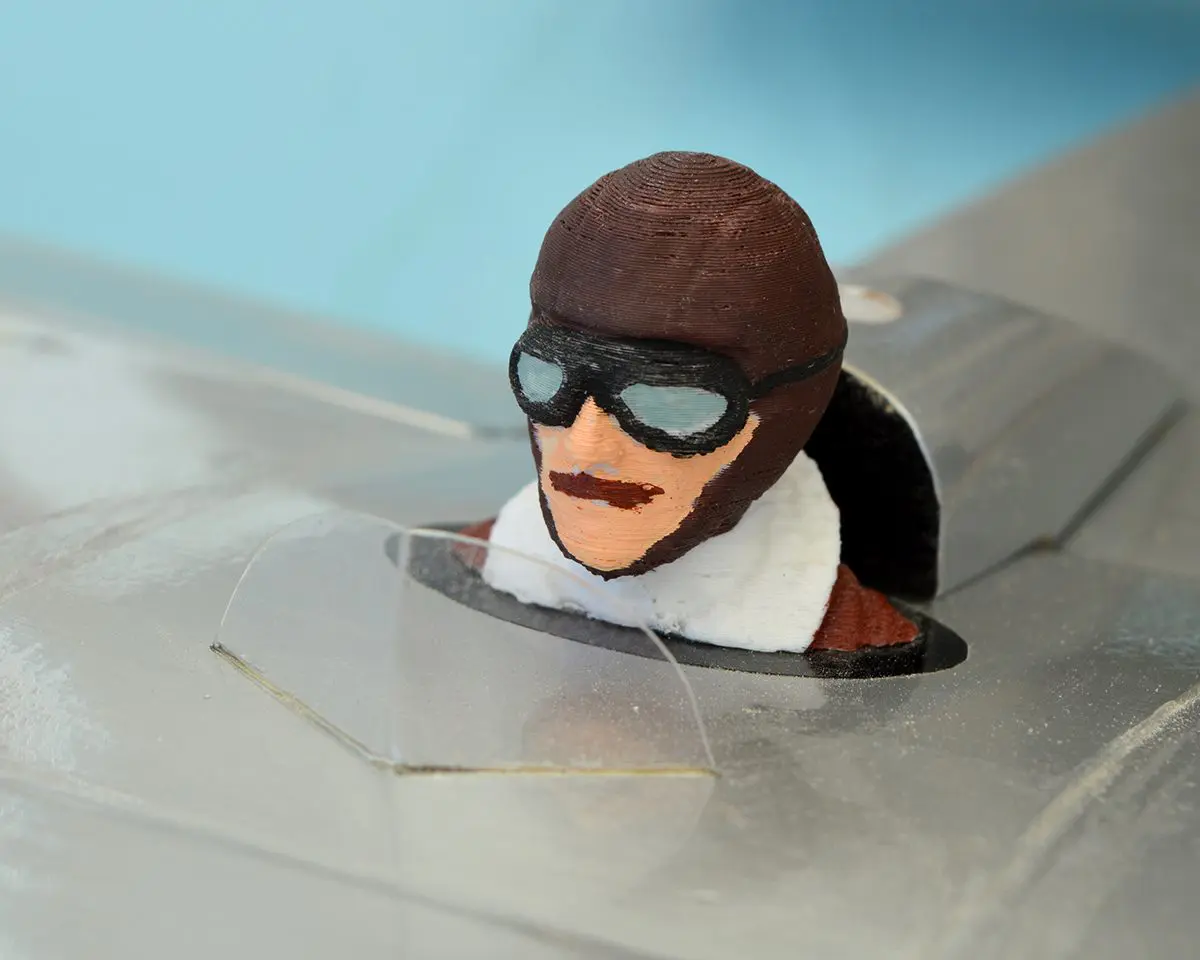
The Right Honourable Charles Farnes-Barnes occupies the Wren’s cubbyhole. He was specifically chosen the same way; scale (1/5 to 1/6), WW1 clothing (still in use five years later, in 1923) and he just fits into the hole. Despite the cheesy grin, I think you can see that he looks just right and ‘fit for purpose’. Charlie hides the battery access (the Wren is electrocuted) and lifts out on a carbon pin, secured by two magnets. You can whip him out in a flash to change the big LiPo, but he won’t fall out.
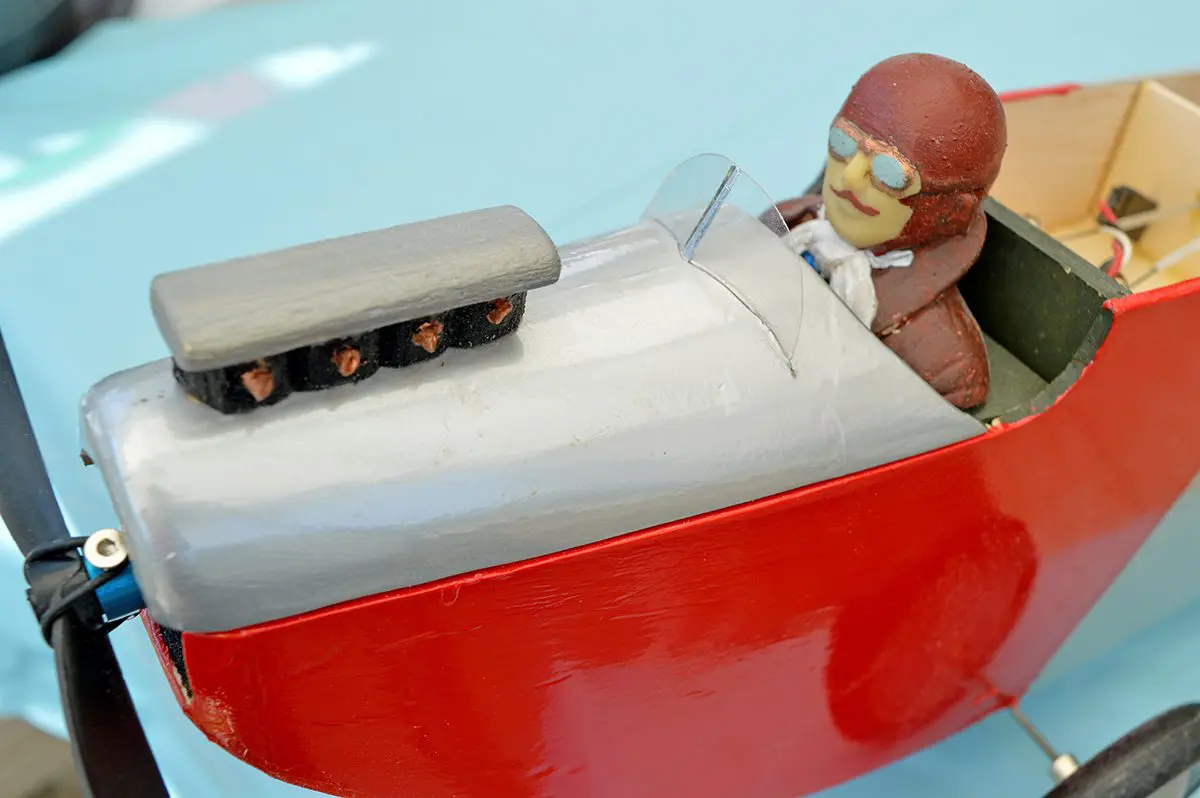
Also from the period is a small French aircraft I’d never seen modelled before and which I built a test model of, the Peyret ‘Avionette’. At just 1020mm span (40’’) and with an ‘open’ cockpit, the model only needed a rudimentary pilot, and got it. At an original 10 metre wingspan, this model managed with a 1/10 scale bust, painted ‘to type’. The ‘cockpit’ is a simple oval of black vinyl with a central hole, so that the bust could be glued direct to the balsa wing skin; it’s never come loose.
You have to admit that the model would look all kinds of wrong without ‘Monsieur Maneyrol’ in place.
TWIDDLY BITS
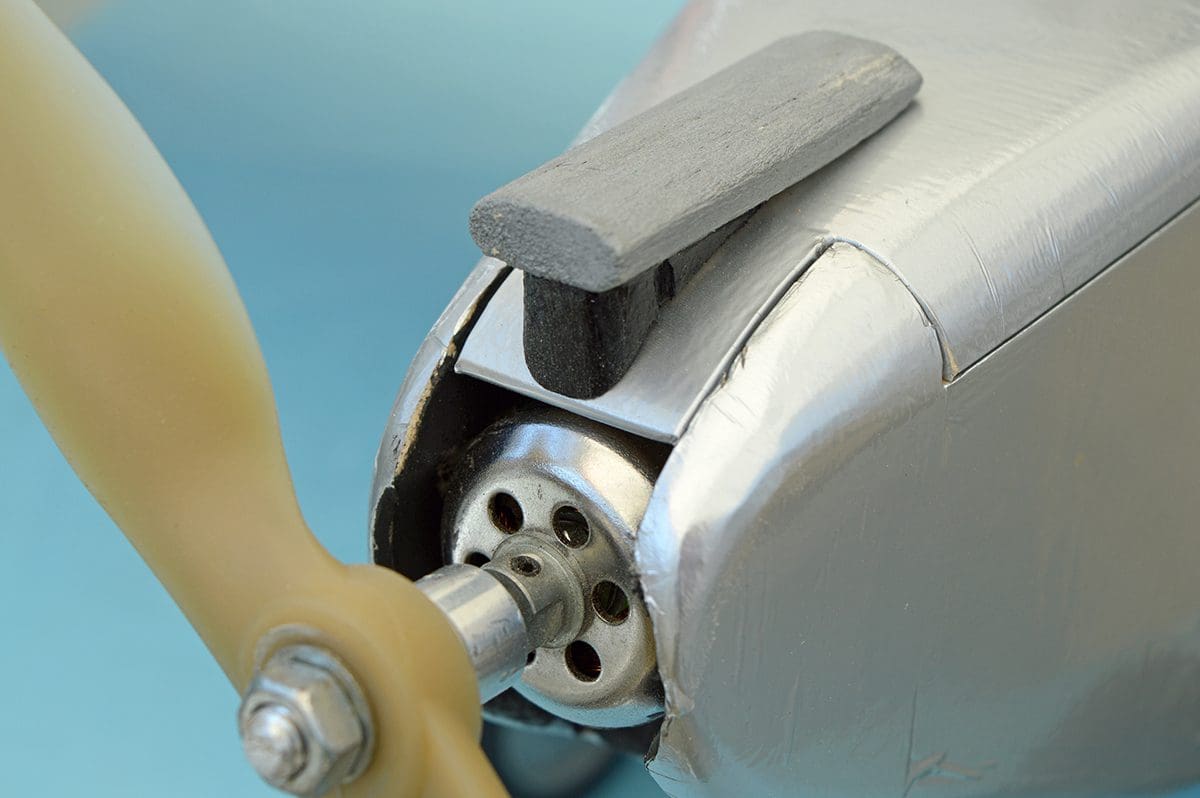
The little Avionette used a Sergant 750cc in-line, air cooled engine, which, funnily enough, stuck up out in the breeze. A small engine reduced to 1/10th scale is tiny, so why not make a simple one? A photo of the engine found online gives the general outline and a bit of balsa whittling later and the thing was done. Appropriate paint added, et voila, c’est complet. A ‘nothing job’ – some wood scraps and a tiny drip of paint – but the plain nose is transformed.
For larger engines ‘out in the wind’ you need to spend a little, but not over-much. The Williams Bros. scale radial engine replicas were renowned for providing lovely looks to the pretend power department, but my choice was to buy kits of the single replacement cylinders, then adapt them to suit other engine configurations – singles, flat and V-twins, even an X-configuration four cylinder for a motor I found on display in the Angers-Marce Air Museum. Some of the kits may still be out there. Seek them, buy them, covet them. The 3D printing crowd have started to produce all kinds of replicas so it’s worth a trawl online to see what you can find.
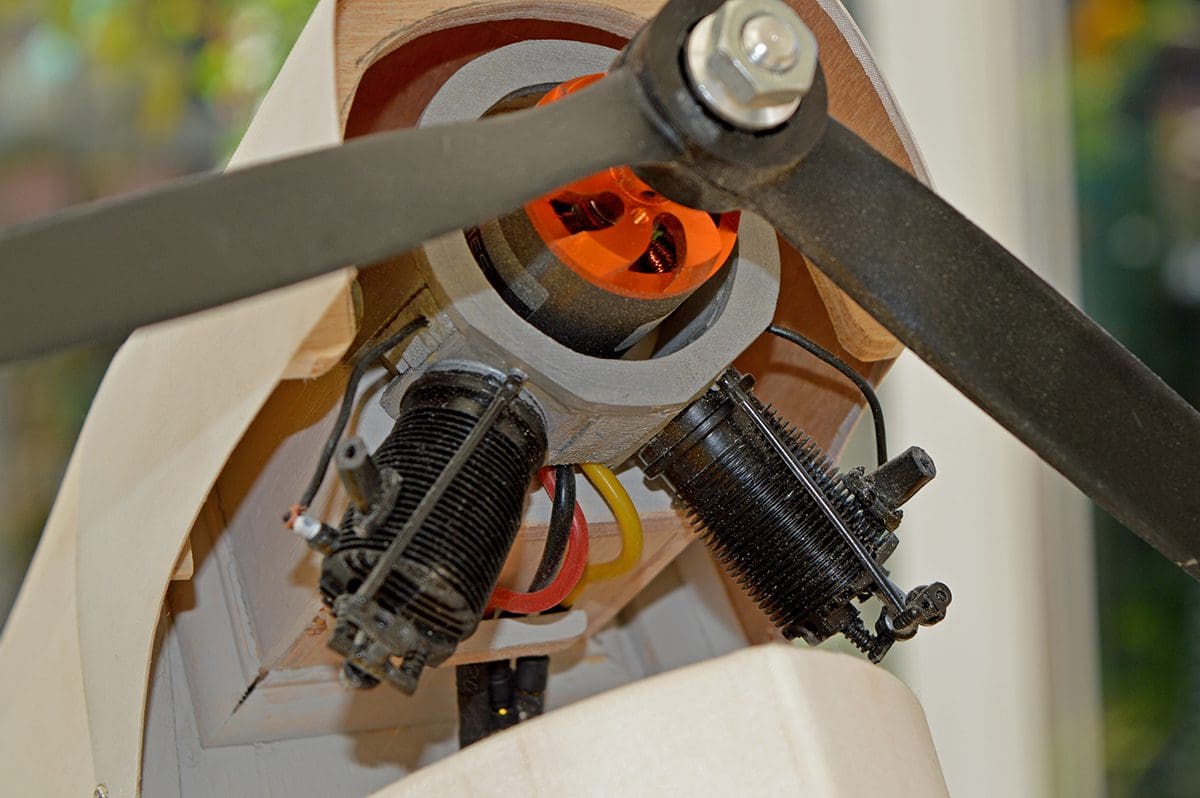
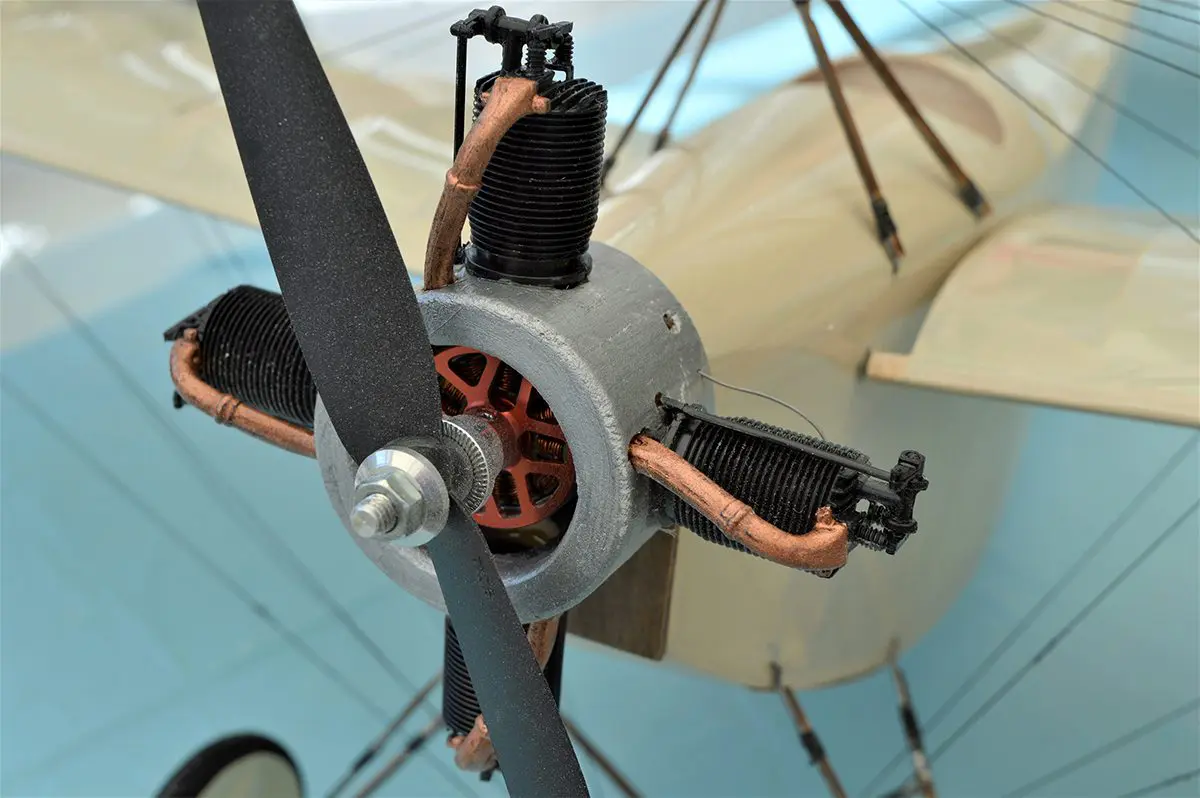
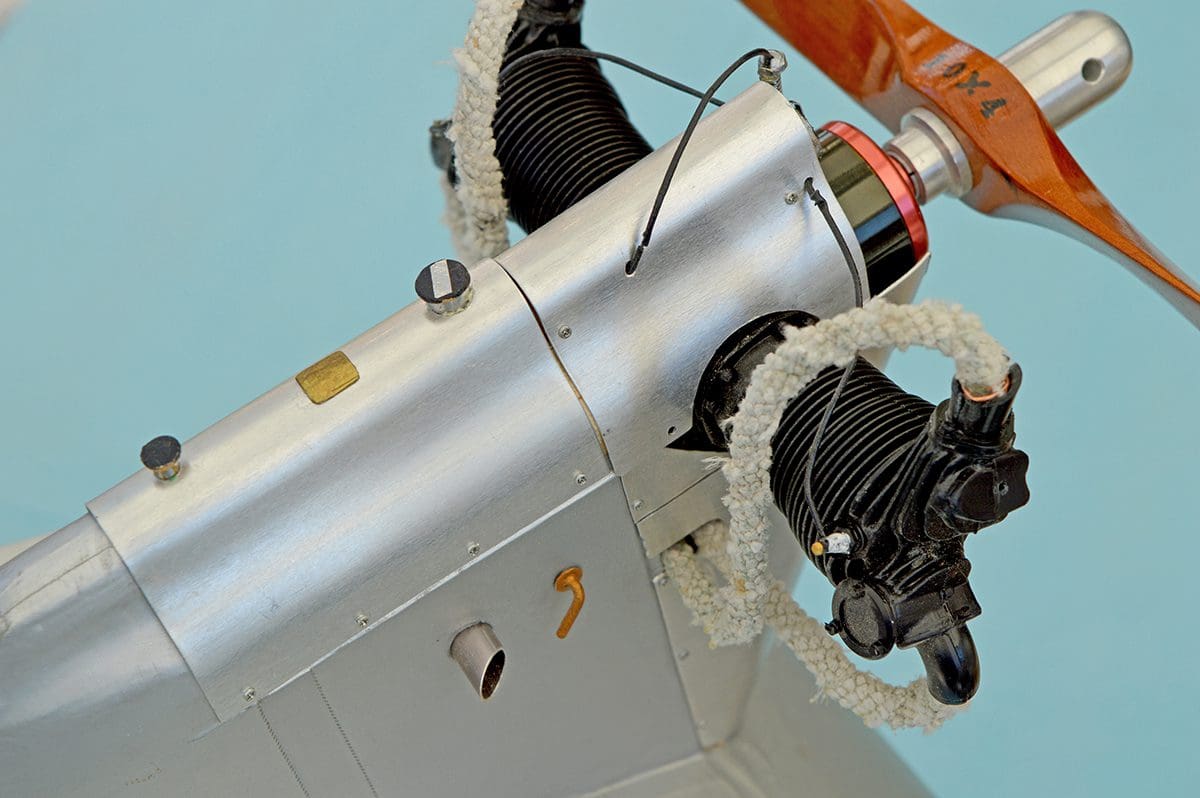
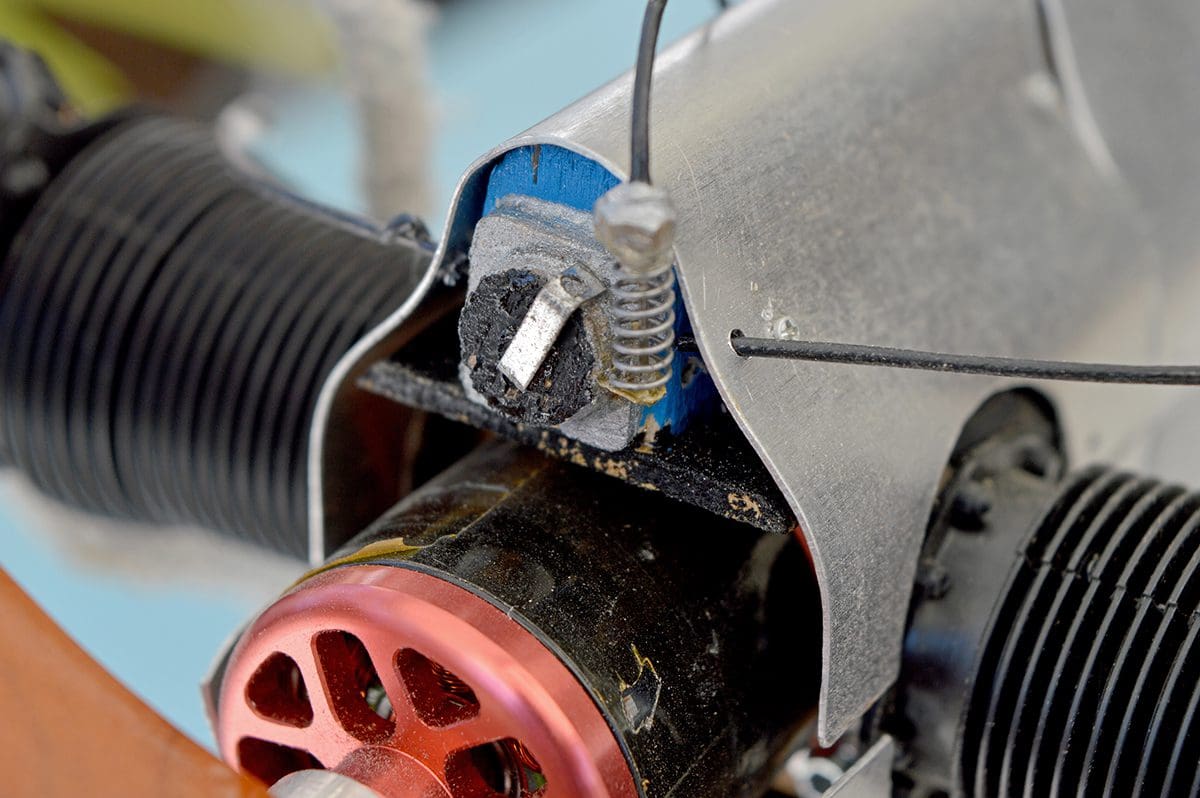
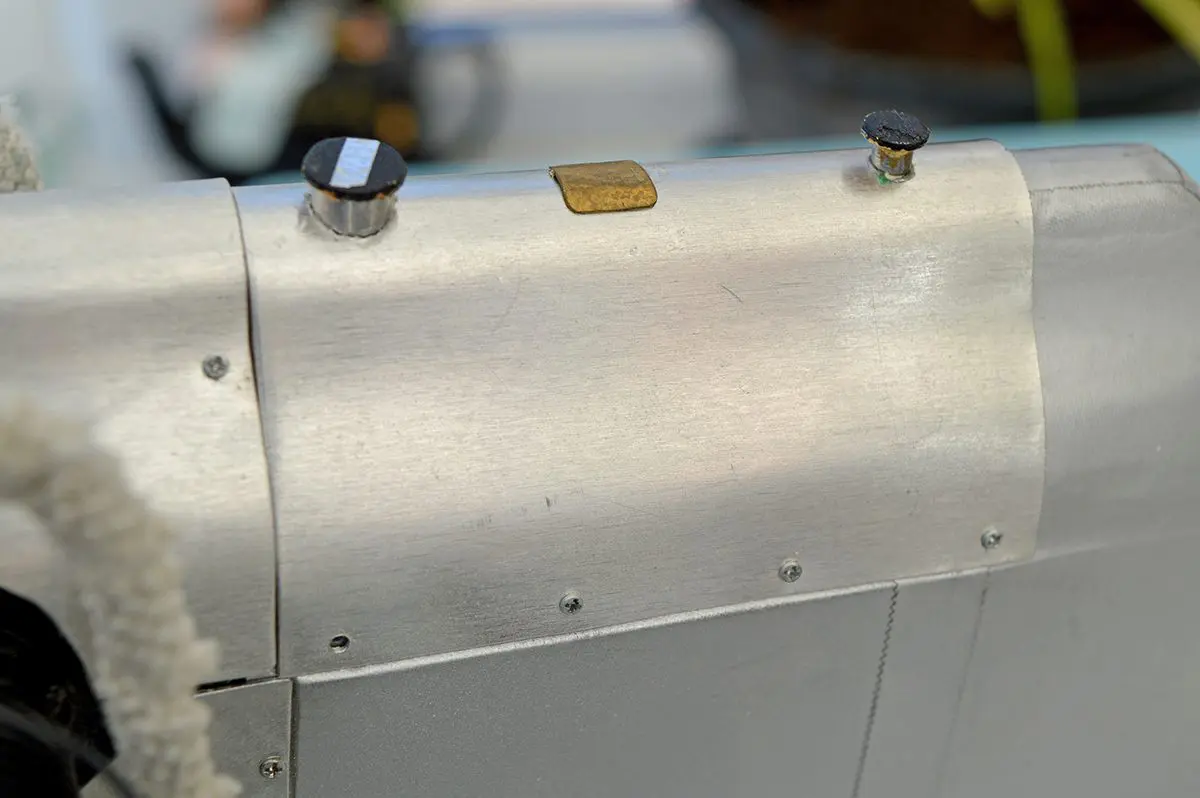
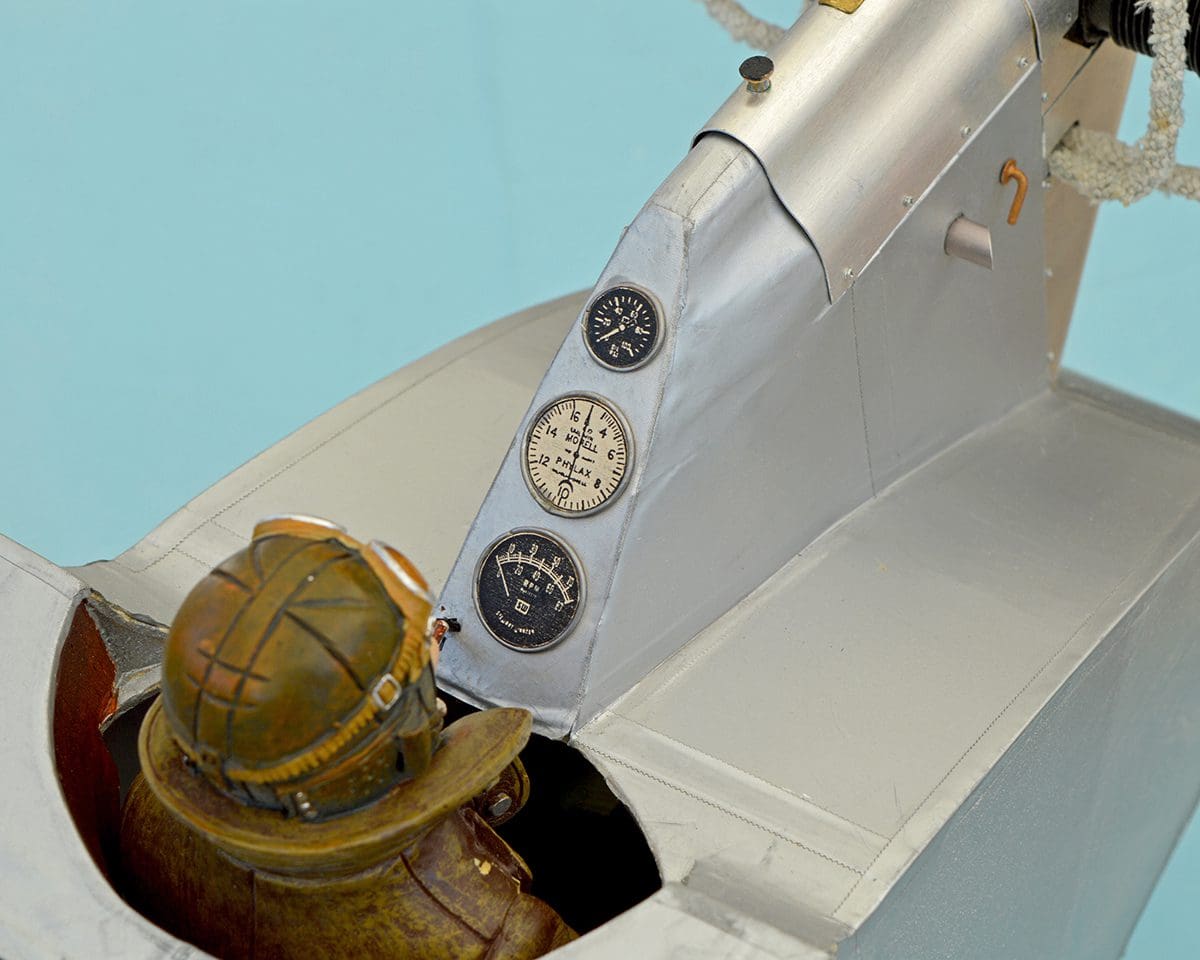
The EE ‘Wren’ used an ABC flat twin engine of nominally 8hp, which is quite distinctive, yet a carefully hacked about pair of Wright Cyclone kit cylinders, with additions, looks the part. I’ve never been pulled up on it yet. It’s ‘dressing’ again. Those bendy ‘Asbestos’ wrapped exhausts are strips of loop-knitted washcloth, unwittingly donated by my wife, wrapped spirally around a wire core, and secured with cyano dobs. The aluminium covers may look difficult to replicate, but they were easily cut from aluminium litho plates, sourced online. I simply cut a piece of wooden dowel of the right curve radius, then finger-formed the parts until they looked and fitted correctly.
Those tiny securing screws? They really are just that, supplied by Mick Reeves Models. Intakes, fuel and oil caps, a maker’s plate and the release lever – all fabricated from scraps of tube and patches of thin plywood. Even the dials are a spoof. Enlarged photocopies of the real thing from a magazine picture, with small diameter solder wire forming the dial bezels.
It’s all smoke and mirrors, I tell’ee.
LACK OF VISION?
Despite my exhortation that a pilot makes all the difference, sometimes that’s impossible to achieve. So, what to do? A ‘blank’ cockpit or canopy isn’t always the worst option.
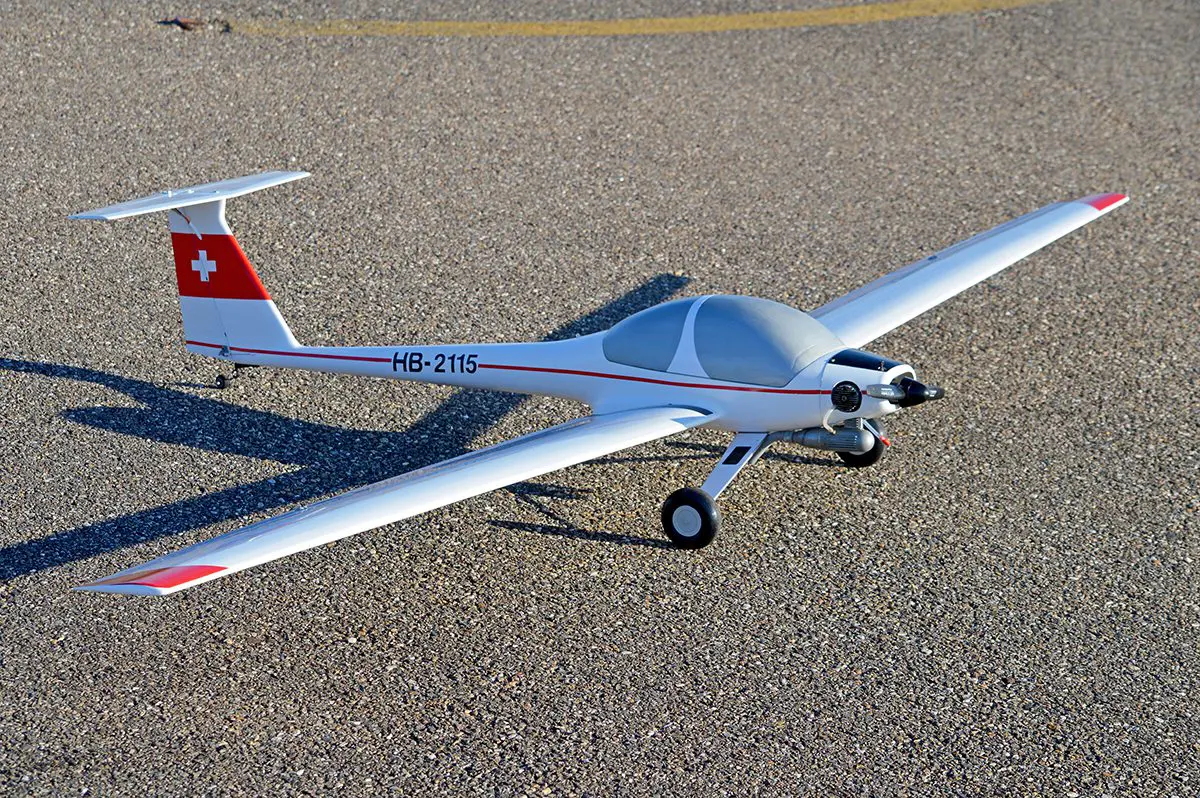
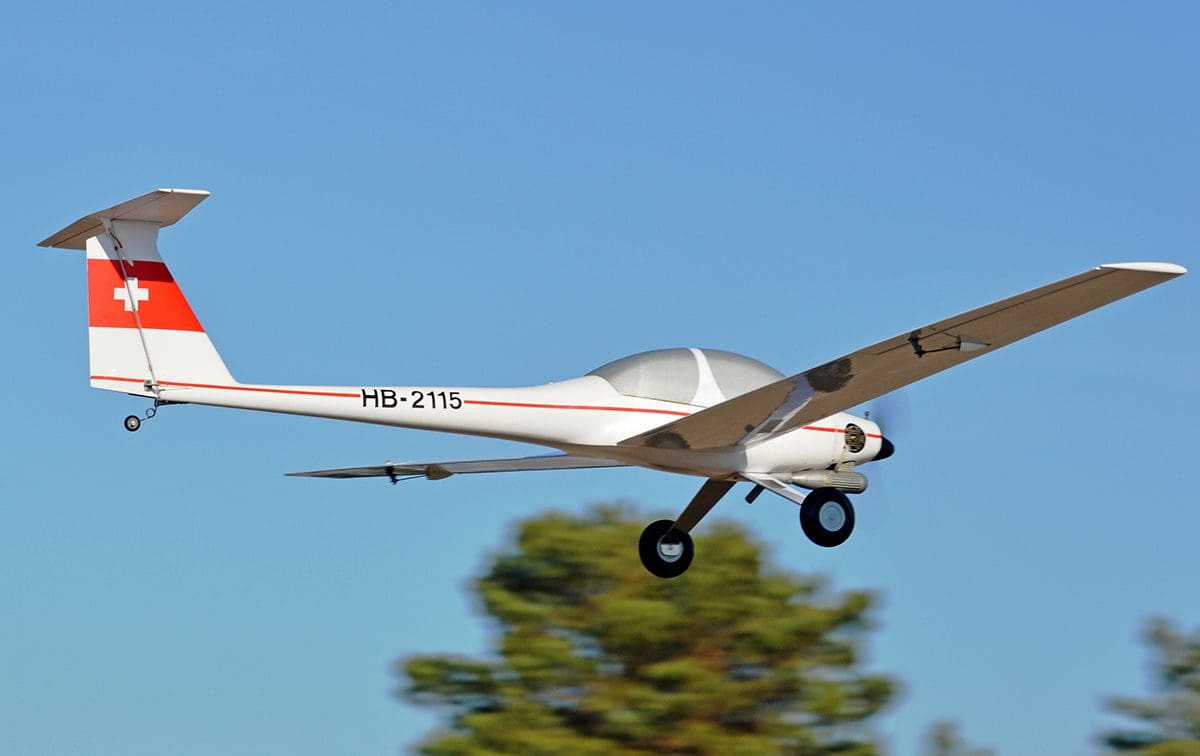
One such challenge (nothing is a problem, it’s just another challenge to overcome) was a motor glider kit I found languishing on a certain online auction site. With no description whatsoever I thought it looked like a ‘Dimona’ of some age or type; winsome, and with those lovely long wings purported to be ‘almost 3 metres wingspan’, plus a curvaceous white fibreglass fuselage. Very few pounds later – I’m too embarrassed to admit just how few – a poorly wrapped ‘parcel’ arrived at the family home. Cardboard, tape and dust (!) were strewn about rapidly, showing just what a mess I’d bought. The sneaky advert photos had omitted to show the reality of badly treated balsa-over-foam wings and that the very distinctive Dimona bubble canopy was in fact in many pieces. Ahh, nuts, I had bought a dog!
Now that canopy could double as a Pigeon’s bird bath, it’s that big, and you simply can’t fudge something that’ll do and not fit one, so what to do? I cast around for someone to mould a replacement, but the few people that responded to my grovelling all wanted a ‘plug’ to work with, a plug being a carved representaton of the canopy that clear plastic can be moulded around. So, I gave up for a while, dejected, whilst the Dimona bits languished.
But then the dimly glimmering light of intelligence finally cast its illumination across my bench. A new clear canopy might be expensive, but a simple, painted, canopy representation would do the job and cost ‘pennies’. I already had all the bits in the workshop – somewhere…
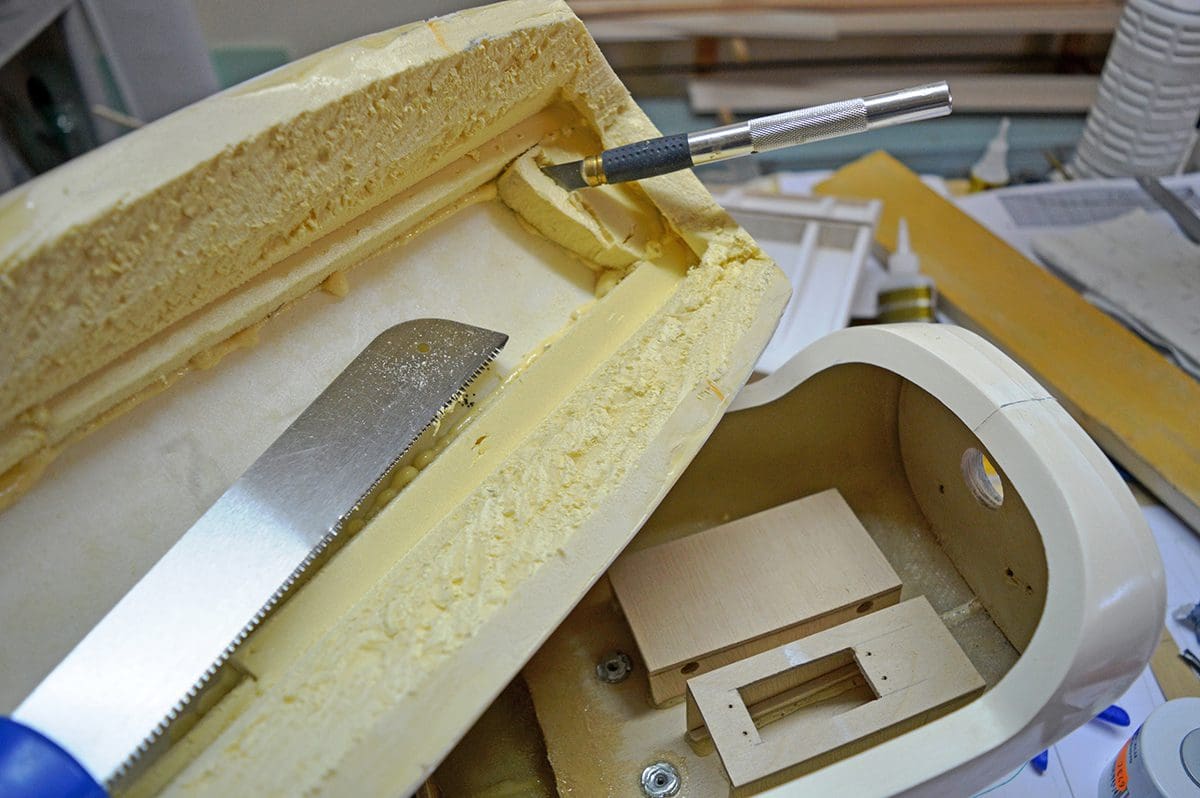
Expanded foam insulation – known to modellers as blue or pink rigid foam – has been used for years to carve parts of, or even whole models. I had some cheap beige foam that would carve well and take an epoxy glass skin after finish sanding. Glued into rough shape, sawn carefully to a better approximation, then sanded until the ‘canopy’ fitted the fuselage recess, the finished foam was given two layers of 25g/m2 fine weave glass cloth, using laminating epoxy, brushed on. Once cured the super-tough skin was sanded smooth and prime painted before more rubbing down and a final coat of ‘spray can silver’ was applied. But no, it was still not quite finished!
Some Dimona canopies have a distinctive ‘band’ across the canopy, part of the support frame. It was easy to replicate with some self-adhesive white vinyl.
Finally, large and strong ‘coin’ magnets were glued to both the fuselage and canopy to secure it in place for flight. Despite its size, weight and drag the big ‘cockpit’ has never detached in flight, nor even during one of those ‘arrivals’ that us weekend model manglers seem to delight in.
The final comments on ‘look’ and suitability should be yours. Pen your words on high denomination banknotes, please! Modelling is expensive – if you want it to be…
DANNY’S DILEMMA
I did say we’d get back to Danny and his journey into R/C models, so here’s one tale.
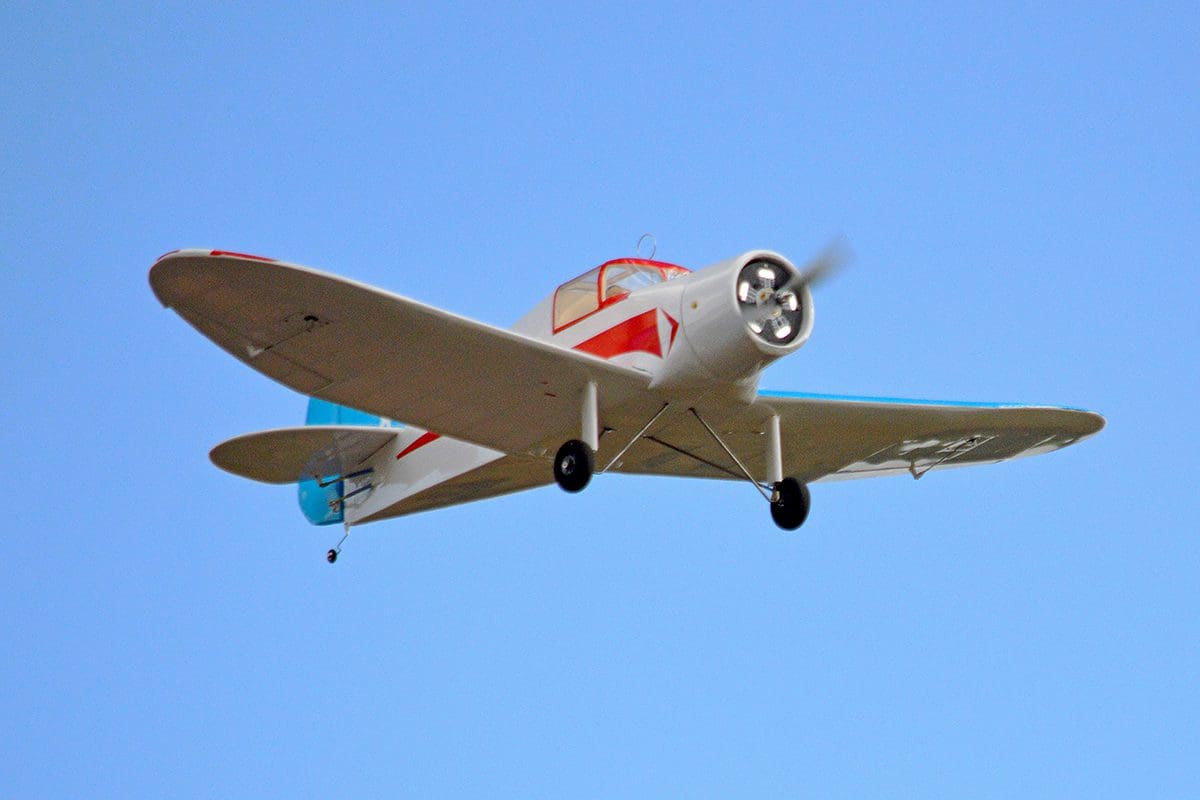
Our lad (he has a couple of years on me) was a returnee to the modelling game; he’d long ago indulged in free flight and, I believe, competitions. Those skills are never lost and once he began his radio odyssey, the fingers woke up and crafted some lovely models. One such different model was his Culver Dart, an American design from the late 1930s. He’d found a kit of the radial engine version in the US and, like many of us wood whittlers, loved the compact and curvy lines.
Many months passed before he arrived at the flying patch with his prettily decorated model, complete with a lovingly crafted facsimile of the radial engine. I was asked to pre-flight the plane and give it the first ‘fly and trim it out’ airing. Danny decided from day one that he would build and fly electric only, so the appropriate LiPo was nestled into the Dart, the ESC beeps indicated ‘armed’, and with the model restrained the throttle stick was moved forward…
Hellfire! The Culver leaped all over the place, shedding bits of that radial effort about the pits. The vibration was horrendous, ‘drumming’ through the airframe and, despite restraint, causing the 60’’ span model to dance to its own manic tune.
With parts of the now demolished ‘engine’ collected together, the postmortem began. Danny had elected to ‘do things his way’ and eschew any external help, which led him down three avenues of mistakes:
The propeller, whilst perfect for the power set up, wasn’t balanced. In fact, it was quite poor in that respect as he had never checked it.
The 400W outrunner had been attached via its rear cruciform mounting to the fuselage bulkhead, which was only 3mm thick lite ply. He, and we about him, were extremely lucky that my ‘shut it off’ spasm was automatically rapid. In those couple of frantically vicious seconds of vibration the bulkhead was ‘split from a— to breakfast time’ and the outrunner hung loose.
The third mistake? He didn’t check it before he left home, which in retrospect may have been a good thing, as testing it alone, on his own and with slower responses, might have caused some bodily damage – to him, not the model.
TAIL WHEEL
Suitably chagrined, Danny took the wounded bird home, had a serious rethink, and took the suggestions and remarks of his friends/near-victims on board.
A couple of weeks later both he and his Dart returned, were tested and the model taken to the altar of fear and occasional sacrifice – the runway. Once again, I was voted in as test pilot and with my resolve and sinews stiffened, I shoved the throttle forward. My nervousness disappeared as the model did the same thing along the patch before lifting off. My concerns scampered away as fast as the model tried to; some initial evolutions proved that the canny Culver was a well-mannered model once the trims were adjusted.
Bringing it in for a ‘greaser’, I handed over the transmitter to ‘most of the way there’ pilot Danny and stood close, waiting to bleat advice. No need, our lad eased the Dart skywards, had a suitably invigorating flight (with some twitches) then eased the model in for… Ah, noix! A dive into the runway that wrote the undercarriage off. Oh well…