Kevin Crozier tries out a bright new star in the EDF firmament
Words >> Kevin Crozier
Photos >> Kevin Crozier, Barry Atkinson
Enjoy more RCM&E Magazine reading every month.
Click here to subscribe & save.
Regular readers may well remember my recent review of Dynam’s smart looking Tiger-striped Hawker Hunter, which had an all too brief service life. However, my interest in the latest high performance EDF jets was well and truly piqued and I resolved to try another one as soon as I could. Well, the opportunity arrived much sooner than I expected, thanks again to CML Distribution, who had a sample from a new range of EDF foam jets that they thought I would like to try. Yes, please!
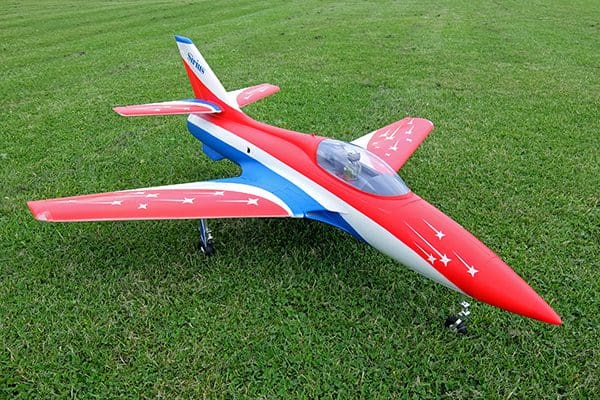
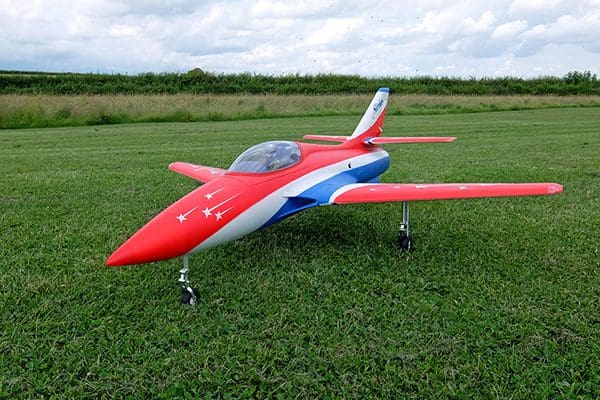
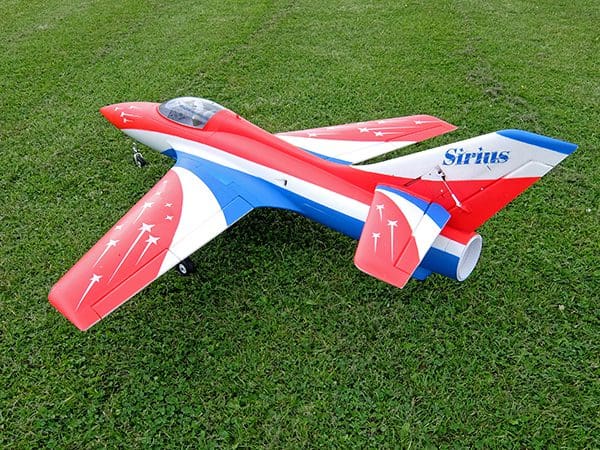
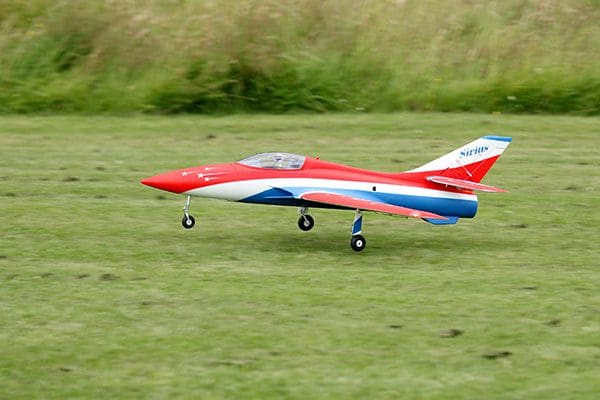
Within a few days a sizeable box had arrived, and the model was unpacked. The kit in question was for the XFly-Model Sirius, a 1.1 metre wingspan stylish sport jet equipped with an 80mm electric ducted fan unit. It looked very smart and only took a short while to assemble.
FOAM IN FOAM
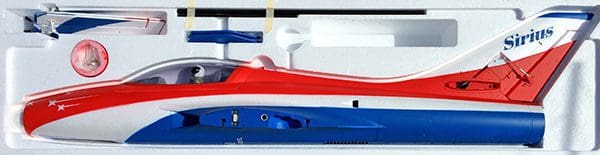
As with most foam models these days the Sirius was very well packed. After taking off the colourful cardboard lid the airframe is neatly presented on either side of the moulded polystyrene core, with the fuselage, tail halves and accessories on top and the wing panels below.
I mention this only to reference how blasé we have become with foam kit packaging these days and we barely give any thought to the better examples, such as this one. In contrast, at roughly the same time we received a kit from a very well-respected European manufacturer and the poor packaging was a big surprise, with everything rolled up in loose bubble wrap, which caused some transit damage. So well done to XFly for such a neat box design.
AIRFRAME EXAMINATION
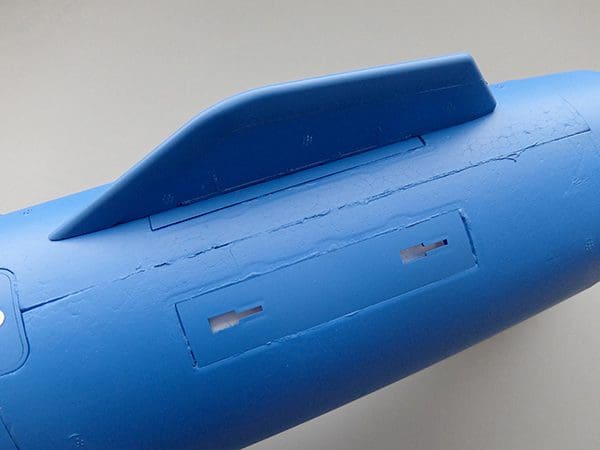
Taking up most room is the impressive one-piece fuselage, moulded from tough EPO foam, which comes complete with an integral fin and ready fitted rudder.
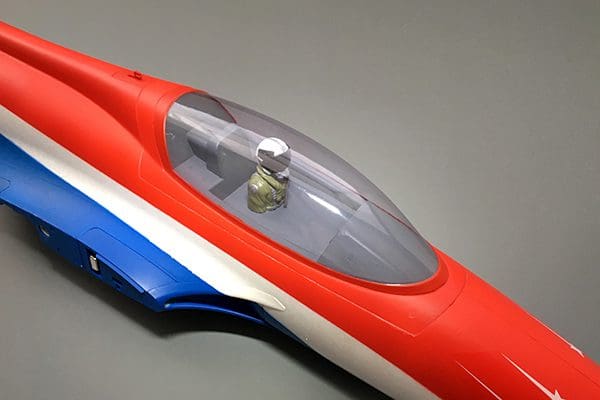
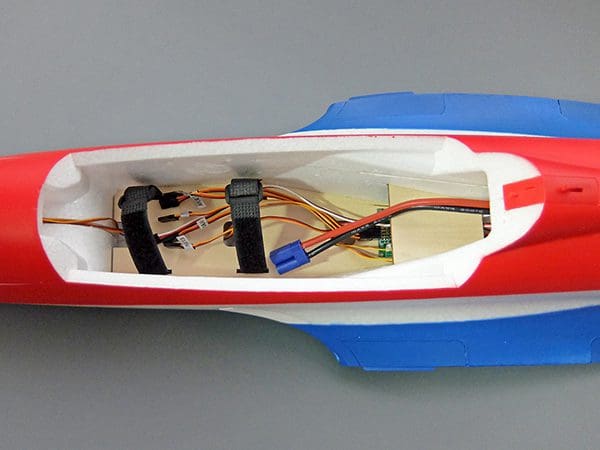
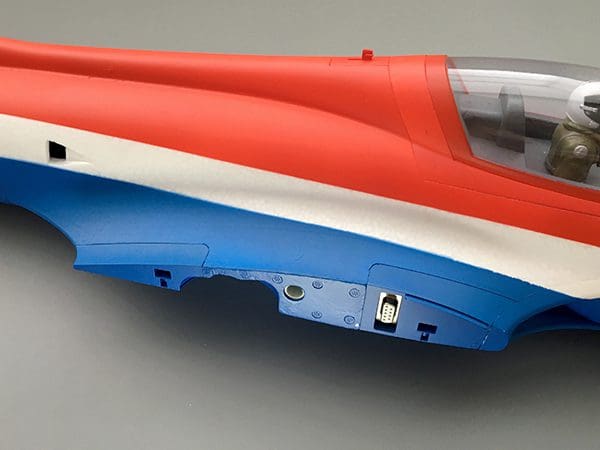
The large canopy, equipped with a neat jet style pilot, serves as a battery/radio hatch; it latches in place using a large moulded tongue at the front and is released using a dummy blade antenna at the rear. The pilot bust is screwed to a ply base so should stay in his/her seat during even the most vigorous of aerobatics!
Taking off the canopy reveals a large battery bay, with an upper ply receiver platform provided at the rear. The servo leads are clearly marked with their functions so fitting the Rx is a doddle. All that is needed is to coat the ply with some 5-minute epoxy to give the Velcro fixings something smooth to attach to, ditto for the LiPo tray. I also smeared some epoxy on small areas of the foam sides for my attaching my satellite Rx and the ‘must have’ Operator ID.
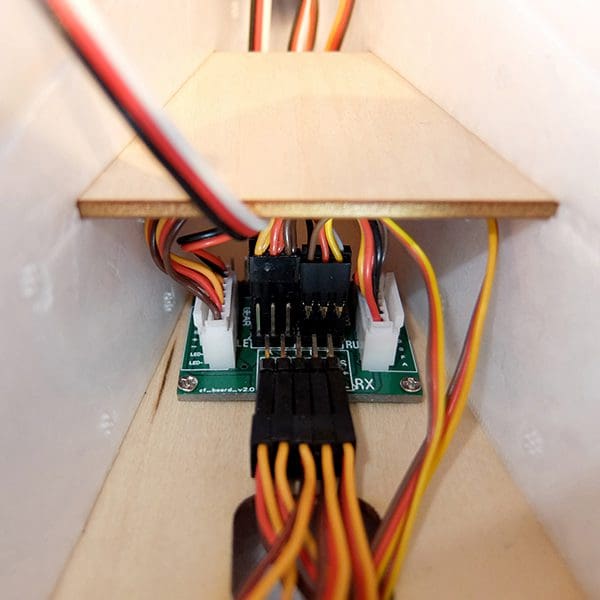
The receiver tray sits above a pre-installed Wiring Board. This provides a centralised hook-up for all the servos fitted to the model, as well as powering the electric retracts and the LED wingtip lights. Since it is all pre-connected all the builder needs to do is to plug the marked-up extension leads into the correct receiver channel.
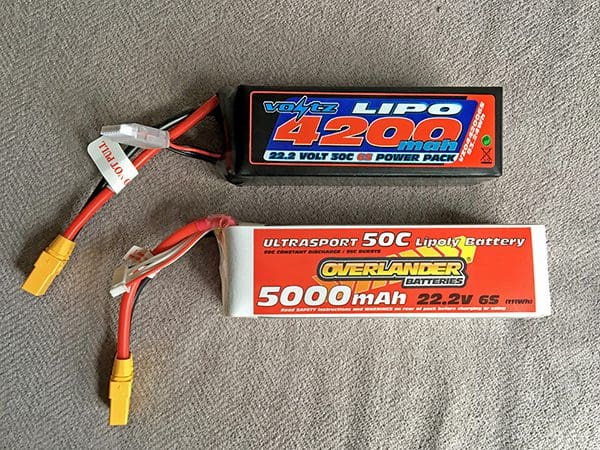
Sirius is designed for 6S 4000 – 5000 mAh LiPo packs and my immediate thought was to use the spare Voltz 4200 pack that CML had supplied for the Hunter review. This is, however, rated at 30C, whilst the instructions recommend a pack of 35C or above. Not wanting to take any risks, especially with the first flights, I decided to invest in a couple of maximum size packs and so opted for two Overlander Ultrasport 6S-5000 50C LiPos. These fit comfortably inside the battery bay, held securely by a bottom strip of Velcro and the two hook and loop straps provided. However, before the first flight I discovered a video online showing a US pilot flying with a 30C battery and the Sirius flew just fine on that, so it was good to know that the Voltz packs I had would not go to waste. The LiPo connects to a 100A Hobbywing ESC, equipped with a 5A UBEC, via an EC5 connector.
FAN FACTS
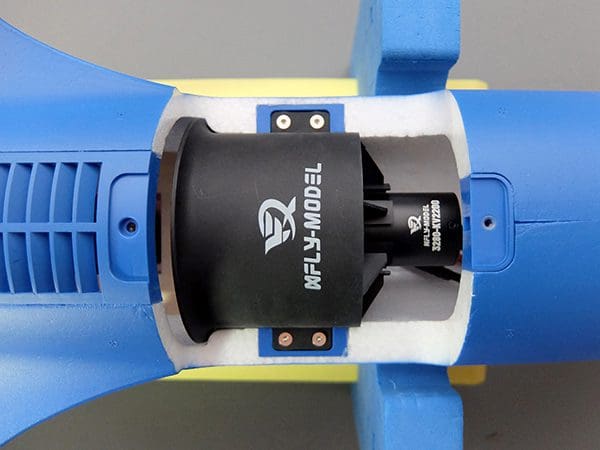
Underneath an easy to access hatch, secured with Allan headed bolts, is the Galaxy X-8 fan unit. Of 80mm diameter and with 12-blades it provides plenty of punch for this 2.5 kg jet and it sounds great too. No howling, just a pleasant jet style whoosh!
The revs come from a 3280-KV2200 brushless inrunner motor that is claimed to provide up to 3200g continuous thrust when powered by the correct 6S LiPo. Maximum thrust is quoted at 3400g.
WINGS & WHEELS
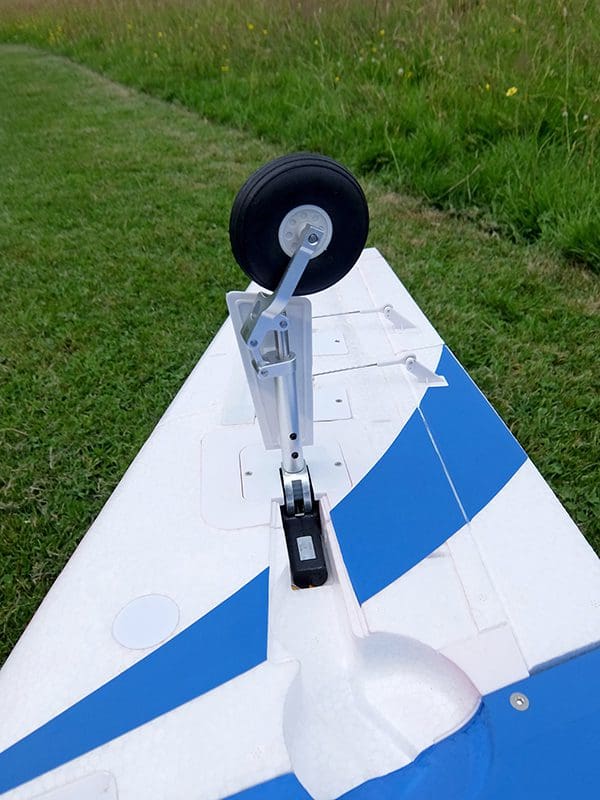
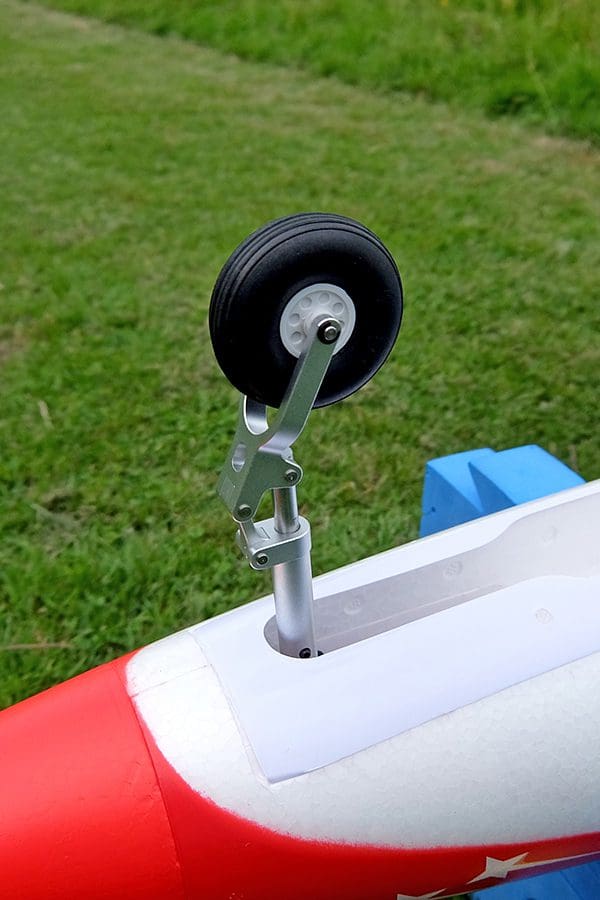
The wings are supplied ready to fit and come complete with electric retracts fitted with CNC machined trailing link struts that provide decent shock absorption when flown off grass, helping to minimise any stresses from being transmitted to the retract mounts. The same strut is fitted to the noseleg.
Each panel is equipped with two 13g digital metal geared servos on flaps and ailerons, neatly connected using short ball-link equipped pushrods. I had flown the model several times before noticing that the balls were simply screwed to the control horns, which I guess shows they are fit for purpose, but after having a similar ball-link get knocked off recently from another foam ARTF (thankfully with the model on the ground) I have resolved to replace the screws with small nuts and bolts before flying the Sirius again.
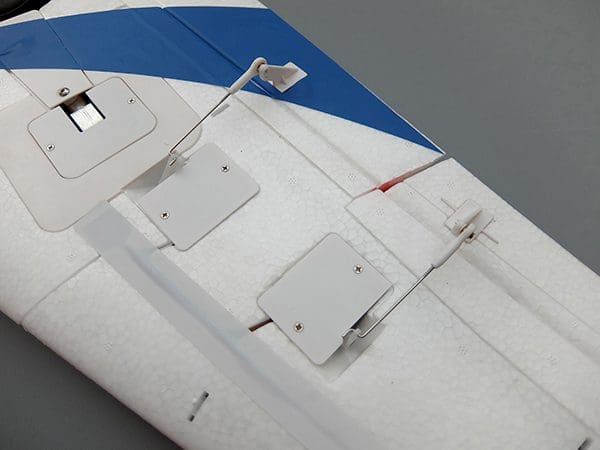
A neat trick with this model jet is that the wing electrics are all connected via a robust D-shaped connector rather than a myriad of loose servo wires. This makes the Sirius very easy to assemble at the flying field. Simply push the carbon wing joiner tube through the fuselage, push on each wing until the connectors mate and the wing fixing points line up, then secure each panel with a pair of M3 x 16mm Allan headed bolts.
AT THE BACK
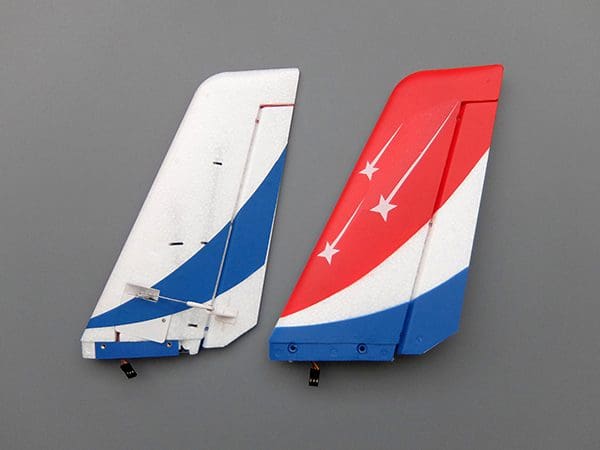
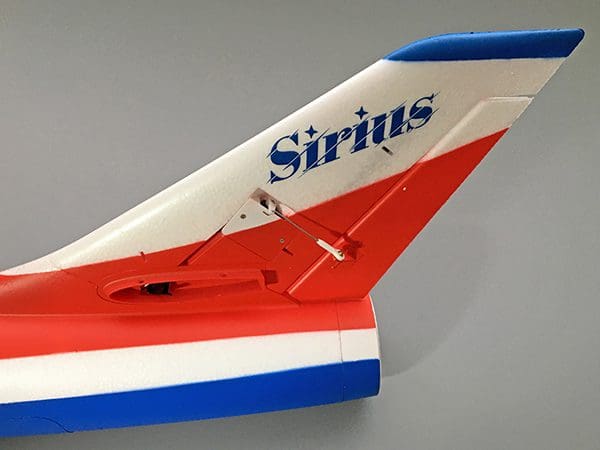
The only other main bit of assembly is to fit the two tailplane halves. These slide onto a smaller diameter spar tube and push into neatly moulded ABS cuffs on each side of the fin. Each is secured with another pair of M3 cap screws. The elevators are also connected using ball-links, this time to slimmer 9g digital servos.
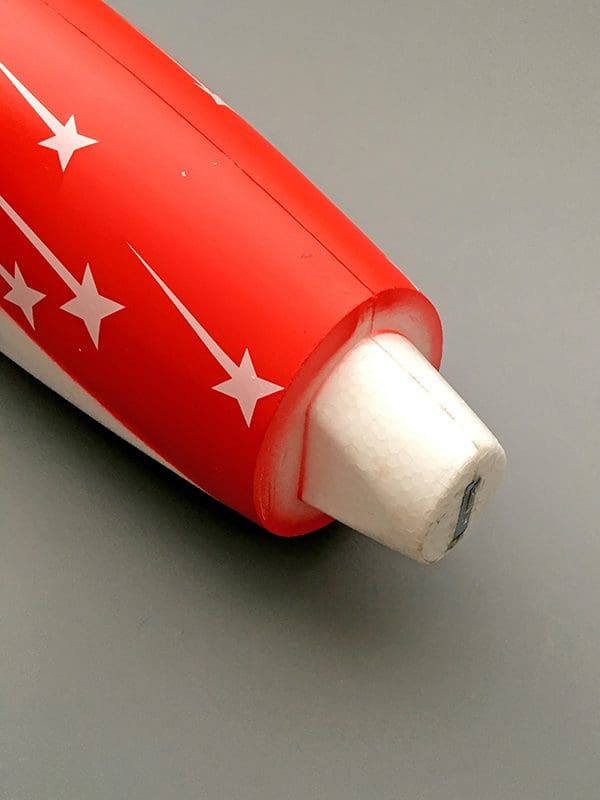
Attention then turns to the ventral fins, which simply slot into place, so offering easy replacement if damaged. Likewise, the nose cone is attached using magnets and will simply knock off if hit by anything. Well, that’s the theory and it sort of works; I managed to give mine a nose-swipe in the grass during a bit of a bouncy landing and the magnets did their job and released it, but the nose cone broke in two; rather that though than causing any serious damage to the fuselage. Thanks to CML’s policy of stocking spares for their models it was soon replaced with a new one.
Returning to the rear of the model, I was a bit disappointed to see that the tail halves were not sitting level with the wings. In fact, they were able to move up and down by quite a bit inside those plastic cuffs and any such movement could only get worse as the foam at the tail roots was sure to flex in flight and get progressively compacted. So, I turned to my usual trick of fitting thin card strips between the cuffs and the tail roots until the slack was taken up. And by fitting these strips below the root on the low-slung side and vice versa on the high side, I was able to make the tailplane line up with the wing, so minimising any in-flight trim. It must have worked as no aileron trim was needed during the test flights.
SETTING UP
I followed my usual procedure of setting the model up using a three position Flight Model switch, with positions 1 and 2 reflecting the Low and High rates shown in the instruction book. Position 3 was my ‘little bit more’ guesstimate, just in case I felt the need for more movement during the test flights
The C of G was then checked with both the 6S-4200 and 6S-5000 packs. Despite their different lengths they are pretty close in weight, so are interchangeable in this respect.
The ESC was then ranged to match my JR transmitter and the failsafe was checked. All that remained was to wait for a suitable weather window before taking the Sirius to the flying field for static pictures, a range check and those all-important first flights.
MAIDEN FLIGHTS
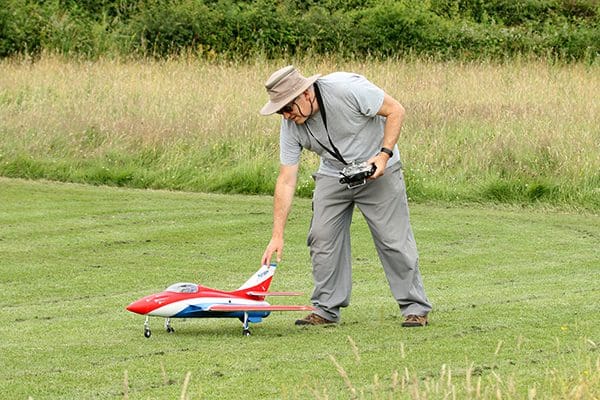
I have to admit that the Hunter episode was weighing on my mind a bit before flying the Sirius for the first time and so I refreshed my memory about the layout of several local flying fields before biting the bullet. You see, a medium size EDF jet like this, even one fitted with flaps, deserves to be tested from a wide, open site with minimal obstructions on both take-off and landing. I even explored flying the Sirius from a local full-size strip, but the grass was being kept deliberately long to minimise summer mowing (news to me!) and the owner, whilst happy for me to fly there, was not willing to sacrifice the length of his turf.
Eventually I settled on the patch I fly at the most and while it has trees underneath the main flightpath the approaches are fairly long and clear, with just a hedge to stay clear of when landing. I could have done with a longer runway to bleed off any excess speed after touch down, but my 6S pattern models land here just fine, without flaps, so I wasn’t expecting too much drama.
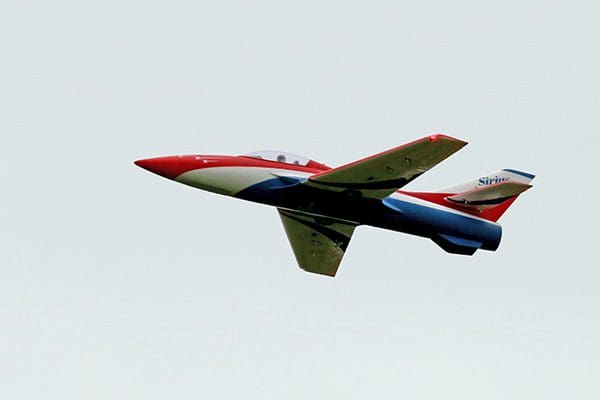
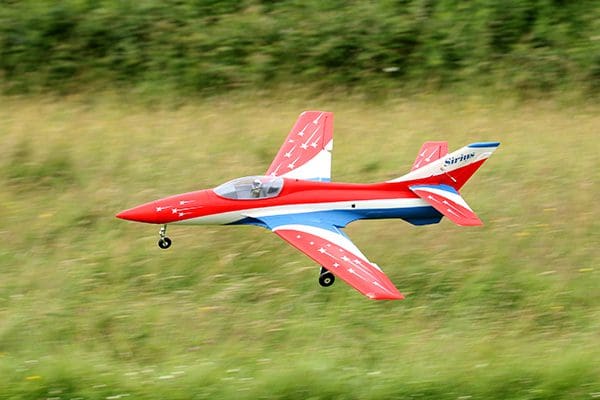
With a nod from Barry, to confirm he was ready with the camera, I opened the throttle and the Sirius surged forward and was soon airborne. I elected not to use any flap as I didn’t want to deal with any pitch changes so early in the first flight.
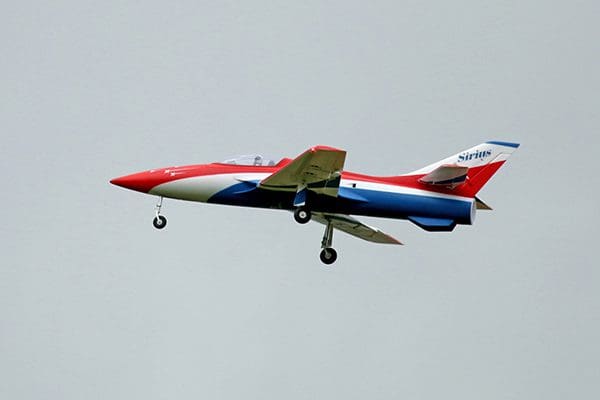
After a couple of medium speed circuits with the wheels down, to check the trims (none on aileron and rudder, but a fair few clicks of down) I retracted the gear and poured the power on. Wow! The Sirius sure can shift!
A few grumbles from Baz nearby soon bought me back to my senses as I needed to slow her down for him to get some wheels up shots. Unfortunately, as always seems to be the way with our recent photo sorties, the bright skies forecast decided to disappear, to be replaced with grey overcast, so the poor chap had his work cut out capturing this slippery aeroplane.
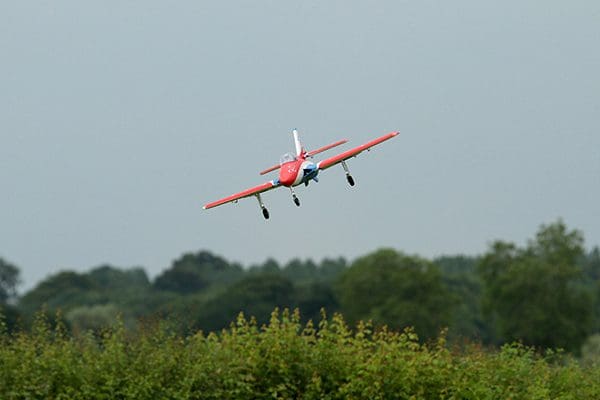
With only a provisional four minutes set on the timer, all too soon my Tx was telling me it was time to land. I set her up in a high circuit and checked the first and second stages of flap; my guesstimates for elevator compensation were pretty much spot on for stage one but full flap needed some work, so I settled in to land the Sirius with partial flap.
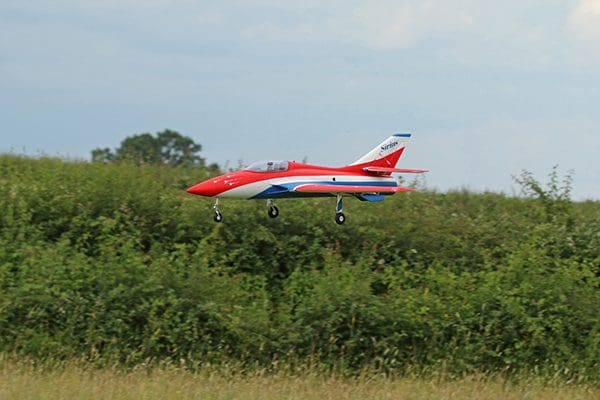
In the event the first landing was a non-event, but the sleek jet did use up pretty much all of the available runway, with just enough room to turn around and taxi back at the end.
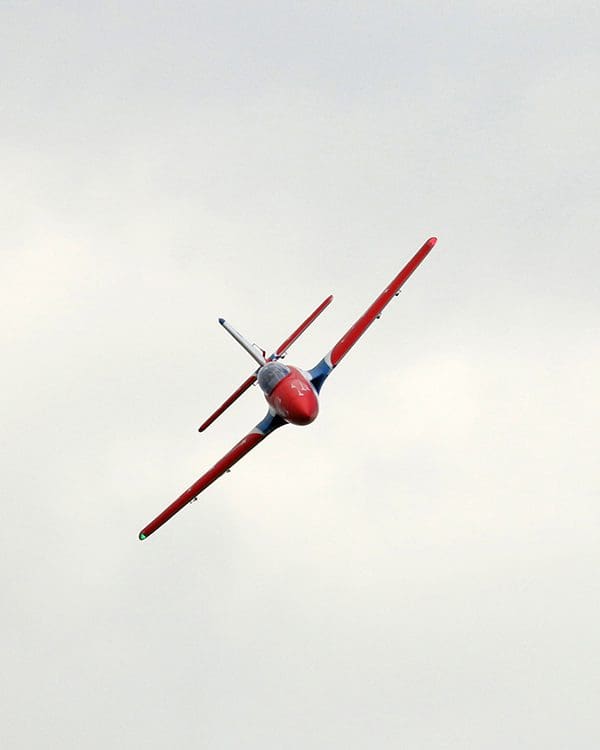
Two more flights followed, and I was very pleased with how the Sirius performed. Aerobatics are easy and very smooth, as you would expect from such a sleek, fast jet. The recommended high-rate settings are ample for this and it’s a joy to steer the Sirius through large loops and long rolls. Landings are no trouble and the addition of a bit of flap does help slow her down a bit.
The only problem with electric ducted fans is the limited flight times, so the Sirius is not unique in this respect. I have been averaging around 40% battery capacity remaining after four minutes of spirited flying so although I could extend it a bit my natural caution tells me to leave the timer where it is, just in case that last bit of juice is needed for a couple of go-arounds.
XFly-Model have done a fine job with the Sirius and I’d be happy to recommend her to anyone with experience of a few low wing aerobatic models.
DATAFILE
Name: Sirius
Model type: 80mm EDF sport jet
Manufactured by: XFly-Model
UK distributor: CML Distribution
www.cmldistribution.co.uk
RRP: £409.99
Wingspan: 1.1m (43.3”)
Fuselage length: 1.31m (51.7”)
Wing area: 23.36 dm2 (362.08 sq.in.)
All-up weight: 2560g (5.64lb)
Wing loading: 109 g/dm2 (35.72 oz/sq.ft.)
Power system: 80mm EDF with12-blade fan & 3280-KV2200 brushless inrunner motor
Connector type: EC5
Functions (servos): Ailerons (2), rudder (1), elevator (2), flaps (2), throttle (via ESC), electric retracts, wingtip lighting
Required to fly: Receiver/transmitter, 6S 4000 – 5000mAh >35C LiPo battery